
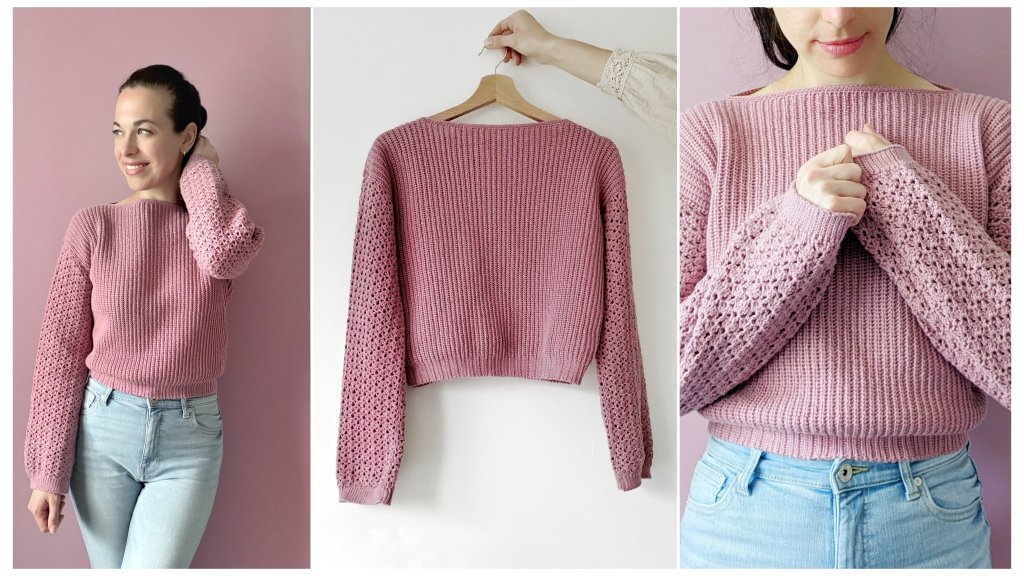
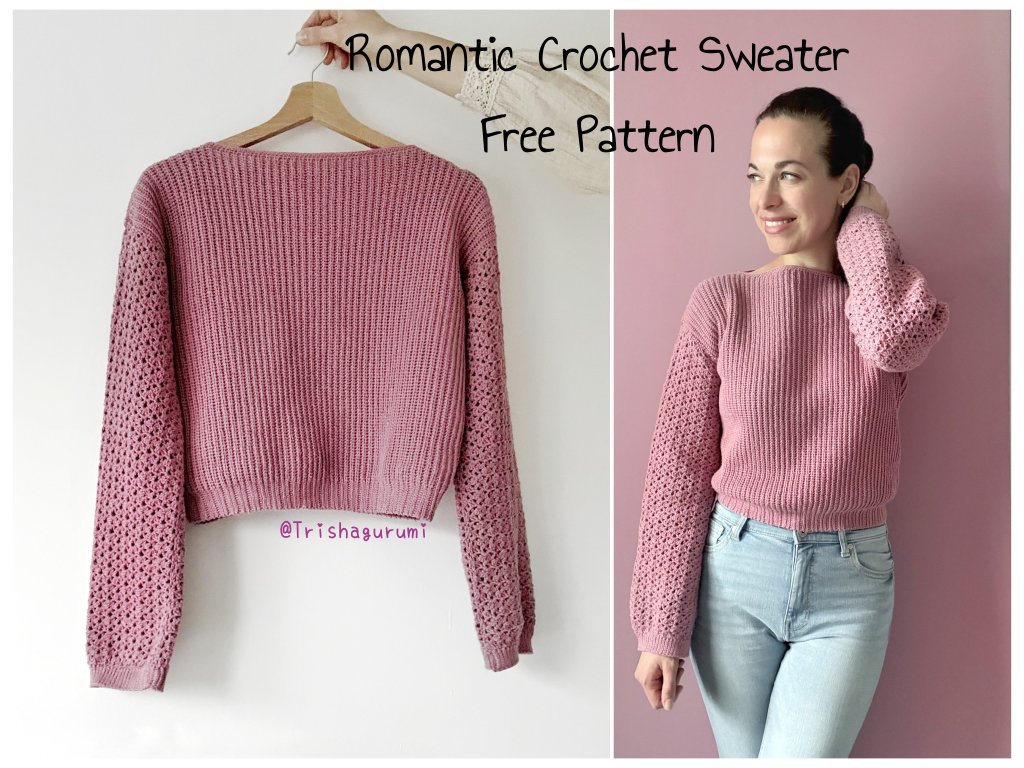
Chic meets lightness—this crochet sweater combines the best of both worlds. The classic knit-look texture of the body gives it a soft, modern feel, while the airy openwork sleeves add a romantic and delicate touch. This sweater is 100% crocheted, yet it feels neither stiff nor old-fashioned once finished.
By combining half double crochet slip stitches in the back loops only for the body with a structure mix of chain stitches and double crochets for the sleeves, the result is a simple yet stylish design. It captures the lightness of a knitted sweater while remaining opaque—perfect for transitional seasons and suitable for everyday wear, even at the office.
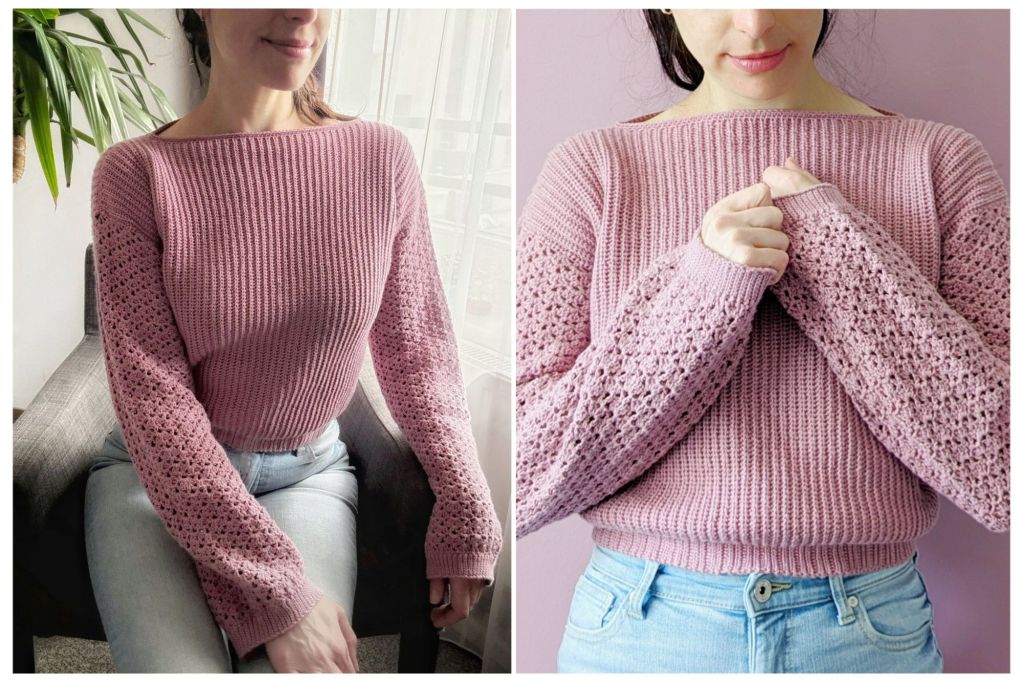
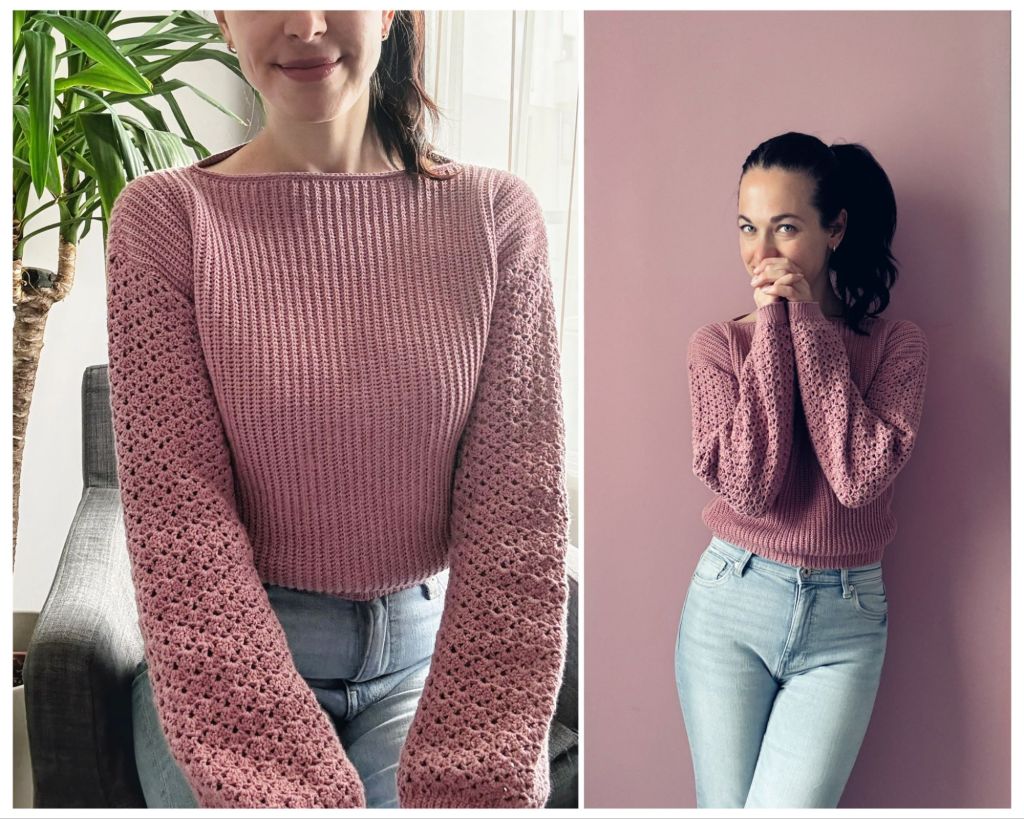
The soft drape of the yarn and the gentle color create an understated elegance. The sleeves, on the other hand, add movement and airiness, making this piece a true eye-catcher. Whether on cool spring days or mild summer evenings, this sweater is a versatile companion that can be styled both simply and femininely.
And best of all: this sweater is made using just two simple, repetitive stitch patterns and straightforward construction (front, back, and sleeves are all worked as rectangles). This makes the pattern ideal even for less experienced—but patient—crocheters. A project for anyone who loves a mix of texture, comfort, and a touch of playfulness.
The free crochet pattern for this beautiful sweater can be found below.
Special Features:
- The sweater is designed as a decent cropped style, with the lower band sitting at the waist.
- The front and back panels are worked identically.
Stitch used: half double crochet slip stitch in the back loops only — this creates a knit-like texture that is fully crocheted yet nicely elastic. A short video tutorial for this stitch technique is available here. - The sleeves are worked using a mix of double crochet and chain stitches (see sleeve chart).
- The neckline is finished with 2 rows of half double crochet, keeping it flexible and comfortable.
Materials
Yarn and Yardage
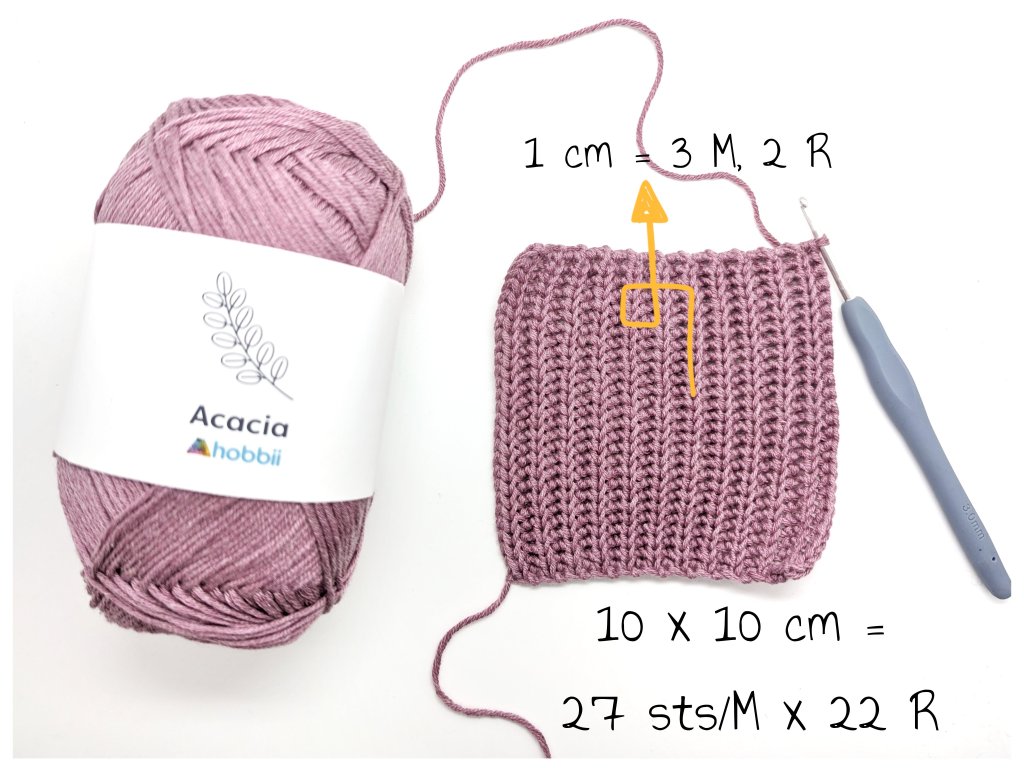
Acacia by Hobbii
(51% acrylic, 49% cotton, gauge: 17 sts × 20 rows = 4″ × 4″ (10 x 10 cm))
Color: Rosewood (120)
Required yardage: approx. 1,400 m / 1,530 yds (size S/M),
equivalent to up to 6 skeins
Tools
- 3.0 mm crochet hook
- scissors
- yarn needle
- 2 stitch markers (ideally in different colors to mark front and back)
- measuring tape
Sizes
Size: S/M
This sweater is designed for size S/M and fits best for a height of approximately 164–168 cm (5’4″–5’6″).
The measurements in the chart are for general guidance only. By making a gauge swatch at the beginning, you can calculate the exact number of stitches and rows needed for your desired length. See Step 1 below for instructions.
It is also recommended to try on the pieces as you go.
Adjustments
- For larger sizes (L and up):
Work the waist band using the wider stitches of the sweater body. This removes the visual separation of the bottom band and creates a more flattering silhouette. - For additional length (above 168 cm / 5’6″):
Increase not only the length (more starting chains), but also the width (more rows), so the waist band does not become too tight.
Abbreviations (US Crochet Terminology)
hdc sl st = half double crochet slip stitch | hdc sl st blo = half double crochet slip stitch in back loop only | sl st = slip stitch | sl st blo = slip stitch in back loop only | ch = chain | ch-sp = chain space | st(s) = stitch(es) | row(s) = row(s) | rd = round | dc = double crochet | rep = repeat
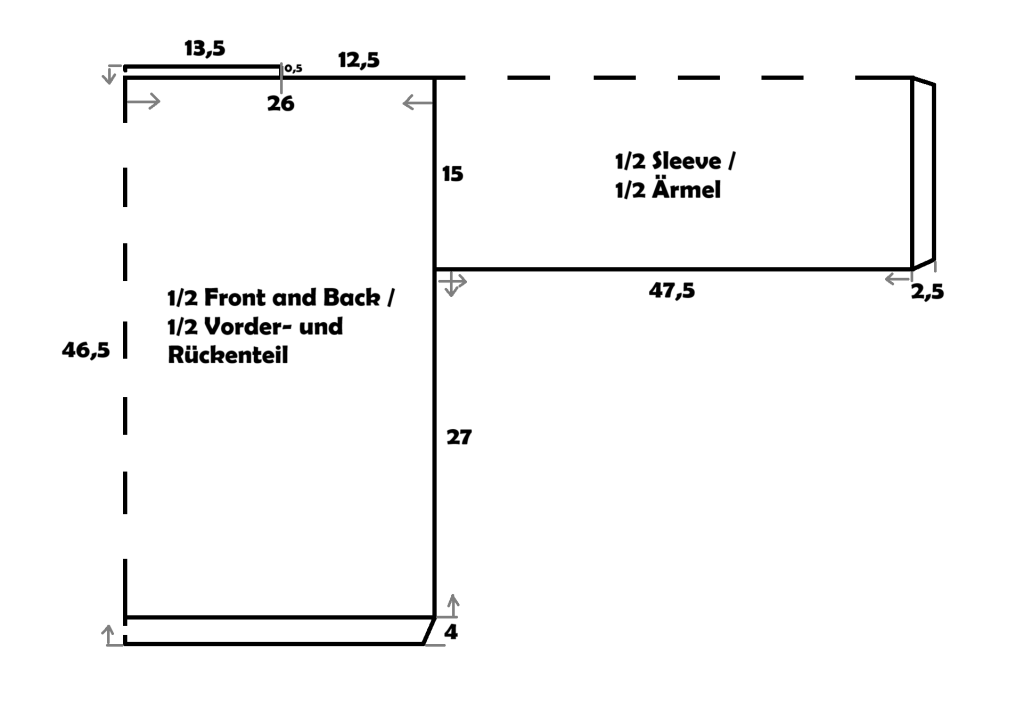
How to crochet the Sweater – Overview
- The front and back panels are worked separately, from one side to the other. The waist band is worked at the same time. The two panels are then joined together at the shoulder/neckline. The following stitches are used for the body:
- half double crochet slip stitch
- half double crochet slip stitch in back loop only
- slip stitch
- slip stitch in back loop only
- The sleeves are started at the center of the joined side edges and worked in rows from the armhole down (excluding the cuff). They are then seamed along the side, and the cuff is added afterward, also in rows.
- Finally, the neckline is slightly extended by working 2 additional rows of half double crochet around the neckline.
Instructions
Step 1: Make a Gauge Swatch
Start by making a gauge swatch. This will help you determine the correct number of starting chains and rows needed.
My gauge:
4″ x 4″ (10 x 10 cm) = 27 sts and 22 rows
For every additional 1 cm in length, add 3 stitches.
For every additional 1 cm in width, add 2 rows.
For a length of approx. 46 cm (18″), start with: 124 chains (+ 1 turning chain) (46 × 27 ÷ 10)
For a body width of approx. 52 cm (20.5″) (excluding sleeves): work 114 rows (52 × 22 ÷ 10)
If your gauge has more stitches, add the difference in stitches and rows accordingly.
If your gauge has fewer stitches, reduce the number of stitches and rows accordingly.
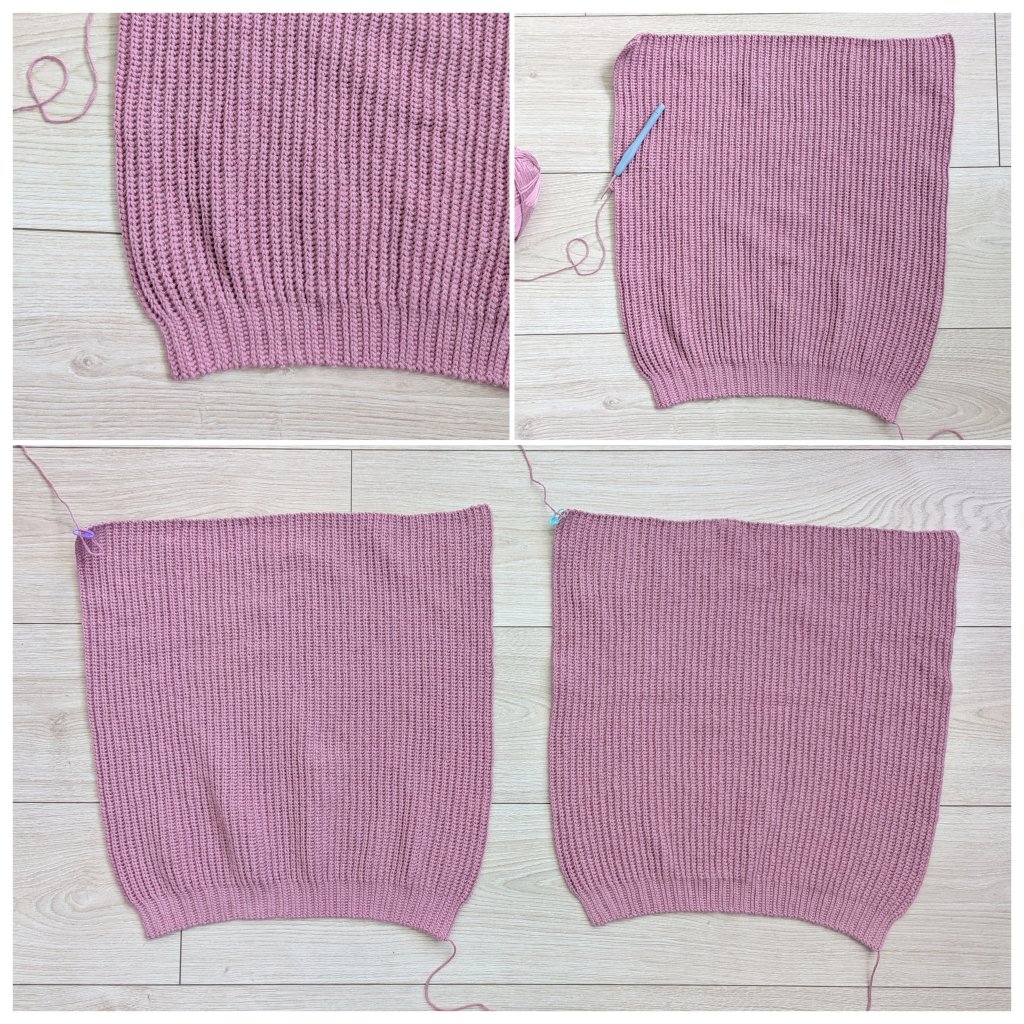
Step 2: Crochet Front and Back Panels
Front and back panels are worked separately in the same way.
Start with the back panel. Leave a long starting yarn end to seam later:
Ch 124 + ch 1 (turning chain)
1. R: 1 hdc sl st in each of the next 111 sts, 1 sl st in each of the next 13 sts, ch 1, turn (124)
2. R: 1 sl st blo in each of the next 13 sts, 1 hdc sl st blo in each of the next 110 sts, 1 hdc sl st in last st, ch 1, turn (124)
3. R: 1 hdc sl st blo in each of the next 111 sts, 1 sl st blo in each of the next 12 sts, 1 sl st in last st, ch 1, turn (124)
4. R: 1 sl st blo in each of the next 13 sts, 1 hdc sl st blo in each of the next 110 sts, 1 hdc sl st in last st, ch 1, turn (124)
5. R: 1 hdc sl st blo in each of the next 123 sts, 1 hdc sl st in last st, ch 1, turn (124)
Rows 2–5 equal approx.:
- 1.5 cm (0.6″) width of the sweater body
- 1 cm (0.4″) width of the waist band
Repeat Rows 2–5 until the piece measures approx. 50.5 cm (20″) wide (size S/M), which equals 27 repeats.
Then repeat Rows 2–4 once more to reach a total width of 52 cm (20.5″).
For a larger size, continue working 4–8 additional rows in pattern (i.e., Row 5, then Rows 2–4, repeat as needed).
End the back panel on the top edge.
Do not fasten off. Secure the working yarn with a stitch marker, as it will be used later to join the shoulders. Leave a long tail (approx. 60 cm / 24″).
Repeat the same process for the front panel using new yarn.
Also secure the working yarn with a stitch marker and leave a long yarn end.
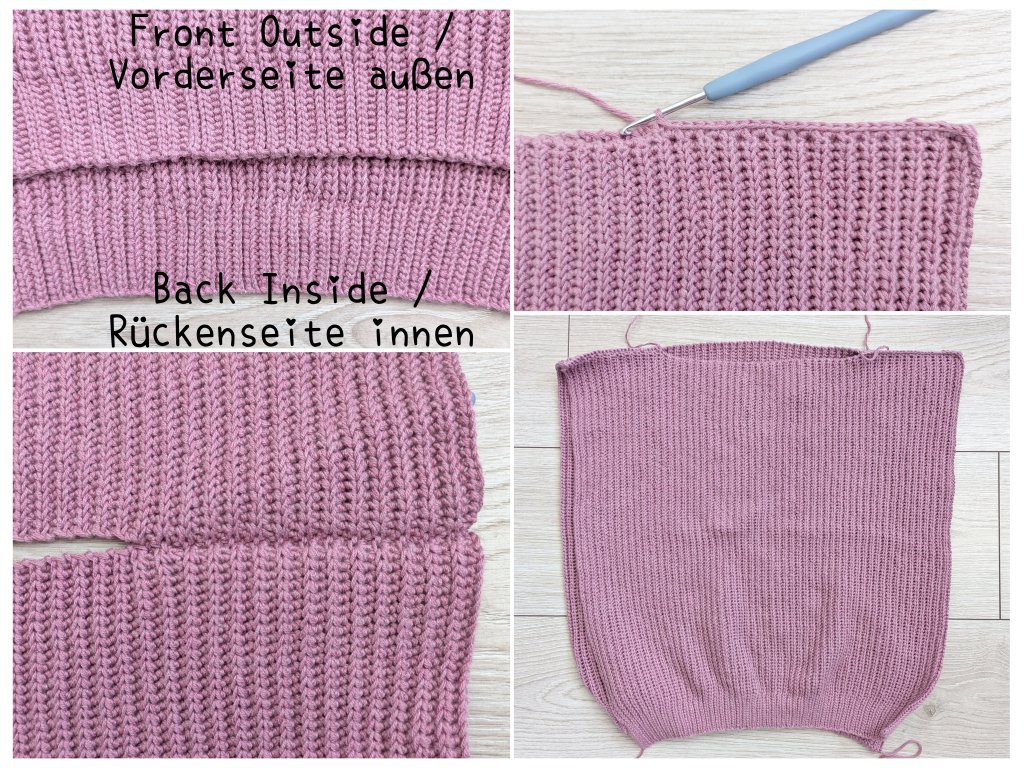
Step 3: Join Shoulders
Pick up one working yarn and join front and back panels at one shoulder using single crochet stitches.
The side where two rows of slip stitches are interrupted by a row of hdc slip stitches is the front side.
Work across 27 stitches (approx. 12.5 cm / 5″) toward the neckline, crocheting into the edge stitches/turning chains. Make sure the stitch pattern aligns with the back panel.
The last stitch should be worked into the raised back loop ridge of both pieces.
Leave the remaining stitches unworked.
Repeat on the other side.
You should now have both panels joined at the shoulders, leaving a neck opening of approx. 27 cm (10.5″).
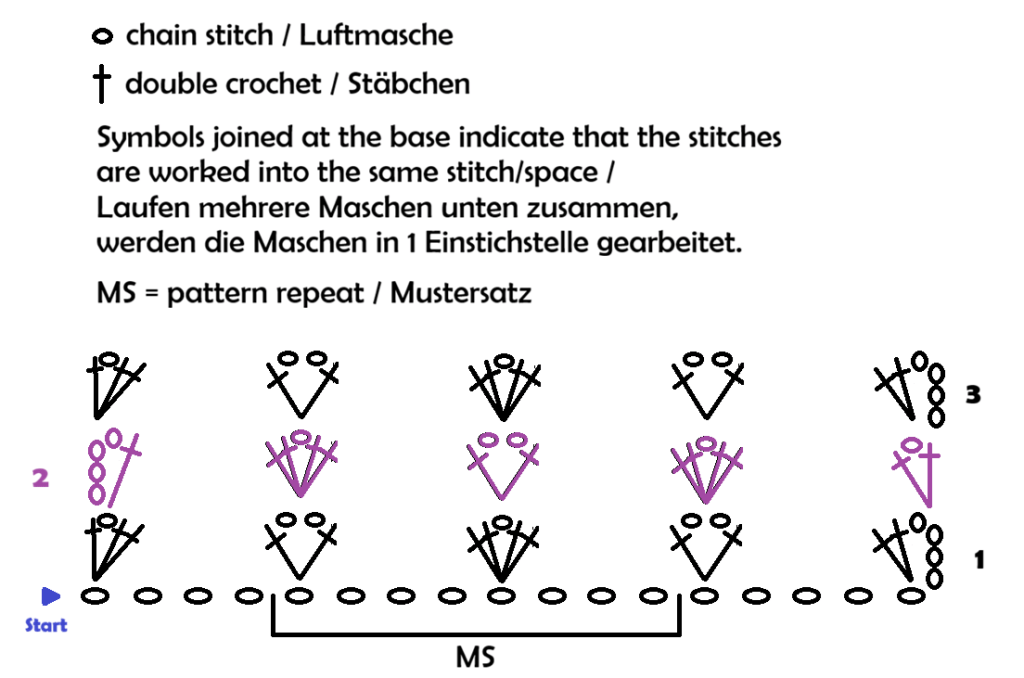
Step 4: Attach Sleeves
The sleeves are worked following the stitch chart below.
Pattern foundation:
Multiple of 8 + 1 + ch 3 (turning chain)
For this pattern:
88 + 1 sts (+ ch 3) per sleeve (45 sts from back panel, 44 sts from front panel)
Work according to the chart:
- Begin with stitches before the repeat
- Repeat the pattern repeat (MS) throughout
- End with stitches after the repeat
Work Rows 1–3 once, then repeat Rows 2–3.
From Row 2 onward, work the double crochets around the chain spaces of the previous row.
Place markers:
- Count 45 sts from the shoulder seam along the back panel → place marker
- Count 44 sts along the front panel → place marker
Right Sleeve:
Work from the back panel to the front panel (violett marker to blue marker), following the chart.
The “right side” of the fabric should face outward in Row 1.
Work until sleeve length reaches approx. 47.5 cm (18.5″). End with a row facing the same direction as Row 1 (right side outward). Leave a long yarn end (approx. 50 cm / 20″).
Left Sleeve:
Repeat mirrored, working from front panel to back panel (blue marker to violett marker). Leave a long yarn end.
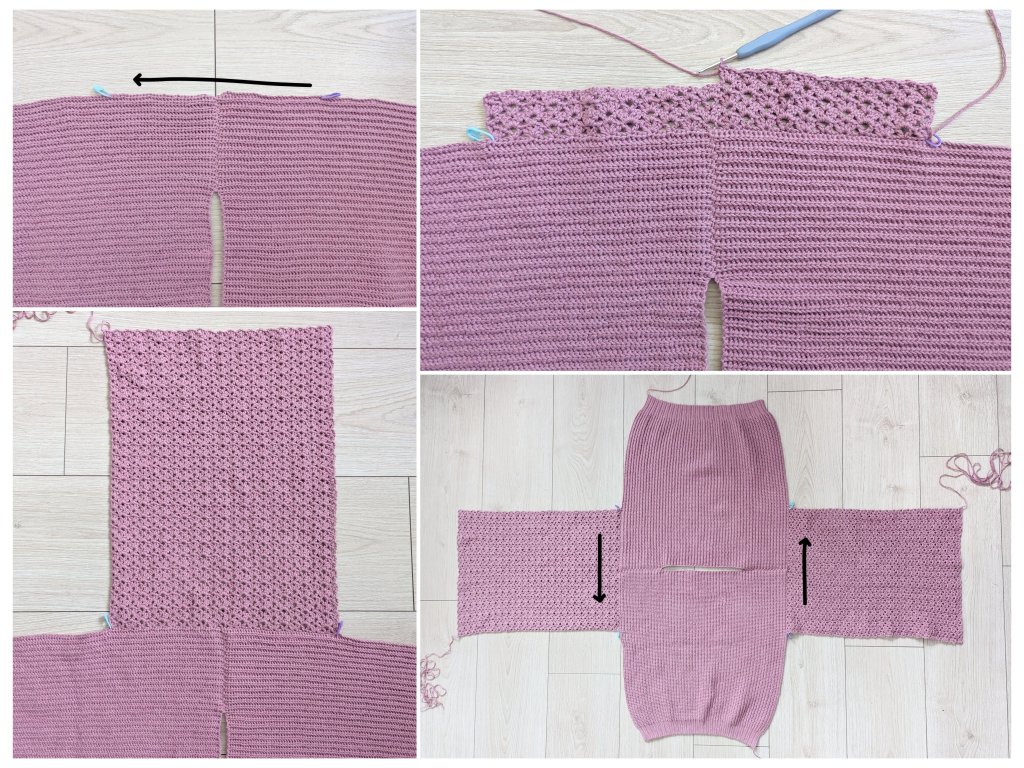
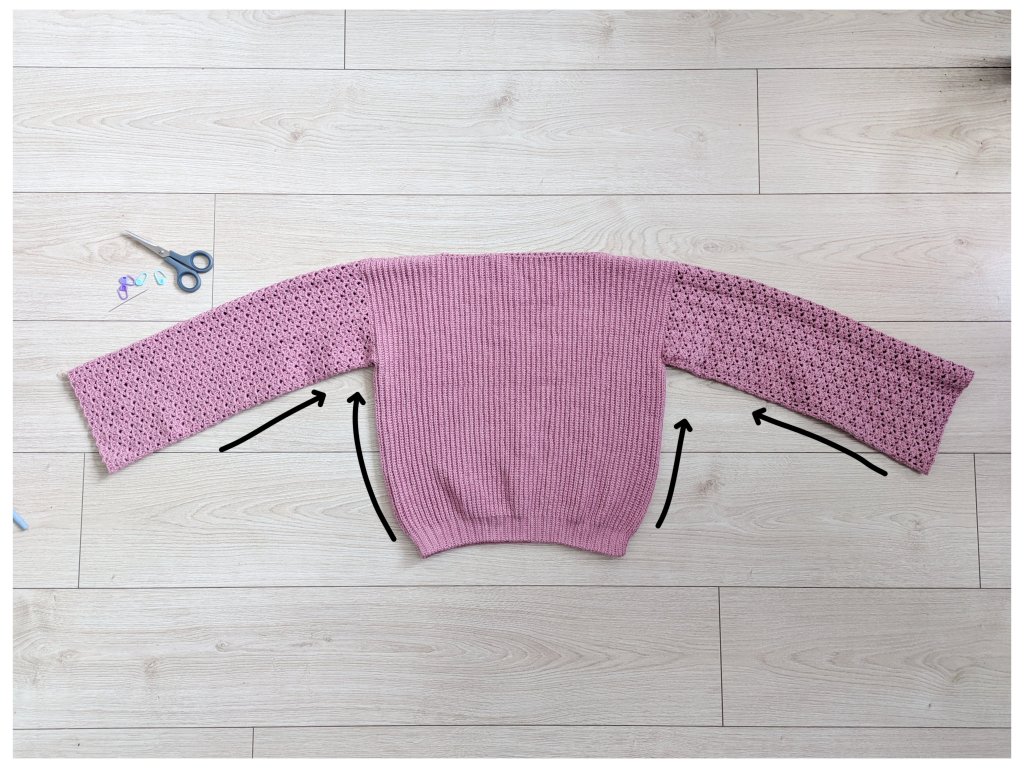
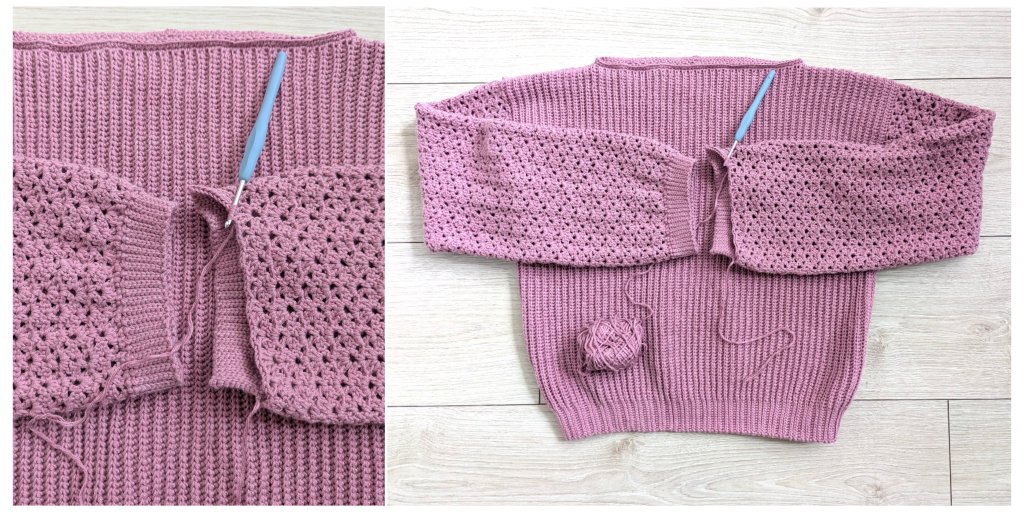
Step 5: Seam Sleeves and Sides
Use the sleeve yarn ends to seam each sleeve from the opening to the underarm.
Use the panel yarn ends to seam the body from the waist band up to the underarm.
Weave in all ends securely.
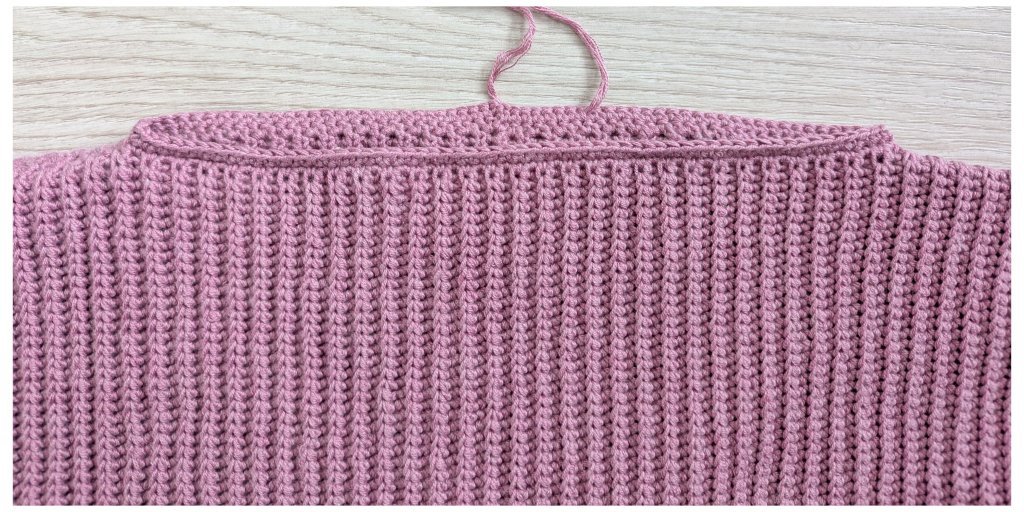
Step 6: Finish Neckline
Attach new yarn at the center back.
Work 2 rounds of half double crochet evenly around the neckline.
Fasten off and weave in ends.
Step 7: Crochet Sleeve Cuffs
Attach new yarn at the sleeve edge.
Ch 10 (9 + 1 turning chain)
1. R: sl st in each chain, sl st into the next 2 edge stitches of the sleeve to join, turn without chaining (9)
2. R: skip the joining slip stitch, sl st blo in next 8 sts, sl st in last st, ch 1, turn (9)
3. R: sl st blo in each of 9 sts, sl st 2 edge stitches together, turn without chaining (9)
Repeat Rows 2–3 until reaching the end of the sleeve.
Use the yarn end to seam the first and last row of the cuff together.
Repeat for the other sleeve cuff.
Finished!
Your crochet sweater is now complete!
I hope you enjoyed making it and found the pattern easy to follow!