

You don‘t know you need them until you have seen them: lifehacks help you in various everyday situations. Whether for lifestyle, work or handcrafting, with a simple trick or a brilliant shortcut you can make your life a lot easier or create fantastic results with minimal efforts in challenging projects. In crochet, hacks can turn your idea or a tricky spot into its best outcome. From starting off to weaving in, from crocheting in even rounds and stuffing the inside of amigurumis to sewing parts together- for every stage in crochet you find useful tips and awesome tricks here. You might be familiar with some of these, while others might surprise you!
Improve your crochet experience now with these 25 awesome crochet hacks. Your crochet will never be the same again!
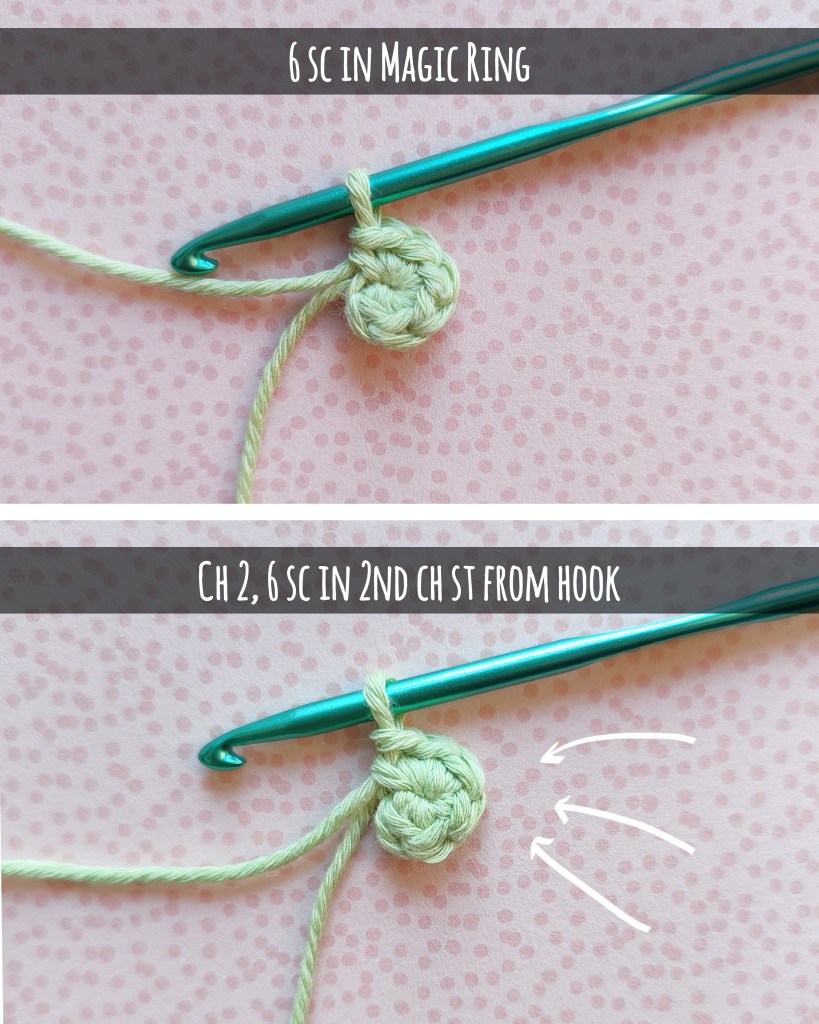
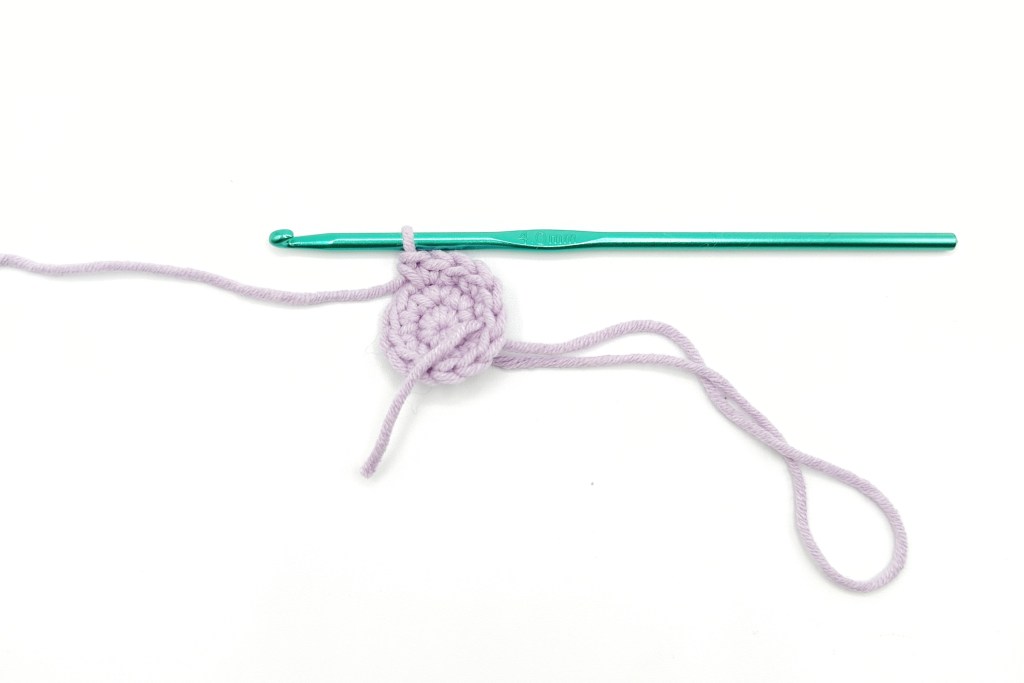
#1: Ch 2 instead of MR
We want to start our list with this very basic, yet incredibly useful crochet hack: when crocheting in rounds you can choose to start with a magic ring or with chain 2 (and working the stitches starting from the 2nd chain stitch from hook). Starting with ch 2 is particularly helpful when you work with uneven yarn (like bouclé or frayed yarn), wool or non-mercerized yarn or with sewing thread (in micro-crochet), but it works great with any yarn type.
#2: The perfect starting length
You want to create a blanket or a sweater and you don‘t know how many chain stitches you need to start with to achieve your preferred length? Just do a foundation chain and decide in the making!
A foundation chain merges the base chain and your first row of (single, double, etc.) crochets in one step. Thereby, you start with chain 2 (for a foundation single crochet) and grow your first row (of single crochets) on the basis of that chain 2 (i.e. you work half a single crochet in the 1st chain stitch, yarn over, and pull through all the 2 loops on your hook). For a foundation half-double crochet start with chain 3, for a foundation double crochet start with chain 4, etc.
Gone are the days of working long chains and then going back to correct your length. You won’t miss any more stitches in your long starting chain and – the main benefit of this foundation row – you start your first row at the same tension as the rest of your project!
See the video below for the foundation single crochet (FSC). For the foundation half-double, double, etc. crochet you work a different underlying stitch, while the actual stitch positions remain the same.
#3: Clean foundation
You want to start with a chain row? Then work your next row thereafter in the middle two loops, that is the front- and the back-loop of the chain stitches, to create a beautiful braid look:

#4: Don’t lose track of your stitch count
You want to work in a long row? To avoid losing track of your stitch count, insert a marker in regular intervals or move your marker along your work, e.g. to every 10th stitch.
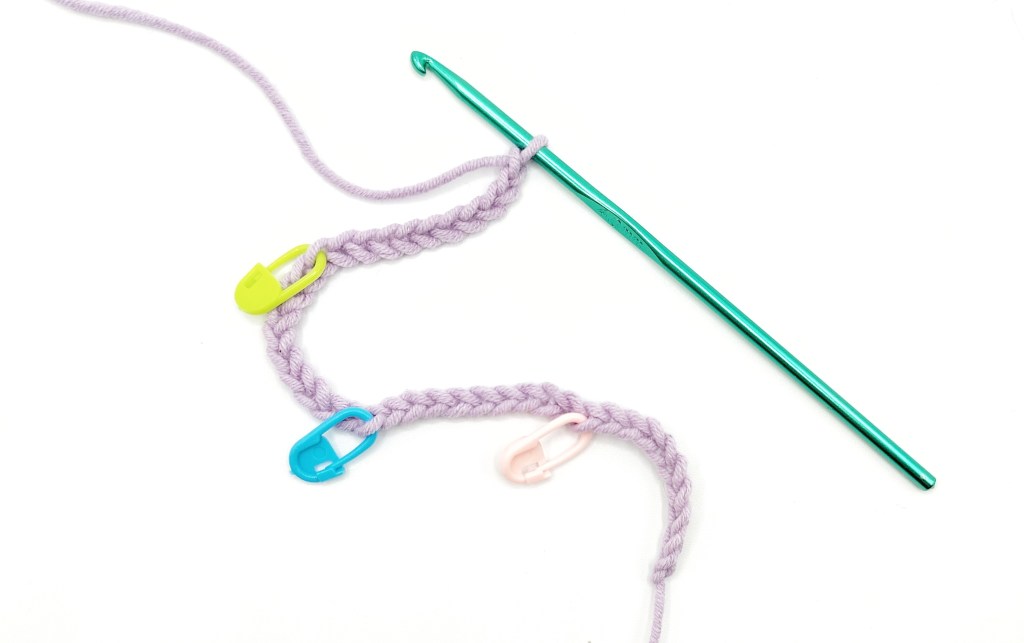
#5: Don’t lose track of your round’s start
When crocheting in spiral rounds, markers help you to not lose sight of the beginning of a new round resp. the end of a previous round. Not having a marker and a scissor at hand? How about using your yarn end as a marker instead! Good alternatives are earrings or a paper-clip too.
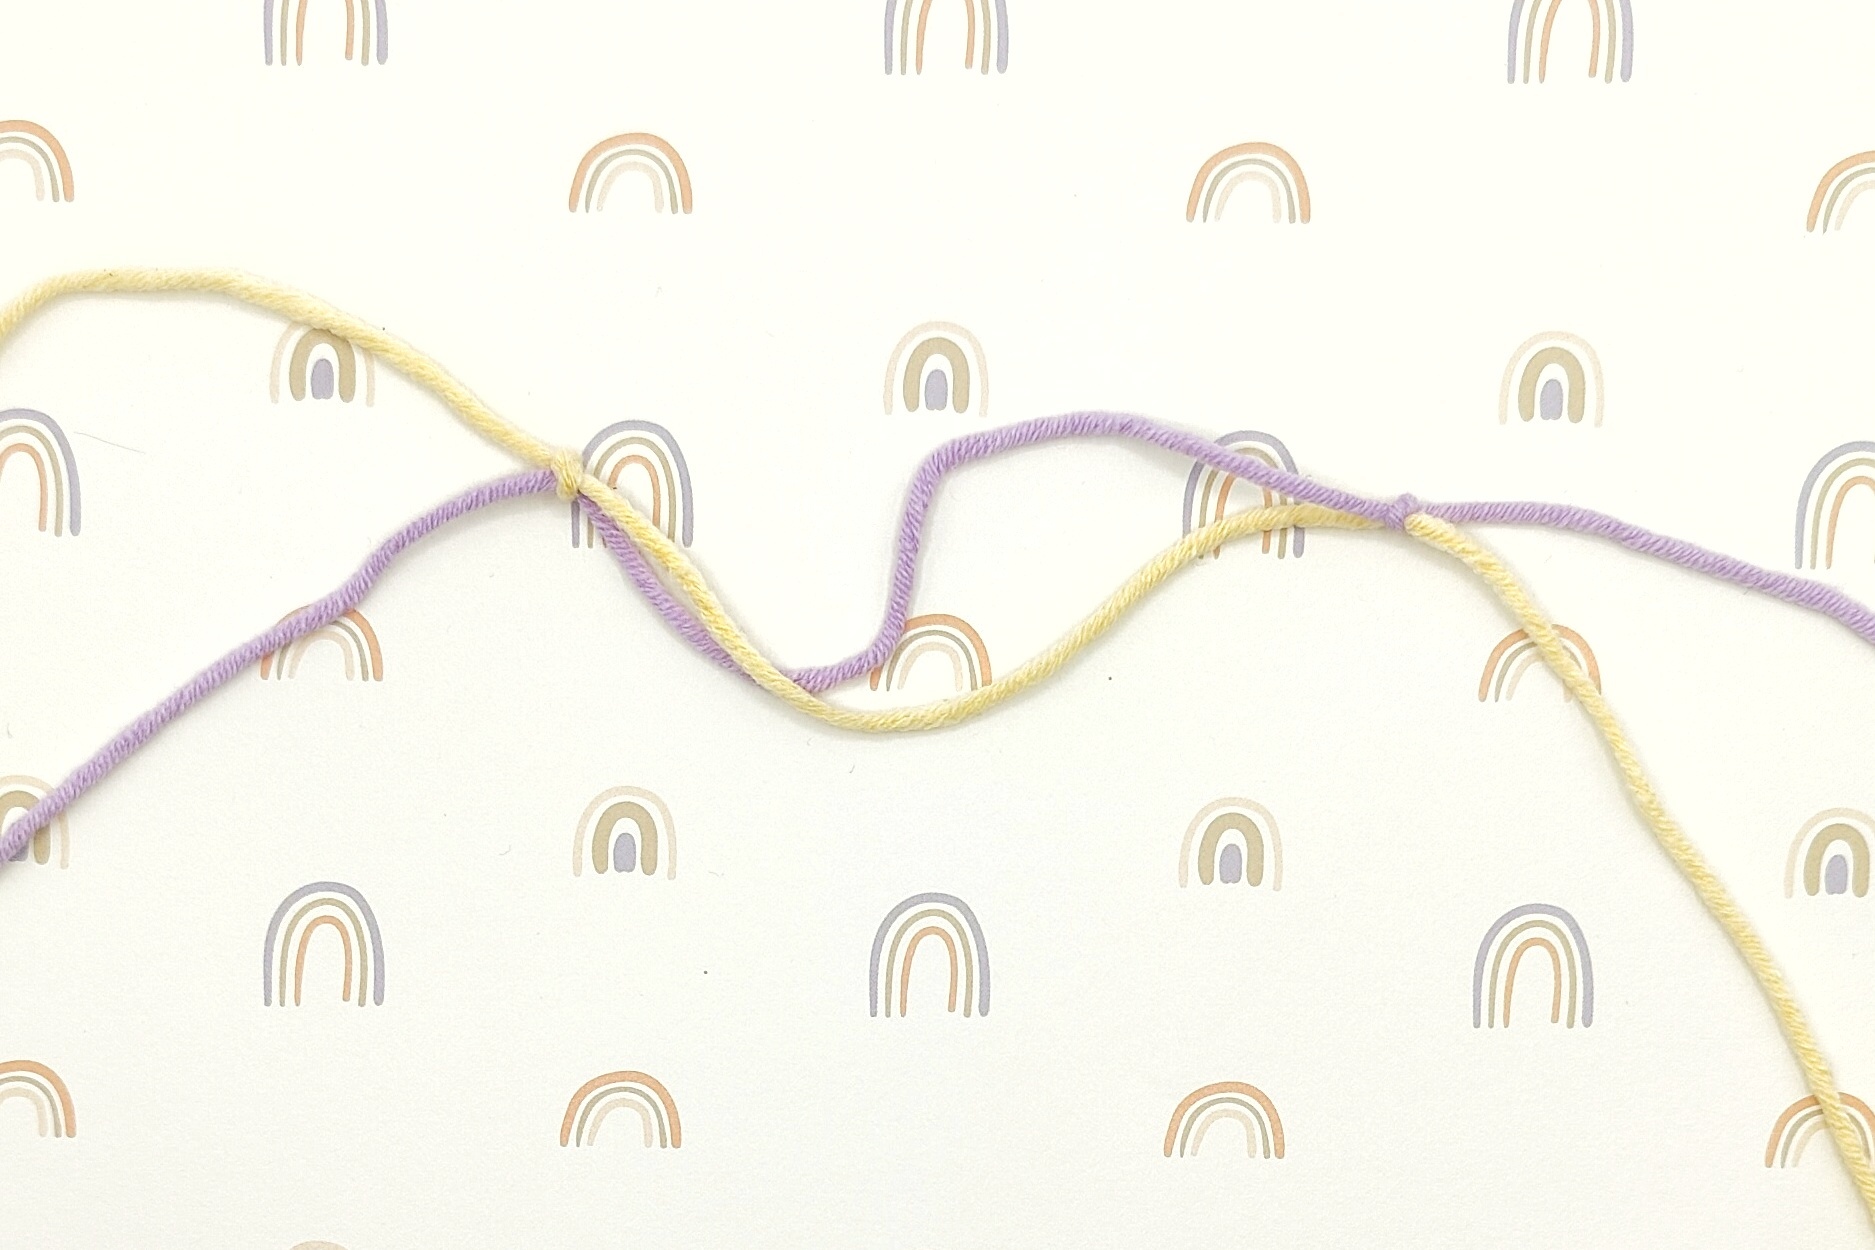
#6: Hidden knot (3 variations)
Your yarn is used up and you have to connect to a new yarn ball? There are three great ways to do that securely and nearly invisibly, depending on the yarn type you work with:
The first version is a particularly invisible way to knot any two yarn pieces together. Simply knot each yarn with itself around the other yarn (do this for both ends simultaneously). Then, pull the knots to each other and cut the remaining ends. This knot is thin and holds securely even when you cut the ends closely to the knot.


The first version knot might not hold well on mercerized, combed yarn or with sleek yarn (e.g. silk). In those cases you can try the crown knot which is particularly strong. Use crochet hack #9 to hide the ends of your knot inside your work.


The third version works for wool or yarn that is multi-threaded. Split the ends into single strands, interleave the strands and roll the surface to the same side as the remaining yarn structure until they are savely intertwined. Wool felts and stays securely intertwined in your finished row. For cotton or other yarn it helps to make the yarn a bit wet before crocheting it in.

#7: Neat colour transition
If you want to create a clean transition between yarn colours, take the new yarn colour in the last yarn-over step of your crochet stitch.

#8: Colour changing crochet
You can skip weaving in the yarn ends between colour changes (or just cut and tie), if you build in the yarn ends in your crochet process. That method in which you crochet your new yarn on top (or behind) your work is called tapestry crochet. Not only does this method save you time, but it’s also more stable than the cut-and-tie method of changing colours in your crochet process.

Bytheway, the tapestry crochet (yarn on top) is a perfect method to crochet a design pattern inside your work. See this post for an easy to follow step-to-step tutorial on tapestry crochet.

#9: Decrease invisibly
If you frequently crochet amigurumis, you might know this crochet hack: single crochet two stitches together in a way that makes the decrease stitch almost unnoticable. How? You simply crochet the next two stitches through their front-loops-only together. This makes the decrease stitch thinner, it better closes the distance to the adjacent stitches (reducing the likelihood for holes after several consecutive decrease stitches) and therefore appears nearly invisible. Your perfect solution for an amigurumi head!

#10: Increase invisibly
Where you can improve the decrease stitch, you can do the same for the increase stitch, but with a slight variation: work the first stitch in the front-loop-only and the second stitch through both loops of the same stitch (like you’d normally crochet your stitch).
The invisible increase creates a cleaner, denser look than the normal increase.


#11: Use household lids for your amigurumi feet
Lids from PET-or glass-bottles are a great way to make the feet of your amigurumi stand steadily. Just insert them into the foot before closing the space to continue with the leg and stuffing.

#12: Invisible closing
You would normally close your spiral-rounded project in a slip stitch and weave in, right? You can end them even more beautifully, by the following trick: end your round in a slip stitch*, then take a wool needle and sew the yarn end from the front to the back of the first next stitch. Then sew from the back to the front of your previous slip stitch. Pull the end and weave it in. When you crochet amigurumis, it’s also sufficient to just knot the yarn end close to the slip knot, instead of weaving in.
* if you worked in double or triple crochet, first reduce the crochet size gradually. That is, if you made a double crochet round, end your round with a single crochet followed by a slip stitch. For larger rounds (with more than 20 stitches), the round looks more even when you conclude with 2-3 gradually decreasing stitch types instead of just 1.

#13: Work in invisibly joined rounds
Working joined rounds allows your rows to appear at one level which creates an even look especially when you change colours between the rounds.
Crocheting in join means (generic description)…
- you start your first round (the magic ring) with a chain 1 (for single crochet rounds) / chain 2 (for half-double crochet rounds) / chain 3 (for double crochet rounds), then continue the number of stitches in the MR.
- At the end of your round, skip the first chain stitch(es) and work a slip stitch in the top of the last chain stitch you started with. That is, the 1st chain stitch for single crochet rounds, the 2nd chain stitch for half-double crochet rounds, etc.
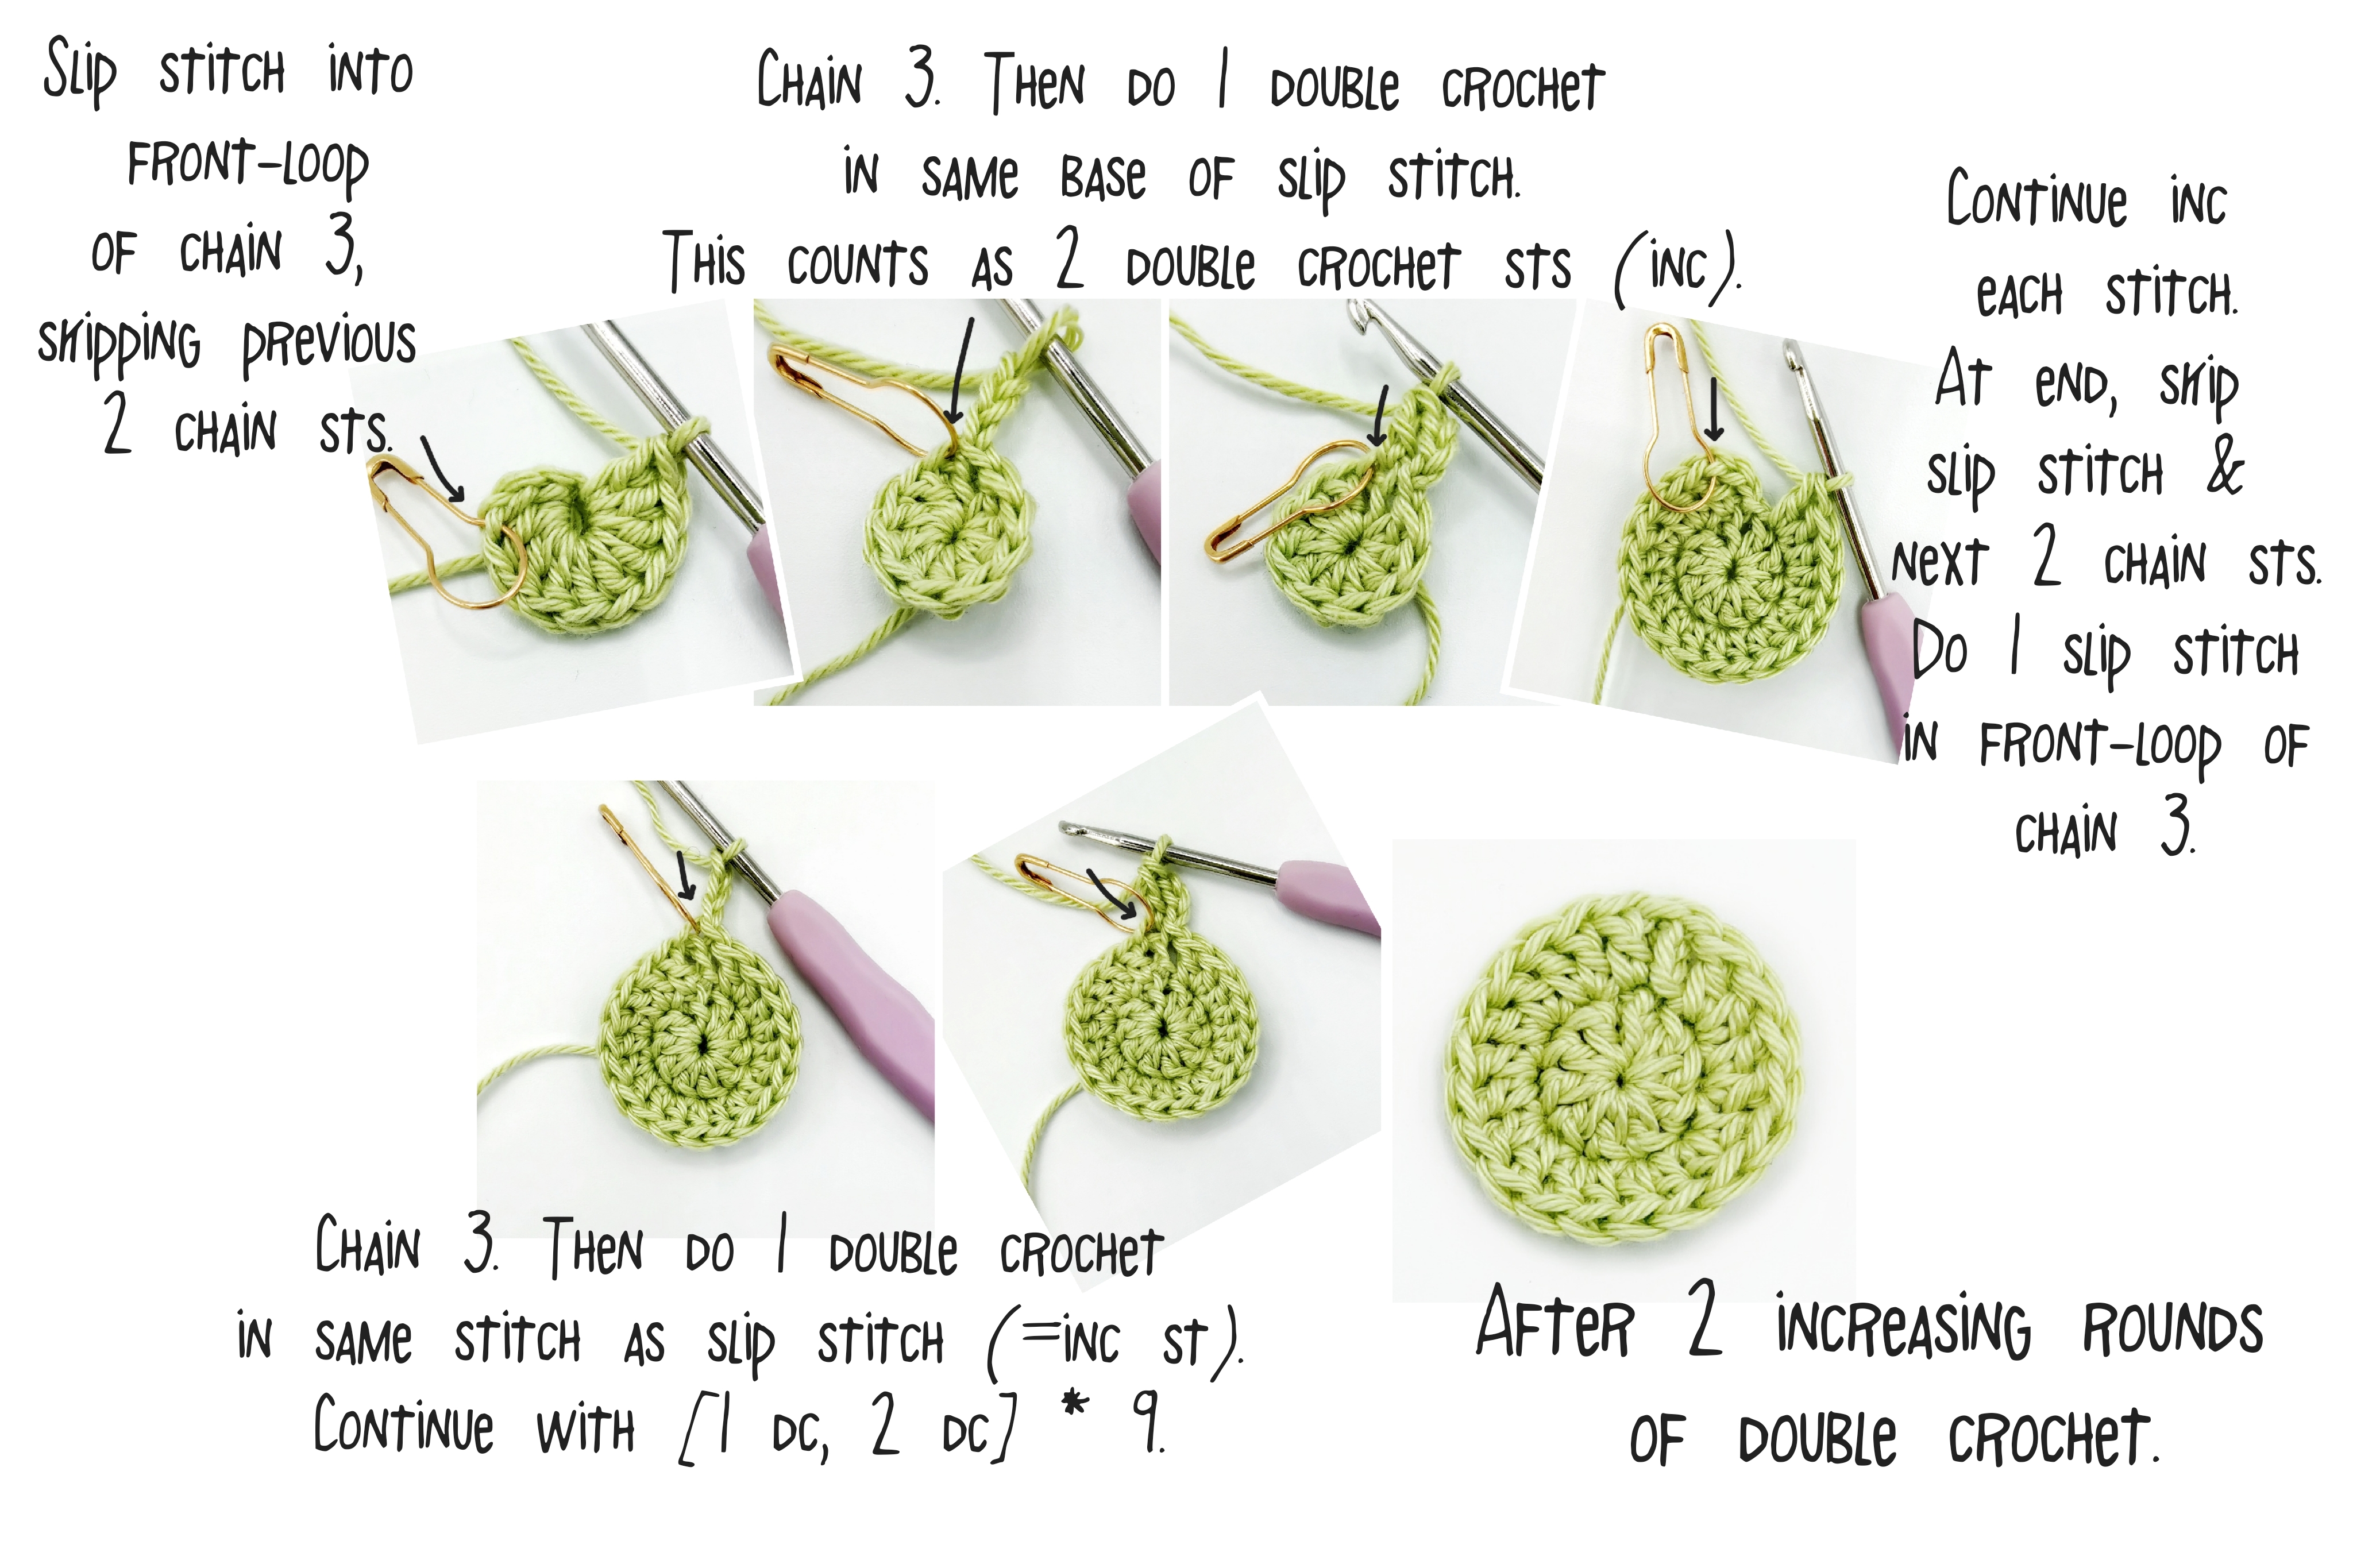
- Again, chain 1/2/3 as before, depending on the stitch type you crochet in. If you work increasing rounds, the next stitch is crocheted in the same base as the slip stitch (that is, in the last chain stitch). The chain stitch(es) and the next stitch correspond to an increase stitch (i.e. 2 sts). Continue the increase round as indicated in the pattern.
- At the end, skip the slip stitch from the round start (2.) and work a slip stitch in the last chain stitch (skipping any other chain sts in-between).
- Repeat 3.-4 while following the crochet pattern…
Despite its practicability, joined rounds leave its trace in the pattern that can be seen in the output (see comparison below). To avoid that, work each slip stitch in the front-loop-only of the chain stitch (instead of the top loops). We have created this step-to-step illustration of the invisible version on joining rounds for you:

Bytheway, a general rule for working in rounds of even increases:
- Single crochet: begin with 6 sts. Your total stitch count increases by 6 sts after each increase round.
- Half double crochet: begin with 8 sts and increase each round by 8 sts.
- Double crochet: begin with 10 stitches and increase each round by 10 sts.

#14: Get rid of visible stuffing
You worked your project too loosely and now your wadding pokes out? Just stuff the wadding into an old piece of stocking before putting it into the body. Do not knot the stocking unless the figure is sufficiently stuffed. Alternatively, stuff the stocking beforehand and crochet around the stocking.

#15: Set position with a fixing pin
Before sewing finished parts together (e.g. sewing arms and legs to an amigurumi body), fix them into place or mark the exact sewing position using pins. This helps you to visualise the outcome before going into the sewing and to avoid sewing in a wrong angle or position (if the parts get out of place while sewing).

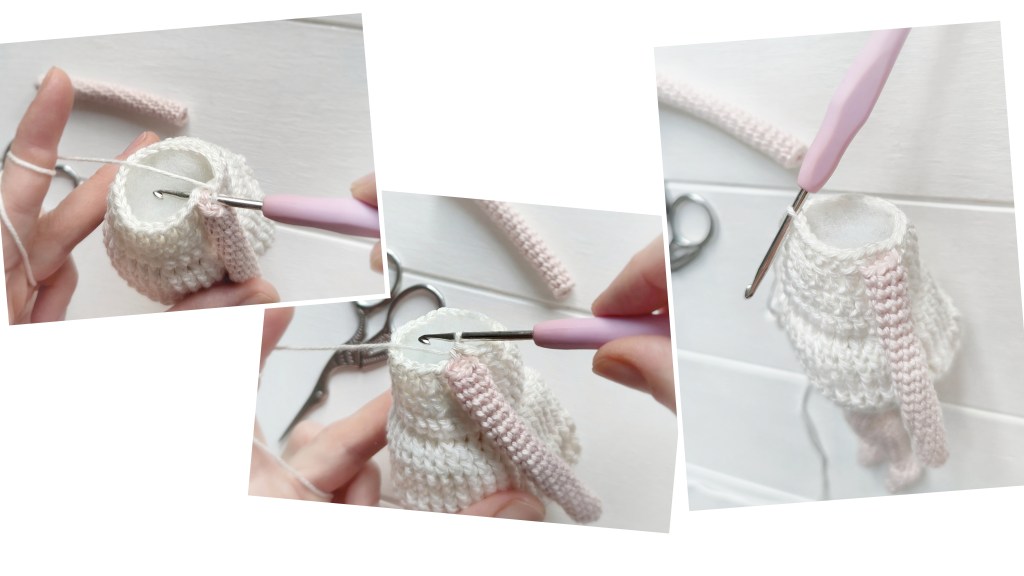
#16: Crocheting parts together in the making
You save time and improve the appearance of your item by crocheting the parts directly together on the go. For instance, for an amigurumi you start with the arms and legs. While crocheting the body, you crochet the arms and legs in the respective area on the body.
#17: Connect crochet parts beautifully
Why sewing when you can continue crocheting? This crochet hack allows you to sew crochet pieces together without a wool needle: just stitch the opposing inner loops of both crochet pieces in a slip stitch together. Your perfect solution for a chic Granny Square blanket!

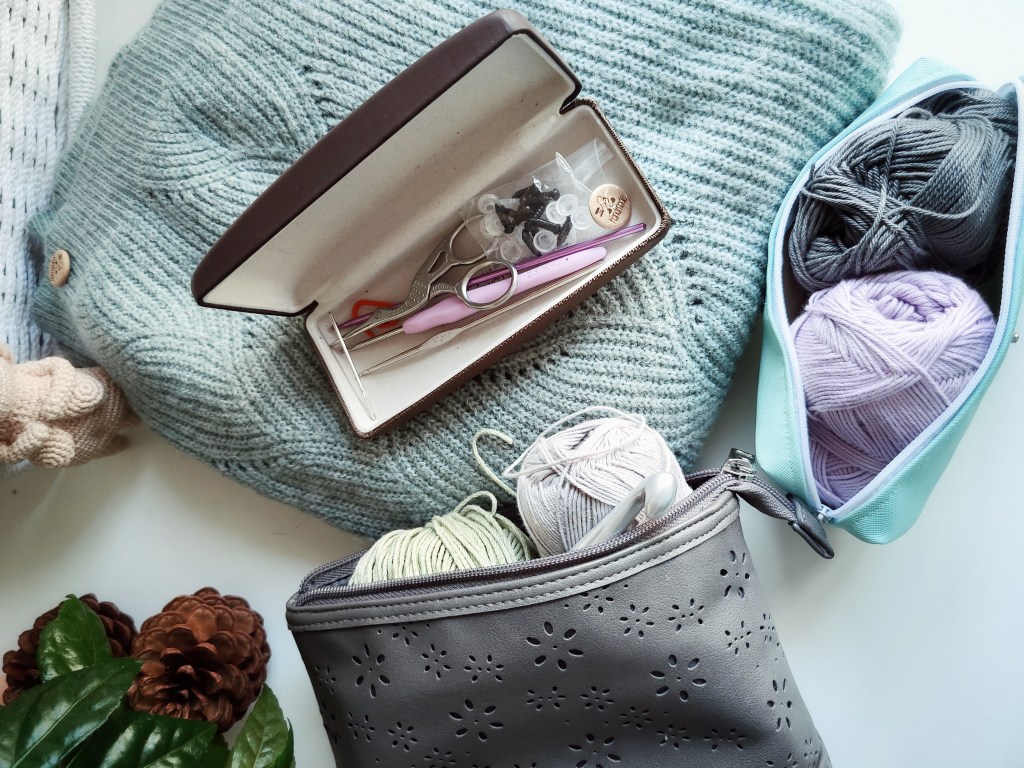
#18: Traveling with your crochet utensils
If you want to have your crochet tools with you when you are on the move, you can simply put the yarn in a chic toilet bag or a pencil case and the small parts (like crochet hook, scissors, wool needle, markers, security eyes, measuring tape…) in a glasses case.
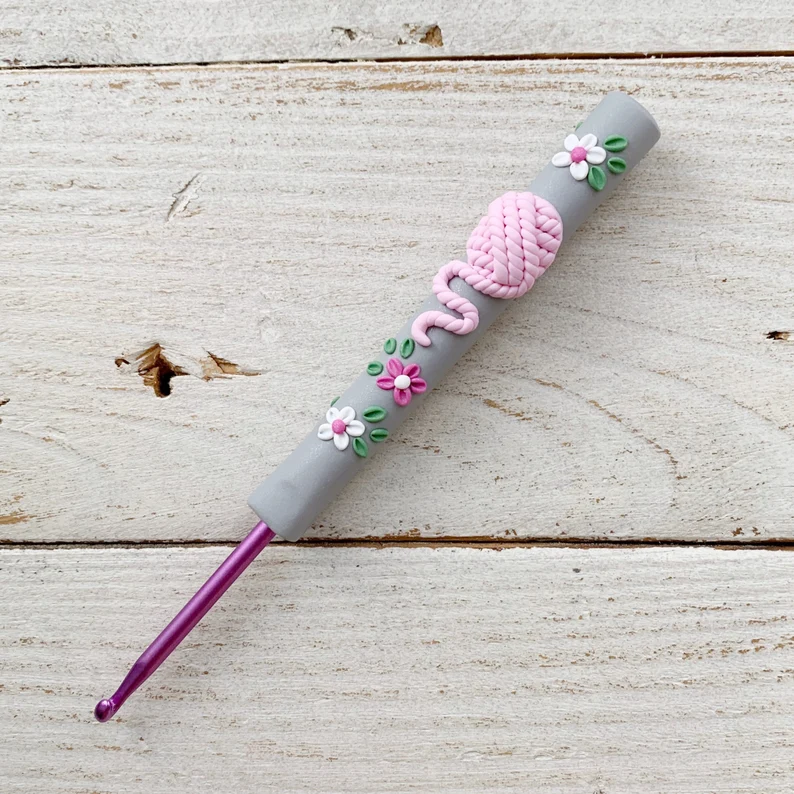
#19: Create your own crochet hook handle
What do crochet and modeling clay have in common? An individualized crochet hook handle! Use polymer clay, a hardenable modeling clay (e.g. by Fimo) to create a handle of your desired (ergonomic) thickness, style and shape. You can engrave the hook size, add a beautiful design and play around with different colours. The ideas are endless, so will be your addiction to making your own crochet design hooks. You are welcome!


#20: Get a lower number
For projects in which you want to get a firm result, e.g. for amigurumis, you should use a crochet hook that is half a size smaller than recommended in the label. That is, when the label indicates a hook size of 3-4 mm, use a hook of size 2.5 mm.
Bytheway, although most labels only show recommendations for a knitting needle size, you can use them synonymously for crochet hook sizes too. Generally, though, use the lower number indication as knitting projects look better when knitted a bit loosely in comparison to crochet projects.

#21: DIY textile yarn
Did you know that you can make your own fabric / textile yarn with some old t-shirt or bed sheet? Try it out!
Although jersey material creates the best textile yarn (it’s soft, with clean sides and it’s easier to work with as a textile yarn), any material can be turned into textile yarn.
#22: DIY bouclé yarn
Do you want to create a thick project in a fancy look but don’t have the right yarn at hand? Try crocheting with a long chain of chain stitches as your working yarn. Important is here that you start your actual project at the same slip knot place as your crochet chain (it’s easier to weave the thin end in than a piece of a crochet chain) and that you grow your crochet chain on the go with your actual project (to avoid to run out of chain-yarn before the end of your project).

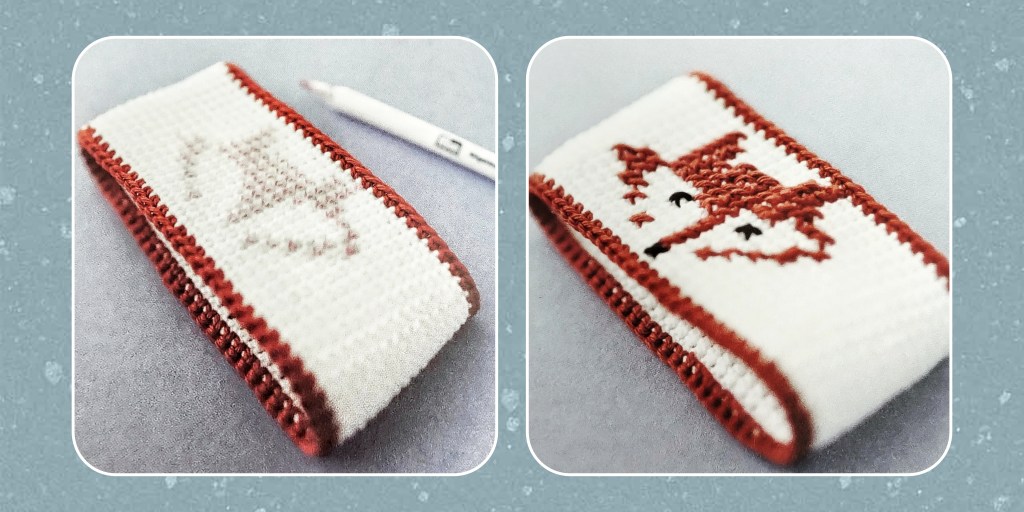
#23: Sketch the pattern before embroidering
You want to sew a pattern onto your finished crochet (e.g. eyes on an amigurumi)? It helps to draw it with a washable pencil beforehand to create a clear design and avoid unpicking previous moves.
#24: Increase yarn thickness with several single strands
You want to make a project with a bulky yarn, but you don’t have one? Take the starting and ending yarn strands (i.e. the strands from outside and inside the ball) of your medium yarn (worsted weight, DK) and use these as your actual (double-stranded) yarn. The more yarn strands you use (i.e. start and end strands of 2 or more yarn balls), the thicker your yarn gets.
This crochet hack also helps you to create your very individualised twist yarn by using yarn strands of different colours!

#25: Take care of your hands
Intense crochet sessions can dry out the skin on your fingers. Despite being unpleasant, dry cuticle can fray unsteady yarn like wool, boucle yarn or non-mercerized cotton. Apply intensive hand or cuticle cream after (!not before or during!) your crocheting and give your hands increased care during the winter months.

We have reached the end of our crochet lifehack list, but we are not done with crochet ideas! Read about these 17 awesome crochet ideas for easy DIY and find your next crochet project for yourself or as a creative gift for someone else.

Very kind of you to share all your insider’s tricks! Thank you.
My pleasure! I hope they are useful to you!