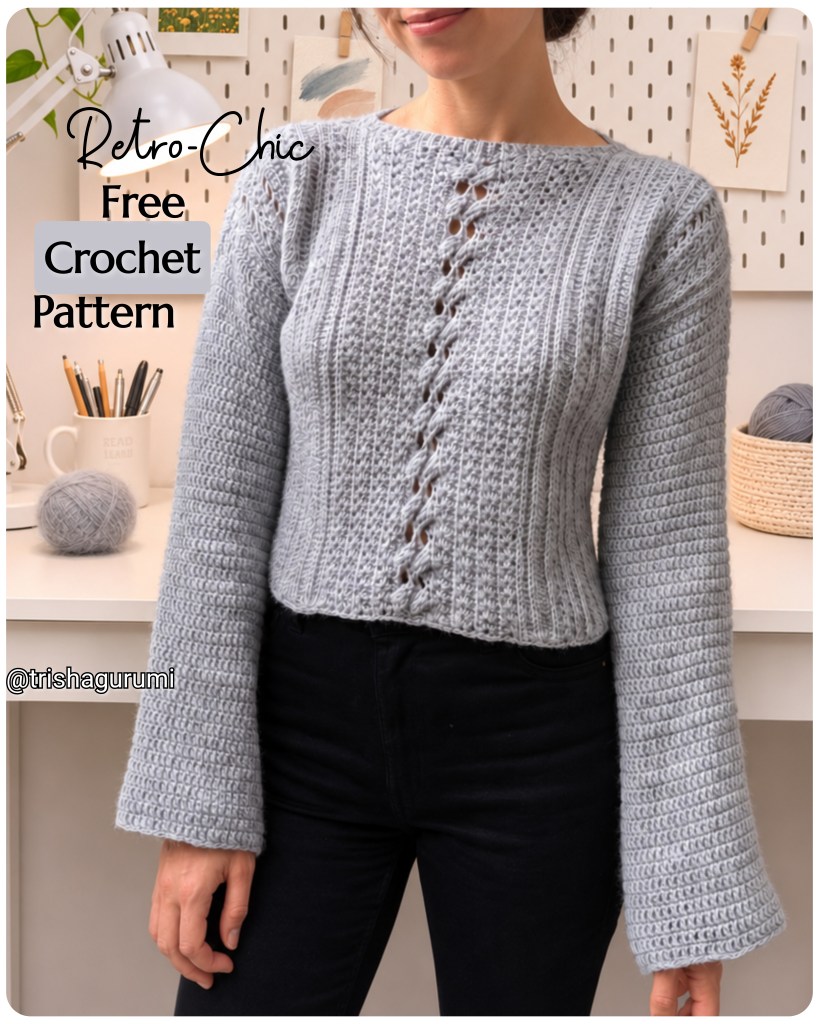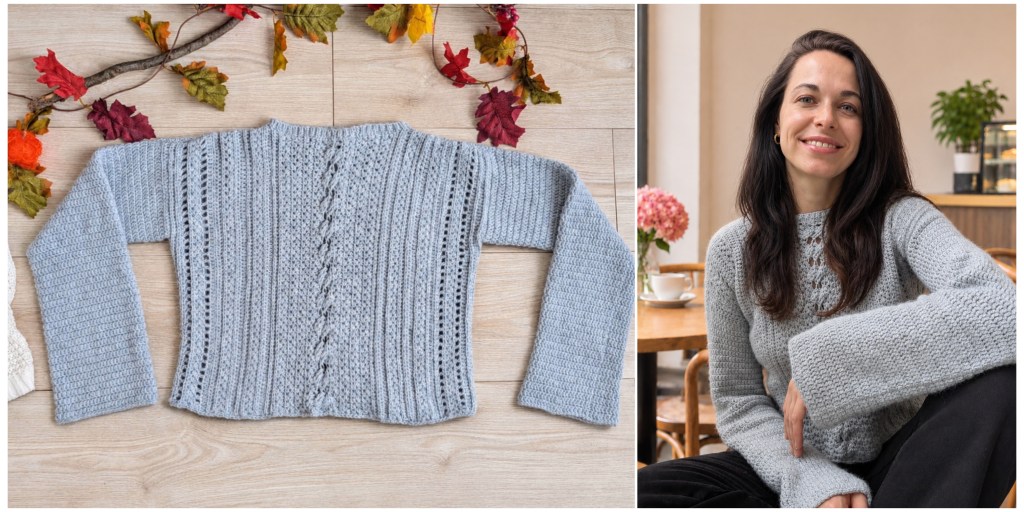
Nostalgic charm meets modern style! My new Retro-Chic crochet sweater combines classic crochet stitches with a contemporary silhouette. Its soft, fluffy texture, playful stitch patterns, and eye-catching cable design bring back memories of Grandma’s handmade sweaters – cozy, timeless, and full of charming details.
But Retro-Chic is anything but old-fashioned! With its cropped length and wide, extra-long sleeves, this sweater has a modern, relaxed look. And it’s exactly this contrast that makes it so special to me.
With this little crochet experiment, I wanted to create a sweater that brings back a touch of nostalgia while still fitting beautifully into a modern wardrobe. Do you think I pulled it off?
I’ll show you how to make your very own Retro-Chic sweater in the free crochet pattern below!
Nostalgic, Modern, and Wonderfully Versatile
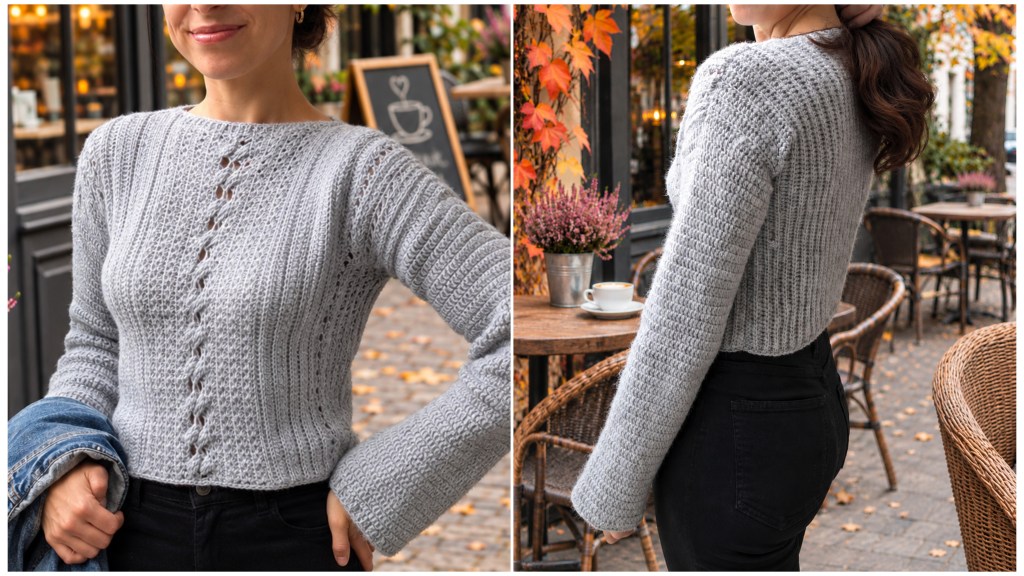
Retro-Chic is a sweater for anyone who loves traditional crochet techniques but doesn’t want to compromise on modern style.
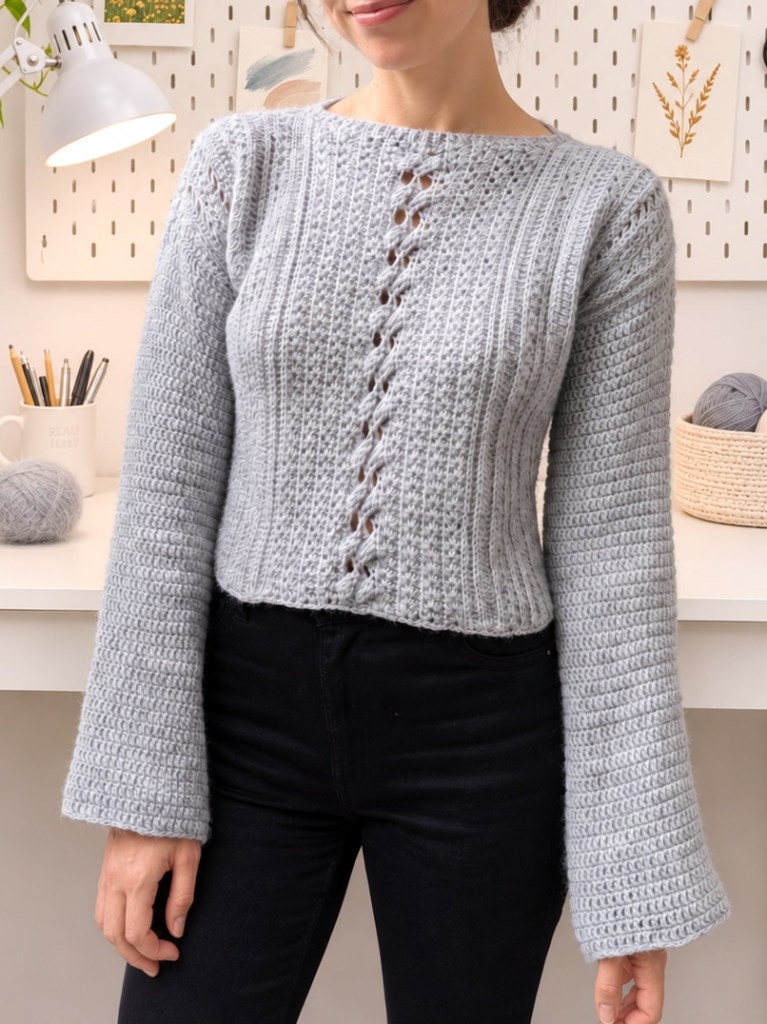
Its slightly fuzzy texture gives it a soft, cozy appearance, while the cropped length and relaxed sleeves create a contemporary silhouette.
I especially love pairing it with high-waisted jeans. But it also looks beautiful with a fitted skirt or layered over a dress, creating a feminine, slightly romantic outfit that’s perfect for both everyday wear and the office.
Retro-Chic is particularly lovely for transitional weather – cozy enough for cooler days without feeling too heavy or wintery.
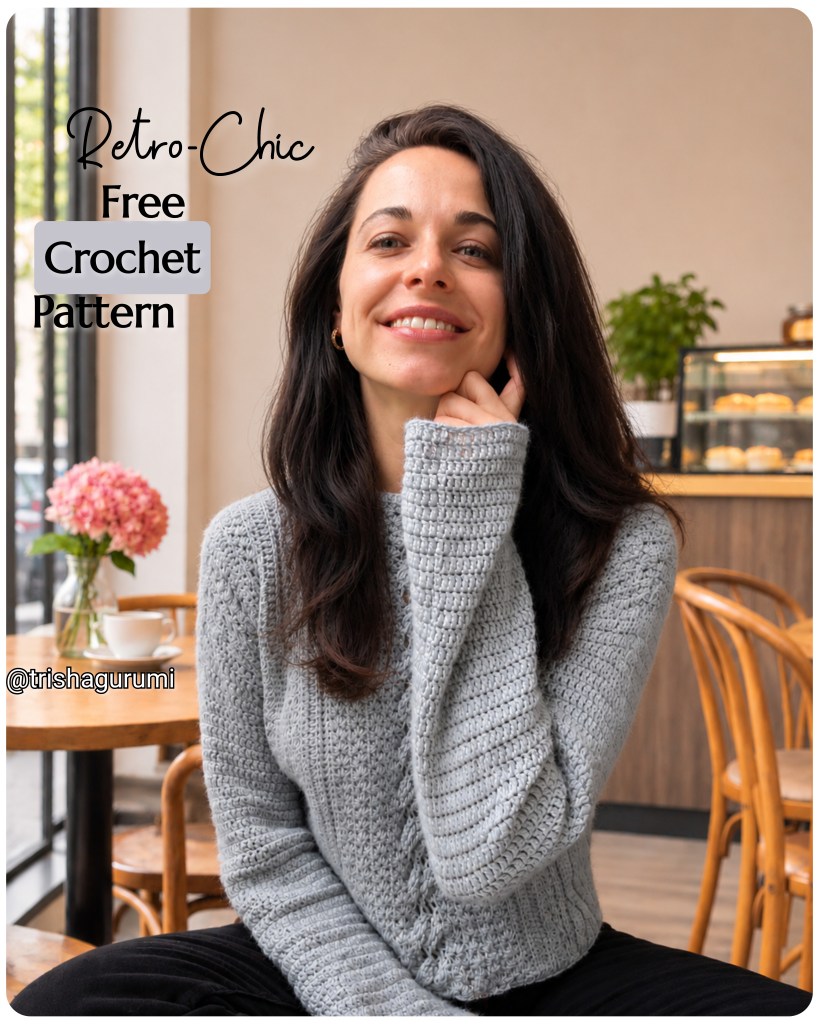
One Sweater, Many Stitch Patterns
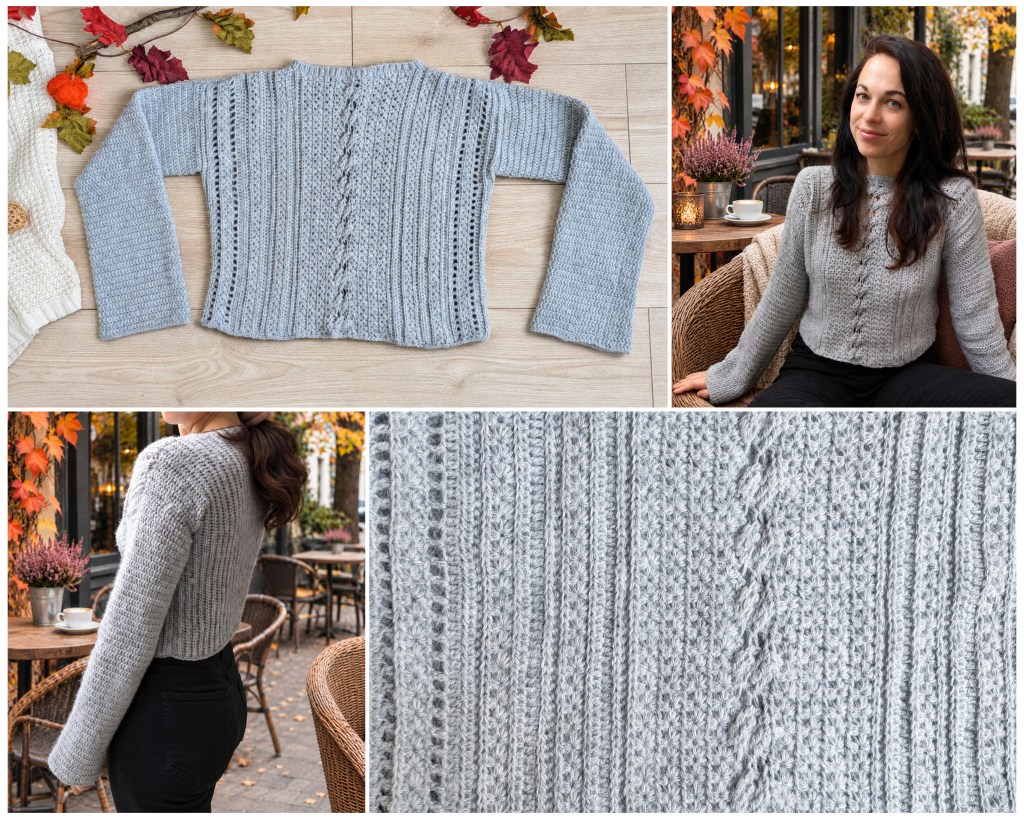
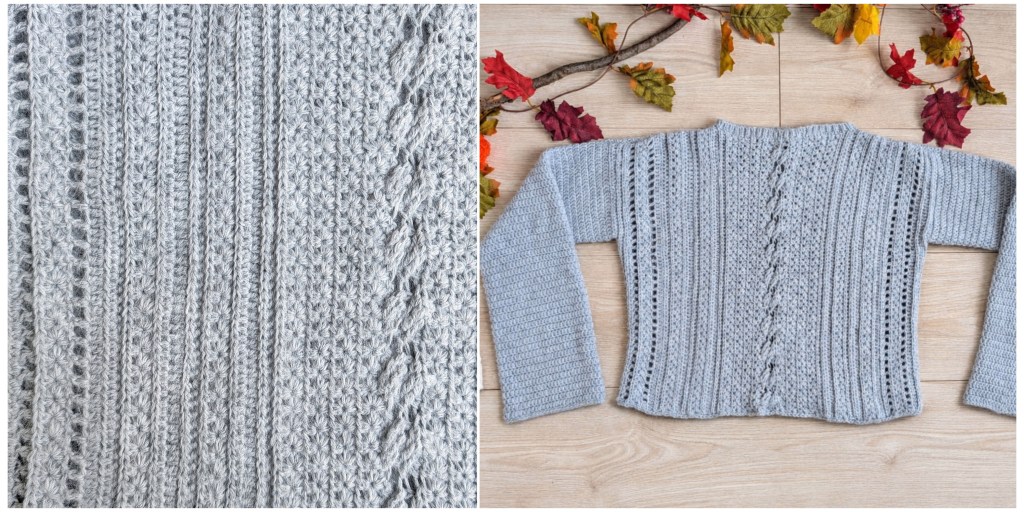
What makes this retro crochet sweater special to me is the combination of different crochet techniques. The front, back, and sleeves each feature their own unique texture, coming together to create a design that’s interesting yet beautifully balanced.
The Front – Playful and Full of Detail
The front is the heart of the design. Different stitch patterns come together to give the sweater its nostalgic character.
Alongside the Lemon Peel Stitch, which creates a delicate, textured surface, the prominent cable pattern running down the center takes center stage. It extends along the entire front and is reminiscent of traditional knitted sweaters.
The Back – Simple and Textured
In contrast to the playful front, the back features a deliberately understated design.
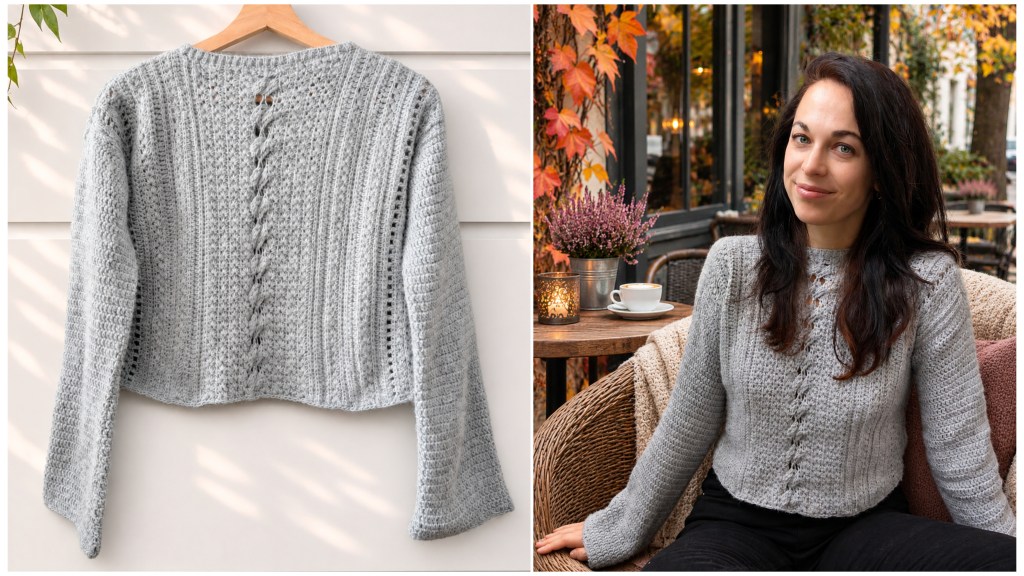
Here, yarn over slip stitches and half double crochet stitches worked into the back loops only alternate in a repeating pattern. This creates a delicate ribbed texture that resembles classic knit fabric.
The repetitive stitch pattern gives the back a clean, balanced appearance and provides a lovely contrast to the more detailed front.
The Sleeves – Wide, Relaxed, and Modern
The sleeves are worked in double crochet stitches, giving them a noticeably different texture from the denser stitch patterns used for the front and back.
This simpler stitch pattern makes the sleeves feel lighter and allows them to drape naturally. Their generous width and extra length also turn them into a modern statement feature.
You’ll find the complete free crochet pattern right below.
Happy crocheting!
Materials
- Medium Weight (#4) yarn in light gray, e.g., Fluffy Day by Hobbii in Light Grey (03) (100% Premium Acrylic).
- Yardage needed: approx. 680 m / 744 yd (size S), equivalent to 4 skeins.
- 3.5 mm crochet hook
- Scissors
- Yarn needle for weaving in ends
Size
Size: S (M/L). Instructions for the larger size are given in parentheses.
Abbreviations
st(s) = stitch(es)sl st = slip stitch(es)YO sl st = yarn over slip stitchch = chain stitch(es)sc = single crochethdc = half double crochetdc = double crochettc = treble crochetch-sp = chain space (space created by chain stitches)sl st2tog = slip stitch 2 stitches together (decrease)FLO = front loop onlyBLO = back loop onlyRd = roundR = rowprev row = previous rowrep = repeat
Stitch Basics / How-To
Yarn Over Slip Stitch (YO Sl St)
In this pattern, the yarn over slip stitches are worked either in the front loop only (FLO) or in the back loop only (BLO). See the comparison images below.
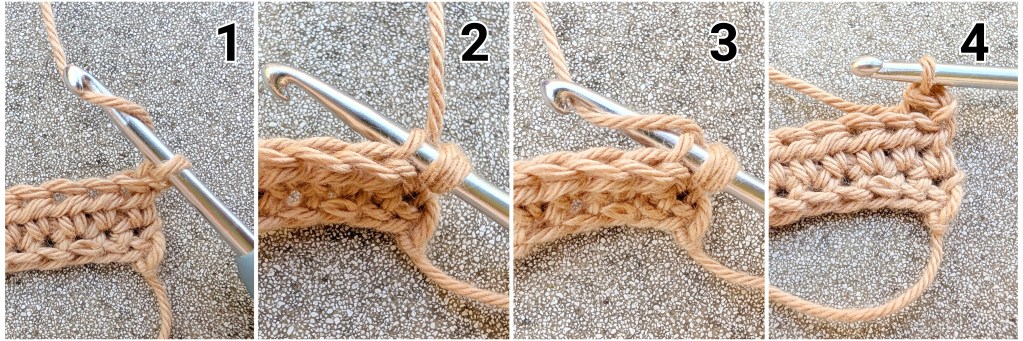
Yarn Over Slip Stitch in the Front Loop Only (YO Sl St FLO):
Image 1: Yarn over (2 loops on hook).
Image 2: Insert your hook into the front loop only of the next st.
Image 3: Yarn over and pull up a loop.
Image 4: Pull the loop through the front loop of the st and through both loops on your hook in one motion.

A Yarn Over Slip Stitch in the Back Loop Only (YO Sl St BLO) is worked in the same way, but insert your hook into the back loop only instead.
Star Stitch
Image 1: Begin the star stitch row with ch 3.
Image 2: Pick up 5 loops as follows: insert your hook into the 2nd ch from the hook and pull up a loop. Then insert your hook into the 3rd ch and pull up a loop. Next, insert your hook into each of the first 3 sts of the previous row and pull up a loop from each st. For this pattern, work in the back loops only (BLO).
Image 3: Yarn over and pull through all 6 loops on your hook.
Image 4: Ch 1 to complete the star stitch.
The colored line on the top of the images indicate the first star stitch.
Image 5: The red arrows indicate the 5 insertion points where you will pick up the loops for the next star stitch.
Image 6: For the first loop, insert your hook directly into the ch-1 space of the previous star stitch and pull up a loop.
Images 7–8: For the second loop, insert your hook under the horizontal strand directly below and pull up a loop.
Images 9–10: For the third loop, insert your hook into the same st and pull up a loop.
Images 11–12: For the fourth loop, insert your hook into the BLO of the next st and pull up a loop.
Images 13–14: For the fifth loop, insert your hook into the BLO of the following st and pull up a loop. You now have 6 loops on your hook.
Images 15–16: Yarn over and pull through all 6 loops on your hook.
Image 17: Ch 1 to complete the next star stitch.
Image 18: Continue working across the row in the same way: pick up 5 loops (for a total of 6 loops on your hook) – the first 3 loops through the previous star stitch and the last 2 loops through the BLO of the next 2 sts. Yarn over and pull through all 6 loops, then ch 1. Therefore, the last star stitch of the row also ends with ch 1.

Crochet Pattern
The sweater is crocheted in 5 steps:
- Crochet the front and back panels: First, both panels are crocheted separately. Each panel is worked sideways: the front panel from left to right and the back panel from right to left.
- Join the front and back panels: Next, join both panels at the shoulders and along the sides using slip stitches, leaving openings for the sleeves.
- Crochet the sleeves: The sleeves are worked directly into the armholes in joined rounds of double crochet stitches, from top to bottom. Each sleeve is finished with a round of slip stitches to create a narrow cuff.
- Add the neckline edging: Crochet a narrow edging around the neckline.
- Finish the bottom edge: Finally, work one round of single crochet stitches along the bottom edge of the sweater for a neat finish.
Gauge Swatch
Start with a Gauge Swatch.
First, crochet a gauge swatch using the back panel stitch pattern. Alternate between half double crochet and yarn over slip stitches, both worked in the back loop only (hdc BLO and yo sl st BLO).
Then measure your swatch to determine how many stitches and rows you need for 4 inches (10 cm).
My gauge (4 × 4 in / 10 × 10 cm): 21 stitches × 16 rows.
Note: The yarn I used is already very soft and relaxed when crocheted. Even steam blocking does not significantly stretch or loosen the fabric. Therefore, the measurements of my crochet pieces remain almost the same after blocking.
If you’re using a different yarn, keep in mind that its dimensions may change slightly during blocking.
Front Panel
Ch 87 (91/95) (multiple of 2 + 1) + 1 turning ch. This will result in a finished length of approximately 41 (43/45) cm (or around 16 (17/18) inches).
1. R: 1 hdc in each st across, turn.
2. R: Ch 1, 1 sl st in the BLO of each st, 1 sl st in the last st (through both loops), turn.
3. R: Ch 1, 1 hdc in the BLO of each st, 1 hdc in the last st (through both loops), turn.
Repeat Rows 2 and 3:
- 1 more time for size S.
- 2 more times for size M.
- 3 more times for size L.
- Note: Row numbers refer to size S. For sizes M and L, the row numbers will shift accordingly due to the additional rows worked at the beginning. The same applies if you add extra star stitch rows for width adjustments.
6. R (Mesh Pattern): Ch 3 (= counts as 1 dc), ch 1, skip next st, 1 dc, (ch 1, skip next st, 1 dc) repeat until 1 st remains, 1 dc in the last st, turn.
7. R (Star Stitch Pattern): Ch 3. Starting in the 2nd ch from the hook, work a star stitch into the first 2 ch and the first 3 sts of the previous row. Complete the star stitch with ch 1. Continue across the row, repeating (1 star stitch using 3 loops of the previous star stitch and the next 2 sts of the row, ch 1). End the row with ch 1, turn.
8. R (Star Stitch Pattern): Ch 2 (= counts as 1 hdc), 1 hdc in the same st as the ch-2, 2 hdc in each star stitch ch-1 space across, 1 hdc in the 3rd ch, turn.
- Rows 7 and 8 form one complete row of star stitches.
9. R (Mesh Pattern): Ch 3 (= counts as 1 dc), ch 1, skip next st, 1 dc, (ch 1, skip next st, 1 dc) repeat until 1 st remains, 1 dc in the last st, turn.
10. R + 11. R: Ch 1, 1 hdc in each st across, 1 hdc in the 3rd ch, turn (2 rows).
12. R: Ch 1, 1 sl st in the BLO of each st, 1 sl st in the last st (through both loops), turn.
13. R (Star Stitch Pattern): Ch 3. Starting in the 2nd ch from the hook, work a star stitch into the first 2 ch and the BLO of the first 3 sts of the previous row. Complete the star stitch with ch 1. Continue across the row, repeating (1 star stitch using 3 loops of the previous star stitch and the BLO of the next 2 sts, ch 1). End the row with ch 1, turn.
14. R (Star Stitch Pattern): Ch 2 (= counts as 1 hdc), 1 hdc in the same st as the ch-2, 2 hdc in each star stitch ch-1 space across, 1 hdc in the 3rd ch, turn.
15. R: Ch 1, 1 hdc in the BLO of each st, 1 hdc in the last st (through both loops), turn.
16. R: Ch 1, 1 hdc in each st (through both loops), turn.
17. R + 18. R: Ch 1, 1 sl st in the BLO of each st, 1 sl st in the last st (through both loops), turn.
Repeat Rows 13–18 one more time.
25. R (Star Stitch Pattern): Ch 3. Starting in the 2nd ch from the hook, work a star stitch into the first 2 ch and the BLO of the first 3 sts of the previous row. Complete the star stitch with ch 1. Continue across the row, repeating (1 star stitch using 3 loops of the previous star stitch and the BLO of the next 2 sts, ch 1). End the row with ch 1, turn.
26. R (Star Stitch Pattern): Ch 2 (= counts as 1 hdc), 1 hdc in the same st as the ch-2, 2 hdc in each star stitch ch-1 space across, 1 hdc in the 3rd ch, turn.
27. R (Star Stitch Pattern): Ch 3. Starting in the 2nd ch from the hook, work a star stitch into the first 2 ch and the first 3 sts of the previous row, working through both loops of each st. Complete the star stitch with ch 1. Continue across the row, repeating (1 star stitch using 3 loops of the previous star stitch and the next 2 sts of the row through both loops, ch 1). End the row with ch 1, turn.
28. R (Star Stitch Pattern): Ch 2 (= counts as 1 hdc), 1 hdc in the same st as the ch-2, 2 hdc in each star stitch ch-1 space across, 1 hdc in the 3rd ch, turn.
Repeat Rows 27 and 28 another 3 times, for a total of 4 complete rows of star stitches.
Now we will crochet the central cable pattern. Check that your work reaches approximately the center of your chest. If necessary, crochet additional complete rows of star stitches until you reach the center.
- The cable pattern is worked using diagonal treble crochet stitches (tc). To make a tc, yarn over twice, then yarn over and pull through 2 loops three times.
35. R (Cable Pattern): Ch 3 (= counts as 1 dc), skip the current st, 1 dc in the next st, (skip 3 sts, 1 tc in each of the next 4 sts, then work 1 tc back into the first skipped st, 1 tc back into the second skipped st, and 1 tc back into the third skipped st) repeat until 6 sts remain. Skip 3 sts, 1 tc in each of the next 3 sts, then work 1 tc back into each of the 3 previously skipped sts, 1 dc in the 3rd ch, turn.
36. R (Cable Pattern): Ch 3 (= counts as 1 dc), skip 3 sts, 1 tc in each of the next 3 sts, then work 1 tc back into each of the 3 previously skipped sts (as in the previous row). (Skip 4 sts, 1 tc in each of the next 3 sts, then work 1 tc back into each of the 4 previously skipped sts) repeat until 2 sts remain, 1 dc in each of the last 2 sts, turn.
- The cable pattern made of groups of 3–4 treble crochet stitches is now complete. Next, we will work the other side in reverse order to create a mirrored pattern.
37. R (Star Stitch Pattern): Ch 3. Starting in the 2nd ch from the hook, work a star stitch into the first 2 ch and the first 3 sts of the previous row, working through both loops of each st. Complete the star stitch with ch 1. Continue across the row, repeating (1 star stitch using 3 loops of the previous star stitch and the next 2 sts of the row through both loops, ch 1). End the row with ch 1, turn.
38. R (Star Stitch Pattern): Ch 2 (= counts as 1 hdc), 1 hdc in the same st as the ch-2, 2 hdc in each star stitch ch-1 space across, 1 hdc in the 3rd ch, turn.
Repeat Rows 37 and 38 another 3 times, or more if you worked additional rows of star stitches before the cable pattern.
45. R + 46. R: Ch 1, 1 sl st in the BLO of each st, 1 sl st in the last st (through both loops), turn (2 rows).
47. R: Ch 1, 1 hdc in the BLO of each st, 1 hdc in the last st (through both loops), turn.
48. R: Ch 1, 1 hdc in each st across, turn.
49. R (Star Stitch Pattern): Ch 3. Starting in the 2nd ch from the hook, work a star stitch into the first 2 ch and the BLO of the first 3 sts of the previous row. Complete the star stitch with ch 1. Continue across the row, repeating (1 star stitch using 3 loops of the previous star stitch and the BLO of the next 2 sts, ch 1). End the row with ch 1, turn.
50. R (Star Stitch Pattern): Ch 2 (= counts as 1 hdc), 1 hdc in the same st as the ch-2, 2 hdc in each star stitch ch-1 space across, 1 hdc in the 3rd ch, turn.
51. R + 52. R: Ch 1, 1 sl st in the BLO of each st, 1 sl st in the last st (through both loops), turn (2 rows).
53. R: Ch 1, 1 hdc in the BLO of each st, 1 hdc in the last st (through both loops), turn.
54. R: Ch 1, 1 hdc in each st across, turn.
55. R (Star Stitch Pattern): Ch 3. Starting in the 2nd ch from the hook, work a star stitch into the first 2 ch and the first 3 sts of the previous row, working through both loops of each st. Complete the star stitch with ch 1. Continue across the row, repeating (1 star stitch using 3 loops of the previous star stitch and the next 2 sts of the row through both loops, ch 1). End the row with ch 1, turn.
56. R (Star Stitch Pattern): Ch 2 (= counts as 1 hdc), 1 hdc in the same st as the ch-2, 2 hdc in each star stitch ch-1 space across, 1 hdc in the 3rd ch, turn.
57. R: Ch 1, 1 sl st in the BLO of each st, 1 sl st in the last st (through both loops), turn.
58. R + 59. R: Ch 1, 1 hdc in each st across, turn (2 rows).
60. R (Mesh Pattern): Ch 3 (= counts as 1 dc), skip the current st, 1 dc in the next st, (ch 1, skip next st, 1 dc) repeat until 1 st remains, 1 dc in the last st, turn.
61. R (Star Stitch Pattern): Ch 3. Starting in the 2nd ch from the hook, work a star stitch into the first 2 ch and the first 3 sts of the previous row, working through both loops of each st. Complete the star stitch with ch 1. Continue across the row, repeating (1 star stitch using 3 loops of the previous star stitch and the next 2 sts of the row through both loops, ch 1). End the row with ch 1, turn.
62. R (Star Stitch Pattern): Ch 2 (= counts as 1 hdc), 1 hdc in the same st as the ch-2, 2 hdc in each star stitch ch-1 space across, 1 hdc in the 3rd ch, turn.
63. R (Mesh Pattern): Ch 3 (= counts as 1 dc), skip the current st, 1 dc in the BLO of the next st, (ch 1, skip next st, 1 dc in the BLO of the next st) repeat until 1 st remains, 1 dc in the last st, turn.
64. R: Ch 1, 1 hdc in each st (through both loops), turn.
65. R–67. R: Ch 1, 1 sl st in the BLO of each st, 1 sl st in the last st, turn (3 rows).
If you added extra rows before the mesh pattern to adjust the size, work additional rows of BLO slip stitches as needed.
68. R: Ch 1, 1 hdc in each st across. Fasten off.
Weave in all ends.
The side where the star stitch pattern is most clearly defined is the right side of the crochet piece.
Back Panel
Start with a new strand of yarn and chain the same number of stitches as for the front panel (ch 87 (91/95)).
1. R: 1 hdc in each st across, turn.
2. R: Ch 1, 1 sl st in the BLO of each st, 1 sl st in the last st, turn.
3. R: Ch 1, 1 hdc in the BLO of each st, 1 hdc in the last st, turn.
Repeat Rows 2 and 3 alternately until the back panel reaches the same width as the front panel.
Fasten off and weave in all ends.
Joining the Panels
Place the front and back panels together, right sides facing each other.
Neckline
Join a new strand of yarn and seam the front and back panels together using slip stitches on both sides, working from the outer edge to Row 15 or Row 48 of the front panel, respectively. This is one row above the last row of star stitches before the central section of star stitches and cable pattern begins, or approximately 15 (17/19) cm on each side.
Work from the armhole edge toward the neckline.
Weave in all ends.
Armholes
Join a new strand of yarn, insert your hook through the bottom edge stitches of both panels at the same time, and join the side seams with slip stitches.
Work from the bottom edge (hem) upward for approximately 26 (27/27) cm, or 57 (59/59) sts.
The finished armhole opening will measure approximately 15 (16/18) cm.
Weave in all ends.
Sleeves
Start at the lowest stitch of the armhole, directly under the armpit. The sleeves are crocheted in joined rounds, working clockwise. Begin each new round with the required starting chains. Do not turn your work!
1–45. Rd: Ch 3 (= counts as 1 dc), 1 dc in each st around the armhole (approximately 56 (58/62) sts), join with 1 sl st in the 3rd ch. Do not turn.
Check the sleeve length and adjust as desired.
Final Round: Ch 1, work 1 loose sl st in each st around. Join with 1 sl st in the beginning ch to finish.
Fasten off and weave in all ends.
Neckline Ribbing
Join a new strand of yarn at the center back of the neckline.
Ch 3 + 1 turning ch.
1. R: 1 sl st in each of the 3 ch (work loosely), sl st 2 sts of the neckline edge together, turn without making a turning ch.
2. R: Skip the decrease st, 1 sl st in the BLO of each of the next 2 sts, 1 sl st in the last st, ch 1 and turn. (3 sts)
3. R: 1 sl st in the BLO of each of the next 3 sts, sl st 2 sts of the neckline edge together, turn without making a turning ch. (3 sts)
Repeat Rows 2 and 3 until you reach the last stitch of the neckline edge. Finish with Row 2, so that the working yarn is positioned exactly at the corner of the crochet piece.
Join the first and last rows with slip stitches (sl st), inserting your hook through both layers.
Weave in all ends.
Hem Edging
To give the bottom edge of the sweater a neat finish, join a new strand of yarn and work 1 sc into each edge stitch and turning chain along the entire hem.
Weave in all ends.
Now all that’s left to do is block your top, and your romantic crochet top is finished!
I hope you enjoyed the pattern and love wearing your new crochet sweater!