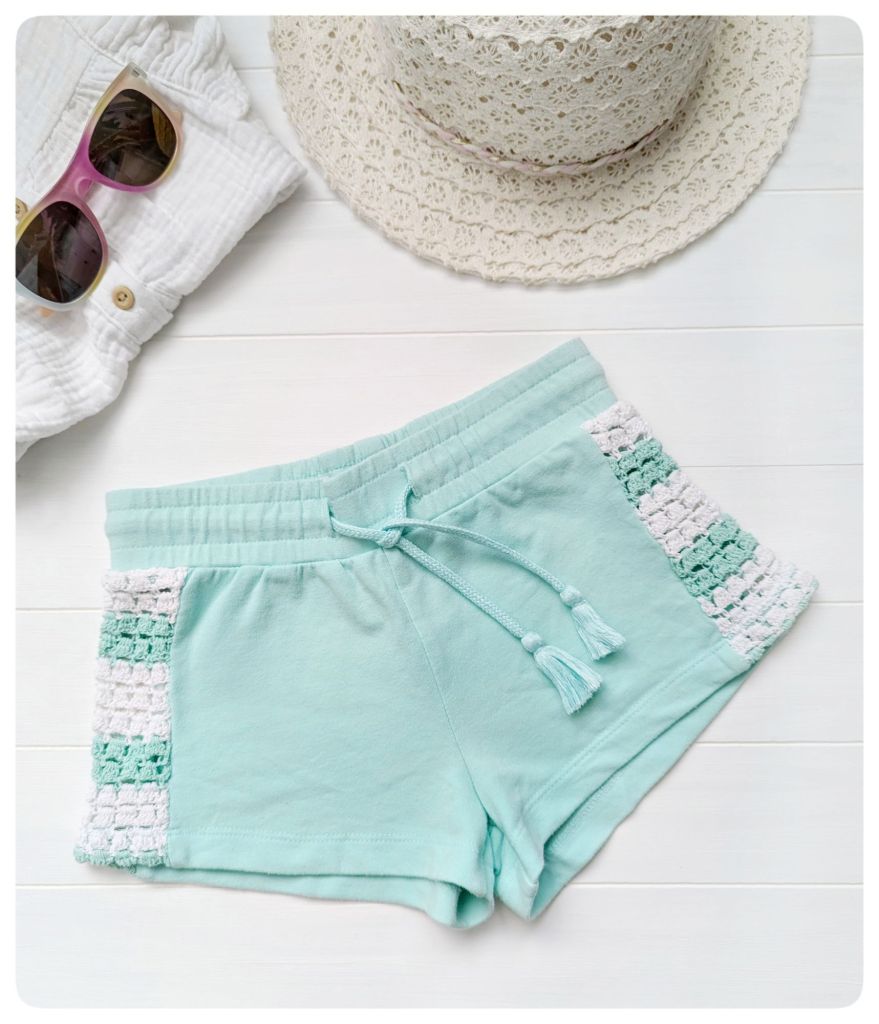
Looking to refresh your wardrobe with a creative touch? Whether you want to widen the legs, make them narrower, or simply enhance their design, try this idea of a crochet side band.
For wider shorts, you can replace a section of the side seam with a crochet band to add extra width and comfort, giving the shorts a unique, boho-inspired look. If you prefer a snugger fit, crochet a narrower band and attach it along the side to bring the legs in for a more tapered effect. Or, if the fit is perfect but you want a stylish update, simply add the crochet band to the existing seams as a decorative element.
This simple yet effective method lets you transform your shorts into a one-of-a-kind piece, perfect for summer outfits or any casual look. With just a crochet hook, some yarn, and a bit of creativity, you can easily refresh your wardrobe while adding a personal, handcrafted touch!
Use preferably shorts with sturdier fabric, like linen or thick cotton. In the illustrations shown, I used the shorts of my girls that are made of jersey. As jersey is very soft, it made the sewing a bit more challenging, but I think it still turned out quite nice after all. As jersey shorts are typically tight-fitting, the size of the crochet band should only minimally change the width of the legs.
Variations for the Crochet Band
There are 3 variations for the crochet side band:
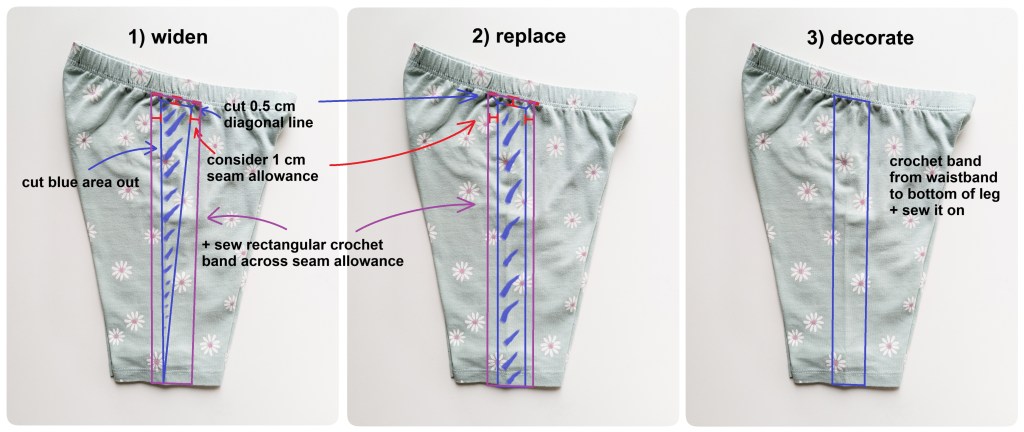
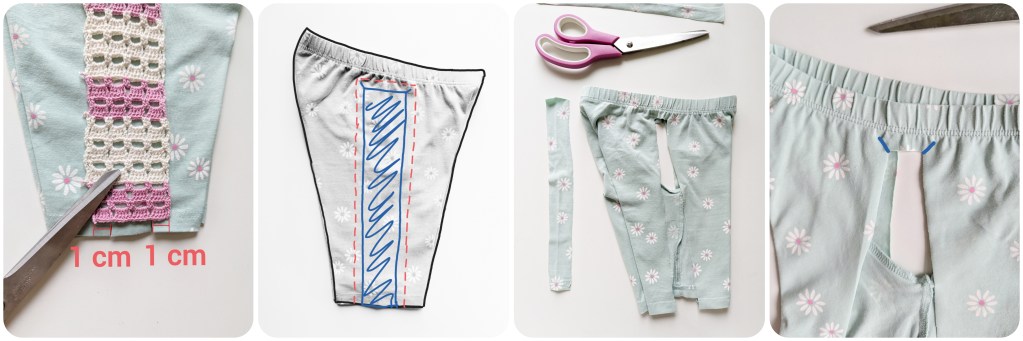
1) you want to widen the shorts’ legs: in this option you need to cut the shape of an isosceles triangle out from each side of the shorts, whereby the tip of the triangle is positioned at the bottom of a leg and the base of the triangle goes along 1 cm below the waistband (this 1 cm corresponds to the seam allowance). When cutting the triangle, consider 1 cm seam allowance along the sides. So, if the triangle is 3 cm wide, the crochet band should be 5 cm wide (3 cm + 1 cm per side). Then, you crochet the side band in rectangular shape and sew the edges along the 1 cm allowance of the sides and the waistband.
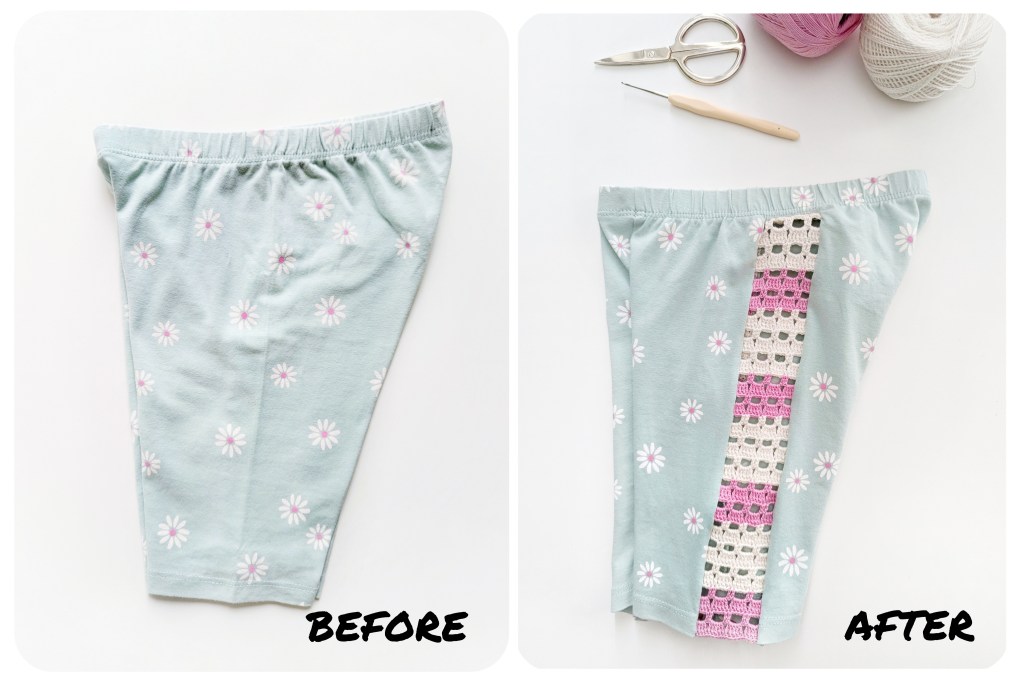
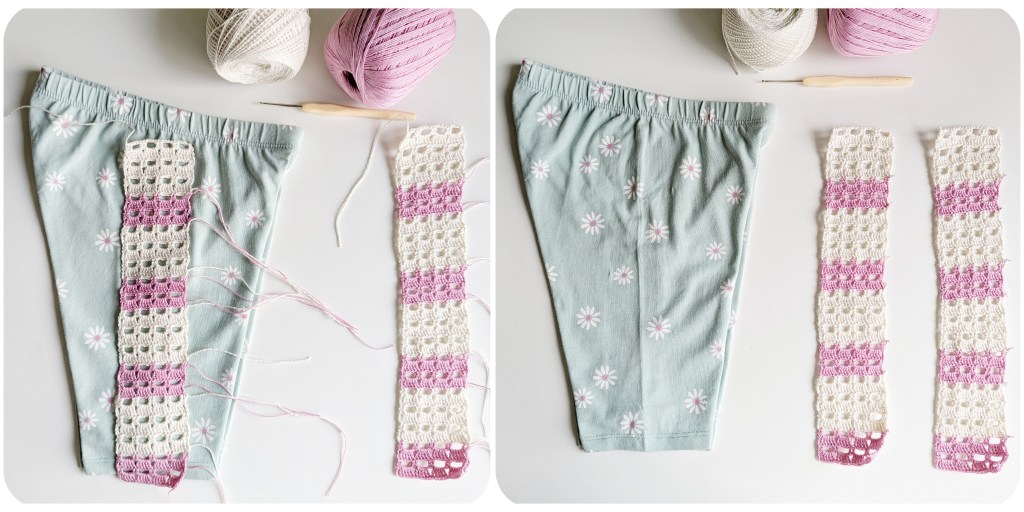
2) you want to keep the shorts’ legs unchanged but replace side-pieces of fabric with the crochet band – this is the option shown in this post. For the details, see the instructions below.
3) you want to keep the shorts as unchanged as possible and just add a bit of crochet elements to improve its look: crochet the rectangular band and sew it along the sides. You don’t need to consider any seam allowance or cut fabric away like in 2).
Starter Tips
- Use shorts made of harder material like linen or cotton.
- The size of the crochet band includes 1 cm seam allowance, so it’s rectangle size cut from fabric + 1 cm at the top + 1 cm at the sides = size of crochet band. For the cut size of the fabric, cut 1 cm fabric less at the top and at the sides.
- The crochet band starts right from below the waistband and aligns with the bottom of the legs. For thicker shorts, you can crochet a 1 cm longer band to fold this 1 cm at the bottom for finishing.
Crochet Diagram for Side Band
The cut area is 3 x 8 cm. To account for the seam allowance, I crocheted a band of size 5 x 9.5 cm.
I used the Boxed Shell Stitch.
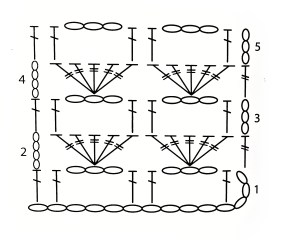
Start with a multiple of 5 + 4 ch sts. I started in white.
1. Row: 1 dc in 4th ch from hook, 1 dc in next ch, (ch 3, skip 3 ch, 1 dc in each of next 2 ch) repeat until row-end, turn
2. Row: ch 4 (count as 1 tc), skip 1st st, (5 tc into next ch-3 sp) repeat until row-end, 1 tc into top of tch, turn
3. Row: ch 3 (count as 1 dc), skip 1st st, 1 dc into next tc, (ch 3, skip 3 tc, 1 dc into each of next 2 tc) repeat until row-end, turn
Repeat 2. – 3. – 2. Row in the white colour, then change colour (to pink) in last st
Repeat 3. – 2. – 3. – 2. in pink, then change colour to white
Repeat 3. – 2. – 3. – 2. – 3. – 2. in white, then change colour to pink
Repeat until desired length is reached.
When sewing the crochet band to the sides, turn the band upside down: the first row goes to the top, the last row to the bottom of the legs.
This is how to do it
1. Iron your shorts so that you create an ironed crease on each side of the shorts (this step is not necessary if your shorts have a side seam which you can use for orientation).
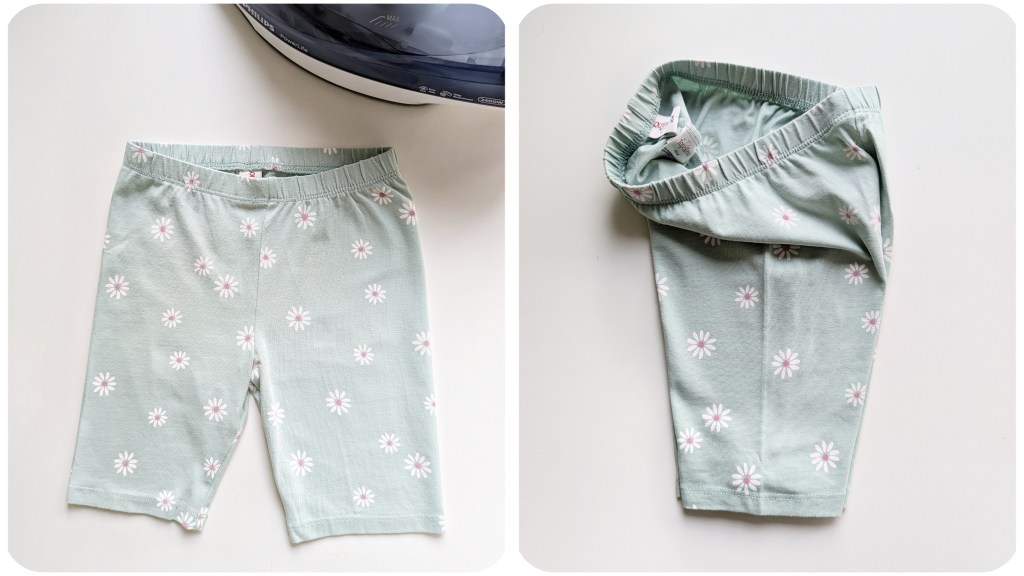
2. Place the shorts on their side.
Measure the length starting from the waistband down to the leg opening or +1 cm further (the latter if the material is thick and the band needs to be folded at the bottom to better blend with the rest of the fabric).
Measure the width that should be visible and add 1 cm seam allowance (this 1 cm will be later used to sew crochet band and fabric together).
This length and width define the dimensions of your crochet band.
Now, crochet the side band. For a pattern example, see this section above.
3. Cut a rectangular shape (length x width of your measures from 2. or size of the crochet band minus 1 cm per side and top). Make sure to leave some space below the waistband for sewing the crochet band and fabric together.
To achieve smoother transitions at the corners when sewing, cut the material diagonally by a few millimeters at the corners.
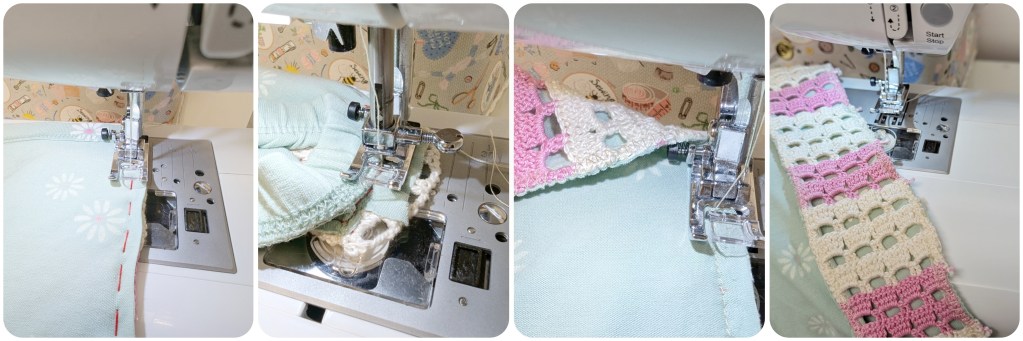
4. Now, sew the right side of the crochet band and the right side of the shorts together, starting along the sides and sewing from bottom to waistband. Make sure that the crochet band aligns with the bottom of the shorts.
In this step I only temporarily sewed the pieces together (using basting or running stitch). For better visibility, I used red sewing thread.
In the last step (6.), I properly sewed the band and fabric together with the sewing machine using straight stitch and zigzag stitch (as an overlock seam).

5. Now, (temporarily) sew the top of the band right below the waistband.

6. Now, properly sew the sides together. I used a sewing machine with straight stitch to properly sew the pieces together. Then, I removed the temporary thread and trimmed the seam to 0.5 cm, so it wouldn’t show through from the outside too much. Finally, I neatend the seam finish with a zigzag stitch as overlock stitch.
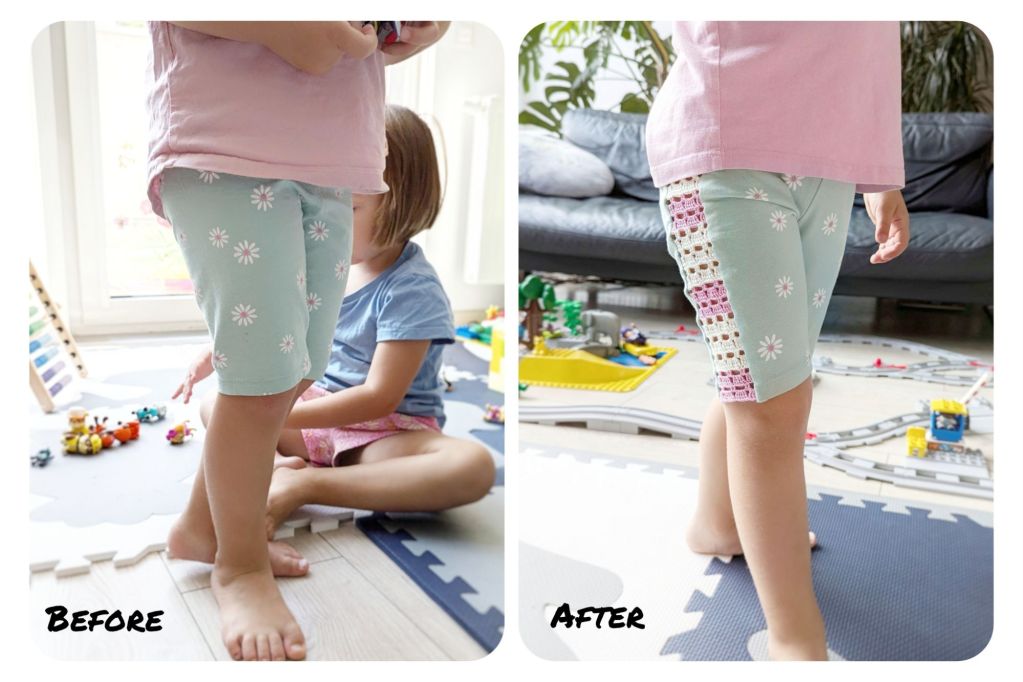
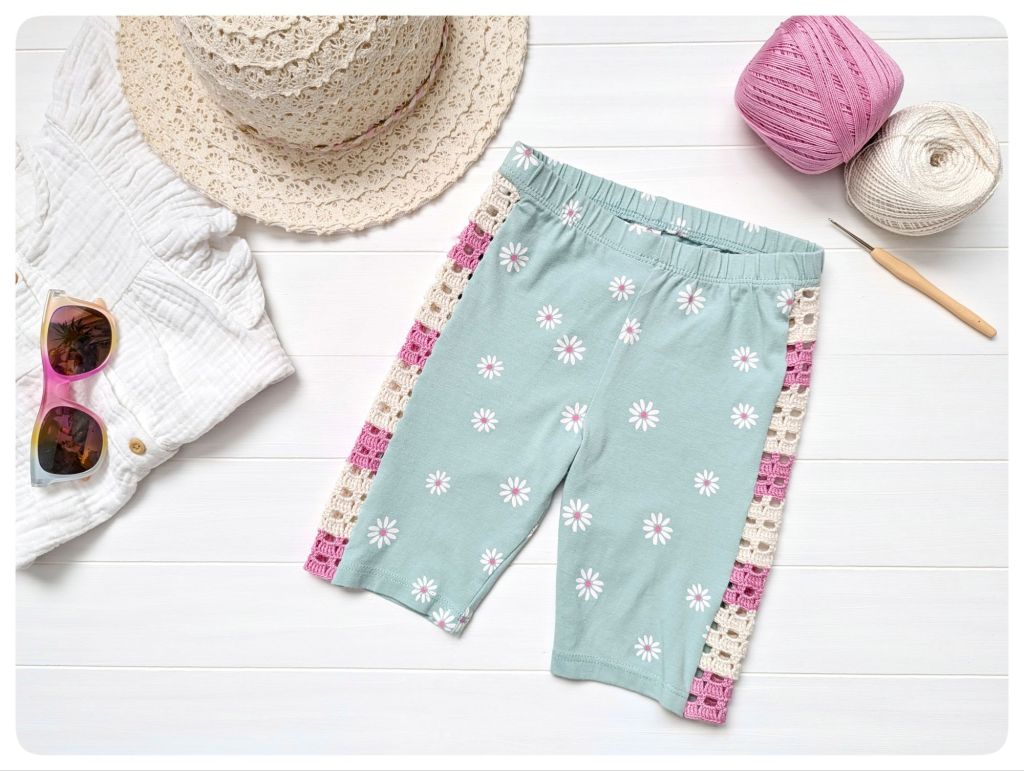
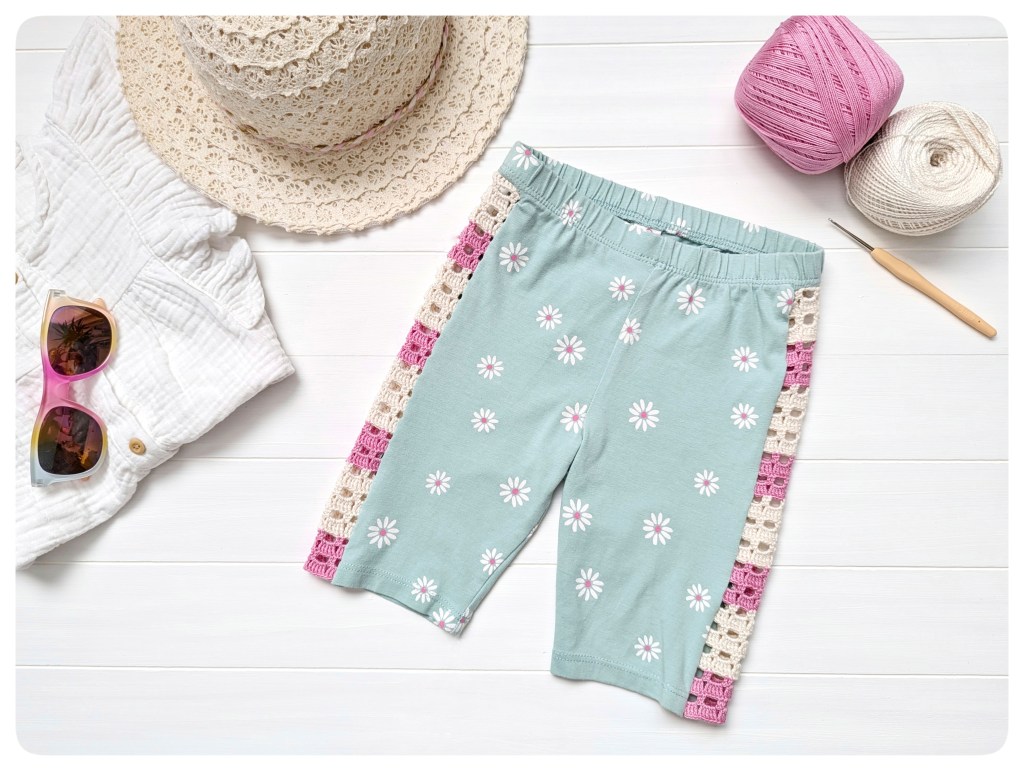
This is the outcome, Before – After: