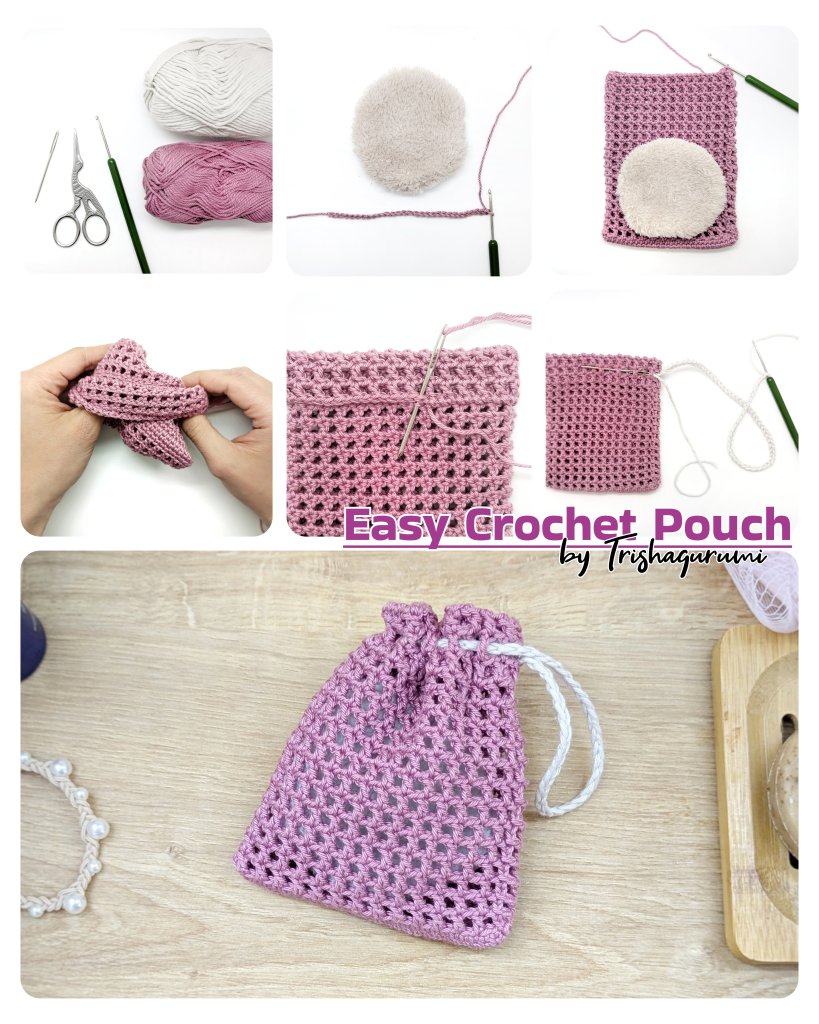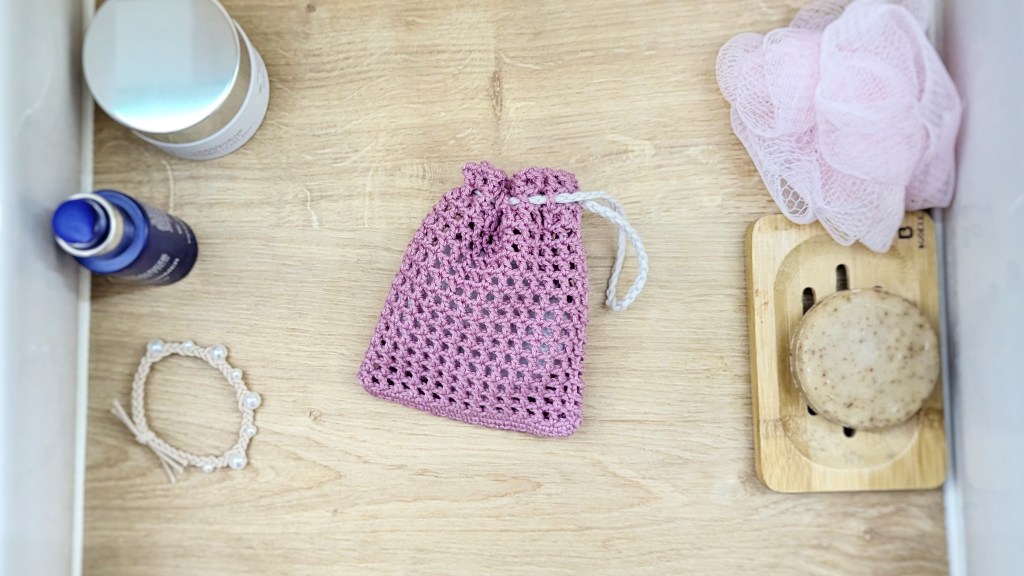
They’re small, incredibly versatile, and add a personal touch to any little gift: crochet pouches. Whether it’s for a present, a book, random items on the go, or—like in my case—for cosmetics, crochet pouches are quick to make, easy to customize, eco-friendly, and long-lasting.
It all started with the idea that I needed a way to keep my small microfiber pads (my must-have for cleansing and removing makeup) together while traveling and stored nicely in the bathroom. Less than an hour later, my mesh-look pad pouch was finished. And in the pattern below, I’ll show you step-by-step how you can crochet the same crochet pouch in no time—even if you’re a beginner with just a bit of crochet experience.

What you’ll need:
- Cotton yarn for the pouch (I used Lana Grossa Cotone Uni — Category 2, Fine/Sport Weight, in berry)
- A different yarn for the drawstring (e.g., medium gray cotton yarn)
- A crochet hook (I used a 2.5 mm hook)
- A yarn needle
- Scissors
What You Need to Know
You start with a foundation chain that is then worked in rounds. You’ll need twice the number of stitches as you want mesh spaces, plus one turning chain to make the mesh pattern work evenly.
The pouch starts with single crochet (sc) and then transitions into a mesh pattern using double crochet (dc), following this sequence:
[ch 1, skip next st, 1 dc in following st]
The pouch is worked in closed rounds. End each round with a slip stitch (sl st) and start the new round with chain stitches:
- For sc rounds: ch 1
- For dc rounds: ch 3 (counts as 1 dc)
Instructions
Crochet Pouch Body
Chain 28 + 1 turning chain
(Start with double the number of mesh spaces you want — in my case, to fit the microfiber pads comfortably — plus one turning chain.)
Round 1:
1 sc in each of the next 27 chains, 2 sc in the last chain, continue on the opposite side of the chain:
1 sc in each of the next 26 chains, 2 sc in the last chain. Join with sl st to first sc.
Round 2:
Ch 1, 1 sc in the same st, 1 sc in each st around. Join with sl st to first sc (not the ch-1!).
Round 3 (Start of Mesh Pattern):
Ch 4 (counts as dc + ch 1), [skip 1 st, 1 dc in next stitch, ch 1] — repeat until end of round. Join with sl st in 3rd ch of beginning ch-4.
Rounds 4–21:
Repeat Round 3 to continue the mesh pattern.
(In my case, I crocheted 16 mesh rounds to fully cover the pad, then added 6 more mesh rounds for the drawstring tunnel.)
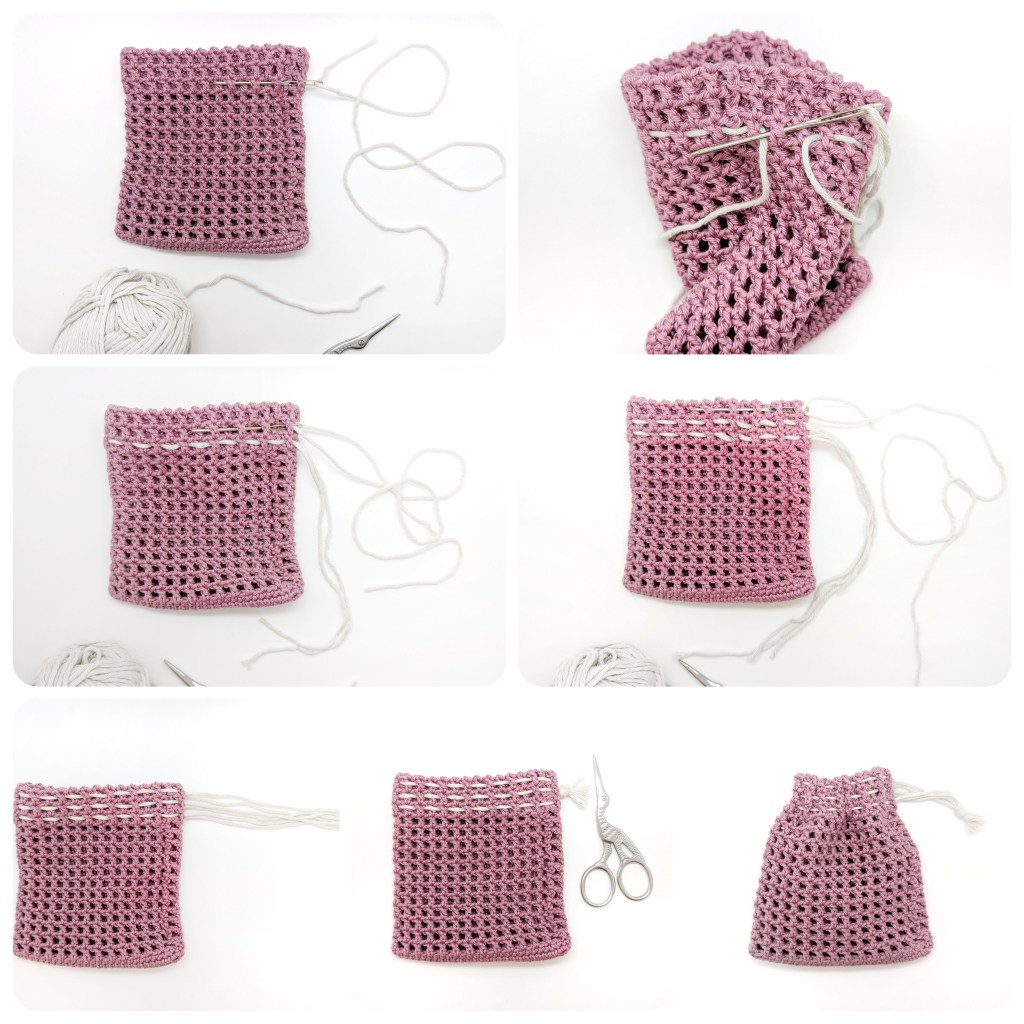
Finishing the Drawstring Tunnel
Turn the pouch inside out.
Fold the last 3 rounds forward so they line up neatly with the 3 rounds behind them. This creates the drawstring tunnel.
Use the yarn needle to sew the last round (Round 21) to Round 15.
Knot the end securely and trim close to the knot.
Turn the pouch right side out again.

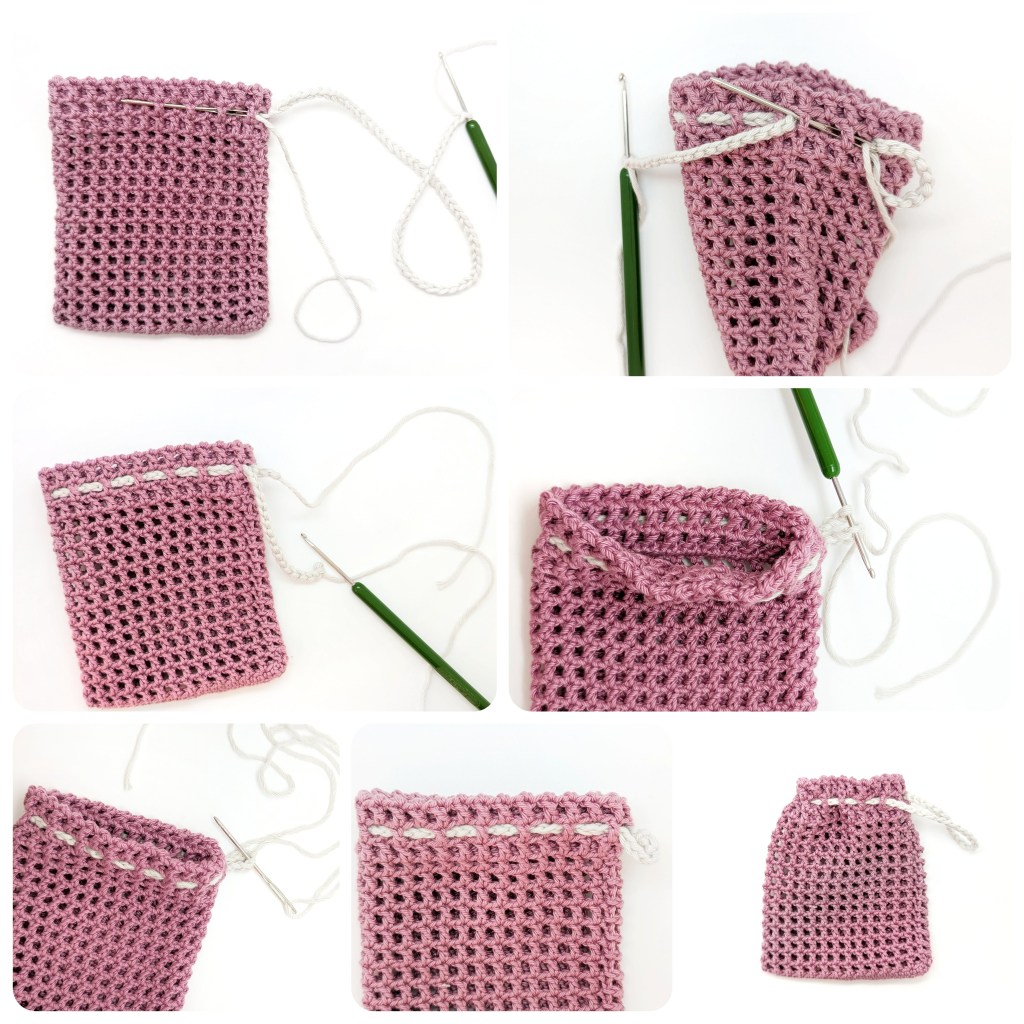
Drawstring:
I tried out two different versions as an alternative drawstring:
Version 1:
In this version, I threaded three separate strands of the thicker cotton yarn through the three mesh rounds that form the drawstring tunnel — at staggered intervals.
The strands are only woven through the outer 3 mesh rounds, not the ones underneath — meaning the yarn does not go all the way through to the inside of the pouch. (From inside the pouch, the strands are invisible.)
Once threaded, knot the yarn ends together close to the edge of the pouch and trim the ends into a small tassel.
Version 2:
For this version, I first crocheted a chain (ch) cord and then wove it through the second-to-last round of the drawstring tunnel — the same way as in Version 1 or – alternatively – entirely through the inside of the tunnel so that the chain is less seen from the outside.
Once the chain reaches the starting point, you can unravel a few stitches to adjust it to the perfect length — ending just at the edge of the pouch plus about 1 cm extra (so it’s easier to grab and pull the cord).
Then, knot the yarn ends and either:
- weave them back into the chain using a yarn needle, or
- trim them neatly.
Your handmade crochet pouch is now complete — functional, cute, and uniquely yours. Whether it’s holding microfiber pads, cosmetics, small gifts, or daily essentials, this little project combines practicality with style.