Your DIY Summer Favorite: A Crochet Top Made with Single Crochet Stitches
Farewell to frost and grey days – hello sunshine, color, and a brand-new crochet top!
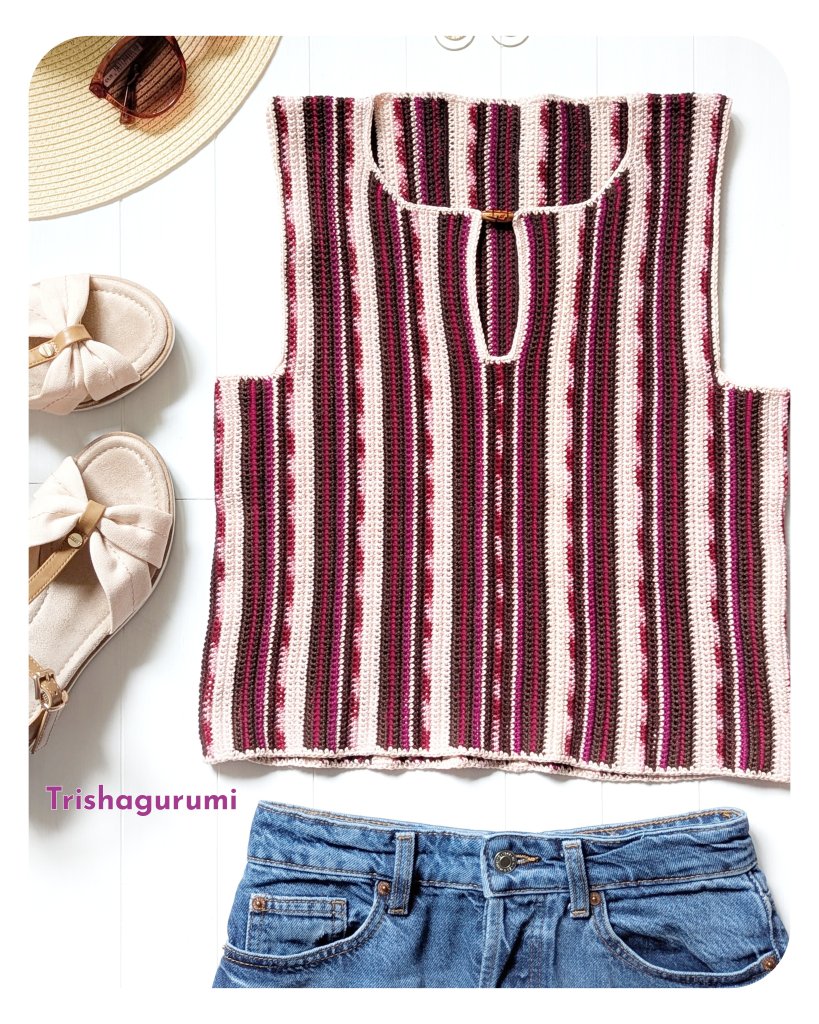
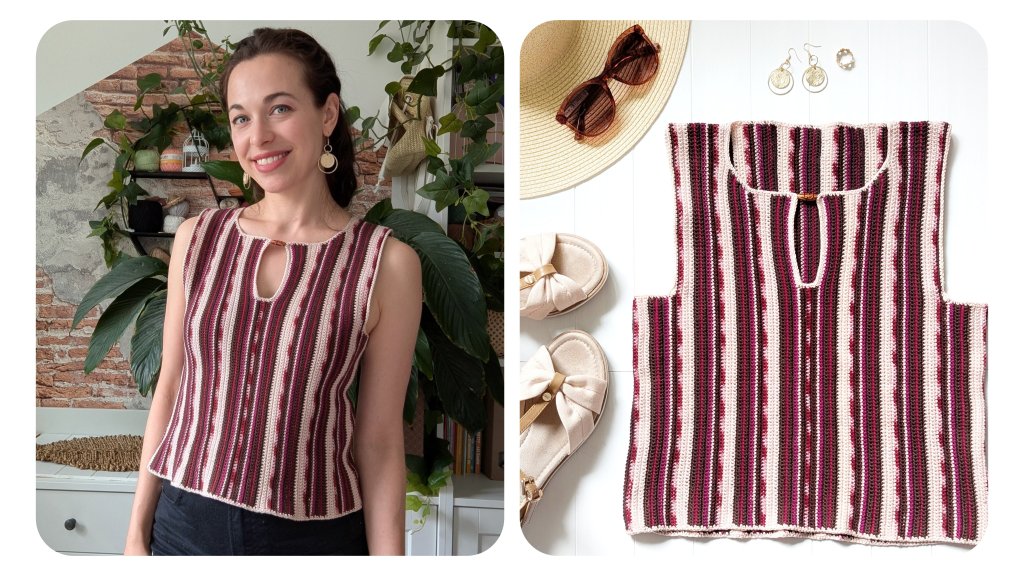
This simple yet stylish top is made entirely with single crochet stitches, making it especially beginner-friendly while still having a lovely, structured texture. It has a classic regular fit, but also looks great cropped – depending on how you prefer to wear it.
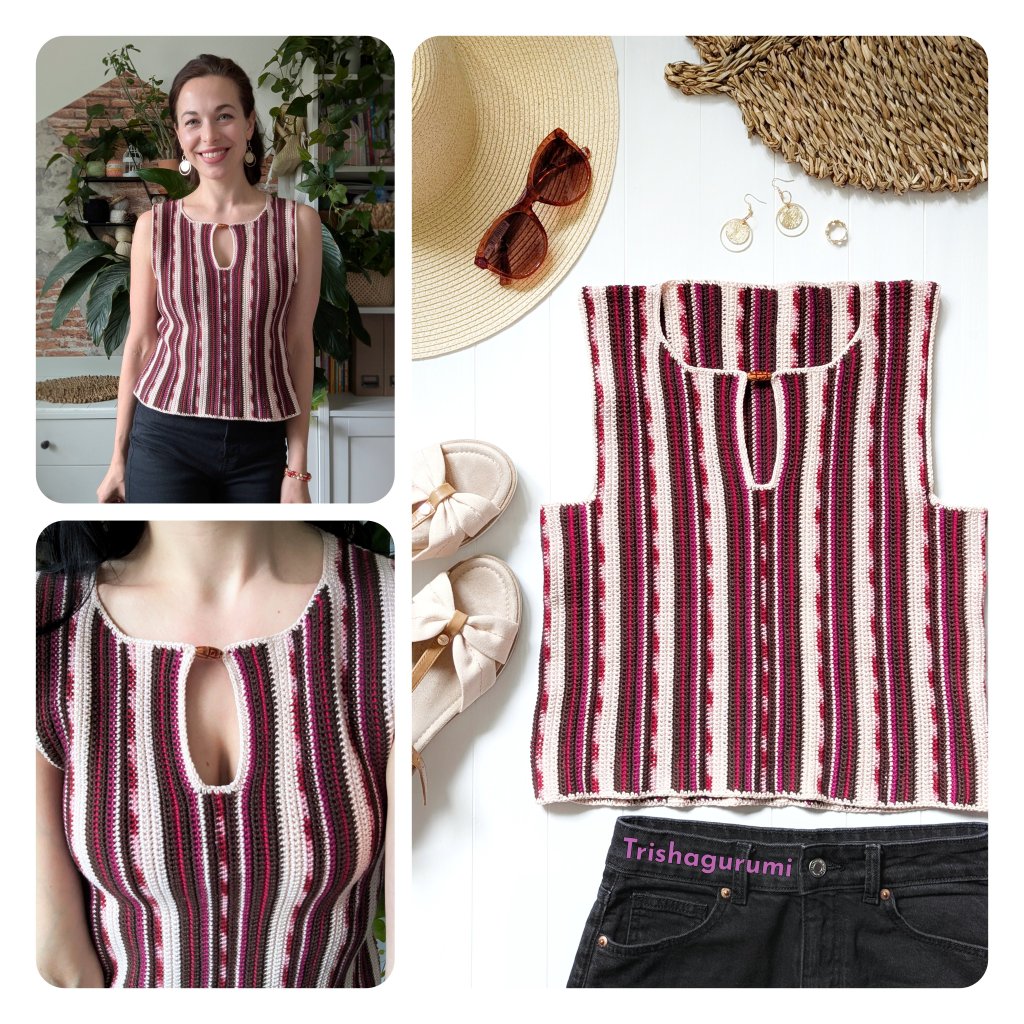
For my version, I chose a harmonious color combination of red, brown, and beige tones. The fine stripes add a lively touch to the design without being too bold. These colors pair beautifully with classic jeans – whether black or blue – making this top super versatile and even office-appropriate. Thanks to the use of cotton yarn, it’s perfect for hot summer days. You could even easily add sleeves if you like.
This is my first crochet top ever made, so it’s been beginner-tested by myself! The striped design also makes it a great project for using up leftover yarn skeins from previous projects. I used 7 different colors: for two of them, depending on the yardage, you’ll need up to 3 skeins, while for the others, you’ll need significantly less (see materials list). I’m definitely hooked and excited to try out other crochet top styles!
You find the design measurements and process steps in the instructions below – I hope they are helpful. All you need to know are single crochet stitches.
Whether you’re looking for a weekend project or a fun start to your summer crochet journey, this top works up quickly.
I hope you enjoy crocheting it and that this crochet top becomes a favorite in your wardrobe.

Size:
- 36/38 (40/42)
- The instructions for the larger size are given in parentheses. If only one number is given, it applies to both sizes.
Material:
Lana Grossa Cotone Uni
(100% Cotton, yardage: appr. 125 m / 50 gr): each 150 gr in Mocha, Powder Pink, each 50 gr in Burgundy, Vine Red, Beige
Friends Cotton 8/4 Print
(100% Cotton, yardage: appr. 160 m / 50 gr): appr. 100 gr in Chocolate, appr. 50 gr in Raspberry Sorbet
Crochet Hook: 3.0 mm
Gauge:
With a 3.0 mm crochet hook, working in single crochet (sc) following the color sequence, the gauge is 26 stitches and 29 rows = 10 cm x 10 cm (unblocked).
Pattern:
Single crochet in rows: Work in rows, beginning each row with a chain-1. This chain does not count as a stitch but serves as a turning chain. For the first row, work your first single crochet in the second chain from the hook.
Color Sequence:
Front piece:
(For size 40/42: 1 row Raspberry Sorbet, 4 rows Powder Pink = 5 rows),
2 rows Mocha, 1 row Burgundy, 2 rows Mocha, 1 row Wine Red, 1 row Beige, 2 rows Chocolate, 1 row Raspberry Sorbet, 4 rows Powder Pink = 14 rows. Repeat from * continuously.
Back piece:
(For size 40/42: 2 rows Mocha, 1 row Burgundy, 2 rows Mocha = 5 rows),
4 rows Powder Pink, 1 row Raspberry Sorbet, 2 rows Chocolate, 1 row Beige, 1 row Wine Red, 2 rows Mocha, 1 row Burgundy, 2 rows Mocha = 14 rows. Repeat from * continuously.
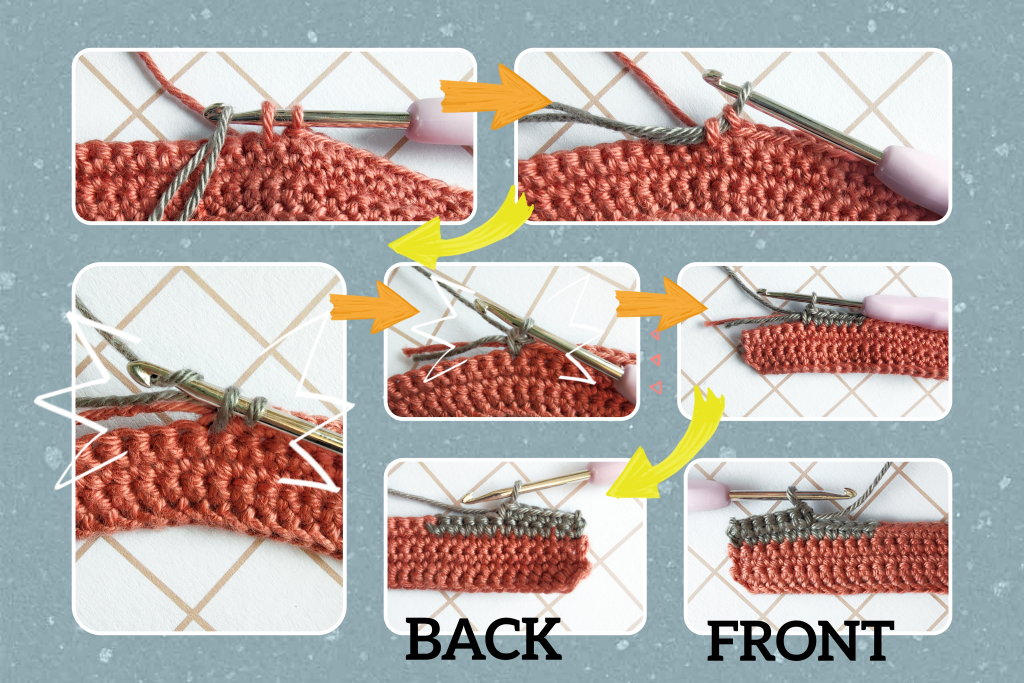
To create clean color transitions, complete the last yarn-over of the last stitch in the old color using the new color. Crochet over the yarn end of the previous color as you go to avoid weaving in ends later.
Process:
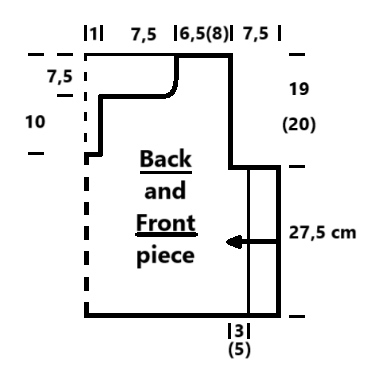
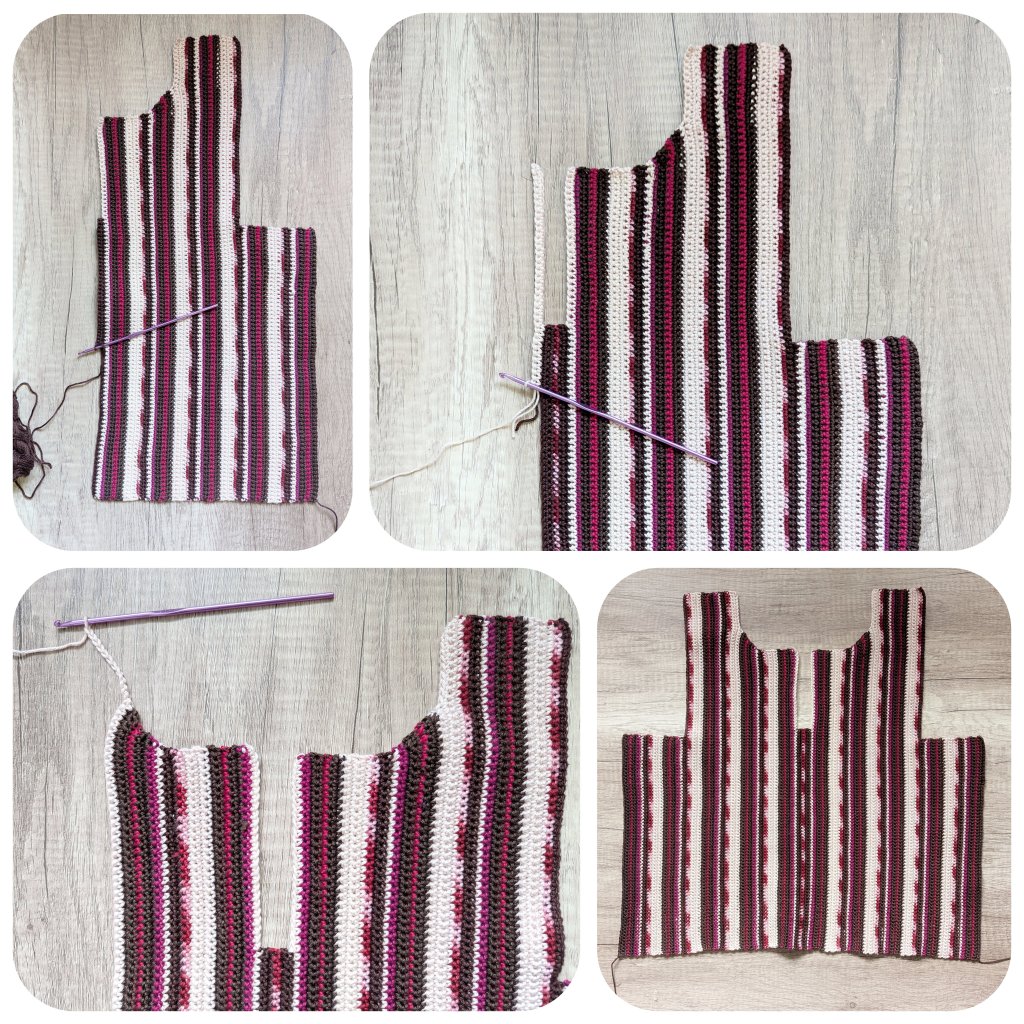
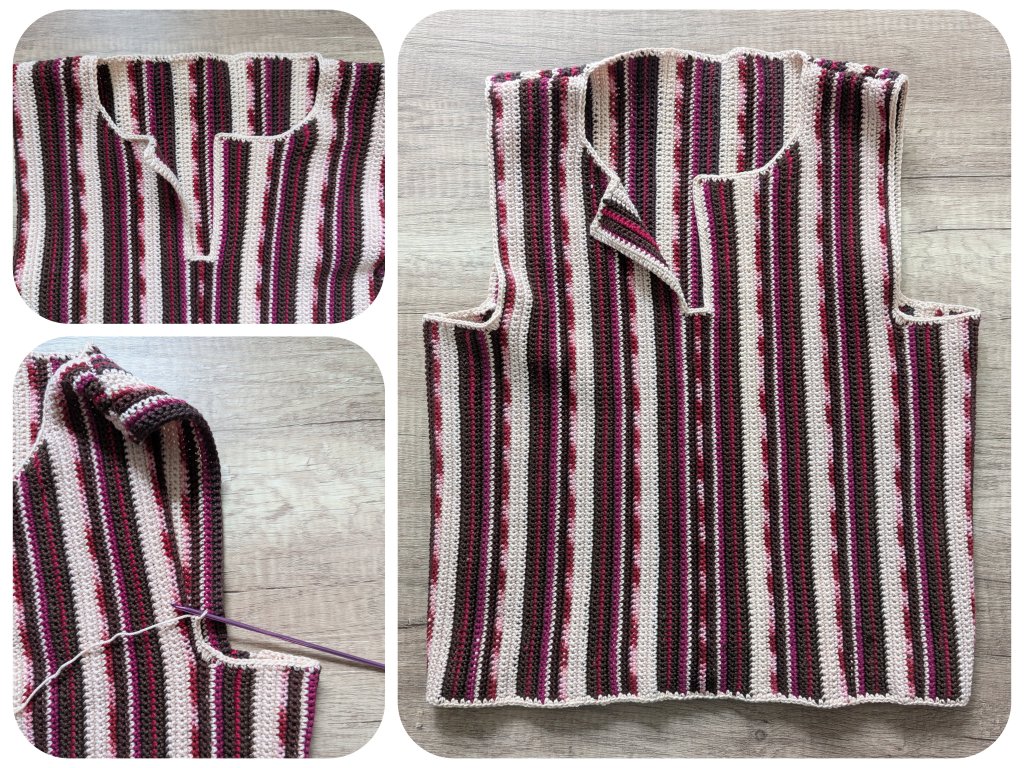
1. Front Piece:
- Work sideways, as indicated by the arrow in the diagram. The front piece begins at the left side edge (as seen from the body) and ends at the right side edge. Starting from the armhole, a deeper neckline is formed. From the end of the chest downward, a slit section is added in the center. The color sequence stays the same up until the middle slit; after the slit, the color pattern is mirrored (starting from the 3rd row of the slit).
- Start: Chain 68 + 1 turning chain in Mocha (or Raspberry Sorbet). Now work single crochet stitches in rows following the color sequence, starting with the version in parentheses for size 40/42 = 68 sc.
- For the armhole, after 7.5 cm = 22 rows from the beginning, chain an additional 47 (49) ch + 1 turning chain on the right edge. Continue working across all 115 (117) sts following the same color sequence.
- For the neckline, after 6.5 (9) cm = 19 (25) rows from the armhole, leave 11 sts unworked at the right edge. Then, over the next 8 rows, decrease at the neckline edge 1x 2 sts (sc3tog), and 2x 1 st (sc2tog) in every second row.
- After 7.5 cm = 22 rows from the start of the armhole (or 5 cm = 14 rows from the start of the decreases – this corresponds to just before the chest center), leave 25 sts unworked in the center to form the slit. After 3 rows, reverse the color sequence (do not repeat the last row). After 2 more rows, crochet the previously left 25 sts again in the next color and continue the mirrored color pattern (Row 3 of the slit marks the point where the color pattern flips).
- After 5 cm = 14 rows, over the next 8 rows, increase again at the neckline edge every second row: 2x 1 st (2 sc into the first 2 sts) and 1x 2 sts (3 sc into the first st).
- Then, chain 11 + 1 turning chain to extend the edge again.
- After 6.5 (9) cm = 19 (25) rows, leave 47 (49) sts unworked at the right edge for the right armhole.
- Continue crocheting the left side over the remaining 68 sts for 7.5 cm = 22 rows.
- The front piece ends with 1 row in Wine Red – (or 2 rows in Chocolate).
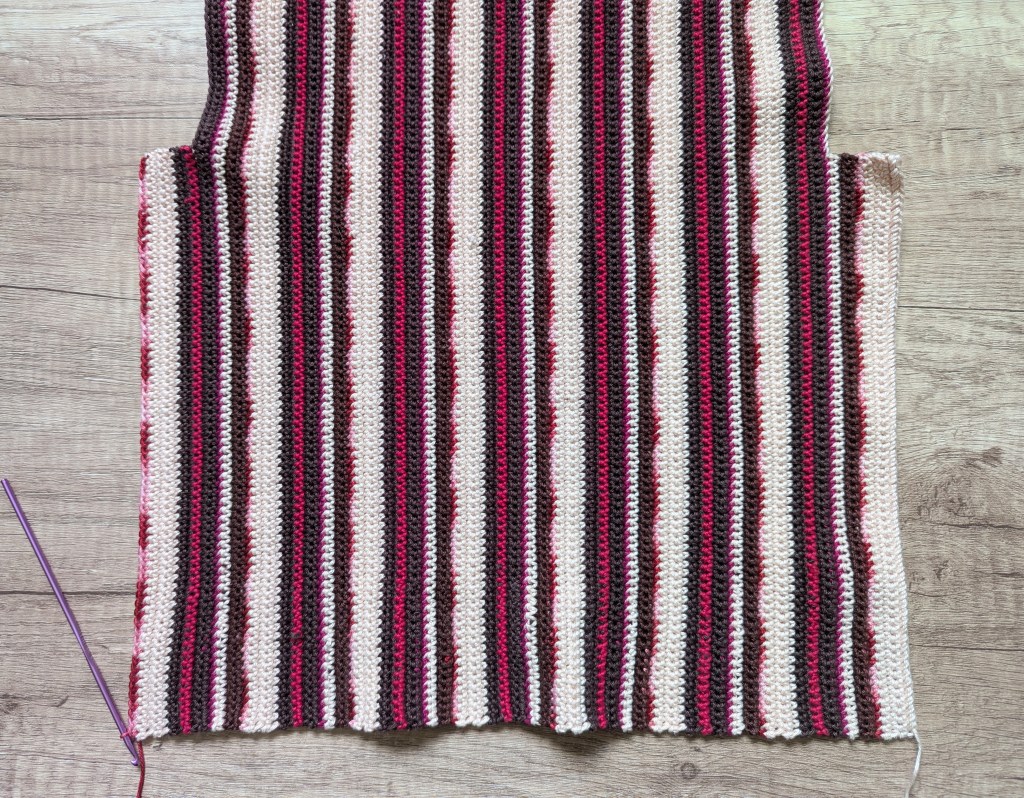
2. Back Piece:
- Work the back piece similarly to the front piece, but with a shorter armhole, no neckline, and no slit. The back begins at the right side edge and ends at the left.
- Unlike the front, the color sequence is worked continuously without mirroring (in the front piece, the sequence reverses at the center slit). Make sure that the back piece does not end in Mocha (or Raspberry Sorbet), as this is the color in which the front piece color sequence begins.
- Chain 68 + 1 turning chain in Powder Pink (or Mocha). Now work single crochet stitches in rows following the color sequence, starting with the sequence in parentheses for size 40/42 = 68 sc.
- For the armhole, after 3 (5) cm = 8 (12) rows from the foundation, chain an additional 47 (49) ch + 1 turning chain on the right edge. Continue working across all 115 (117) sts in the given color sequence.
- For the neckline, after 6.5 (9) cm = 19 (25) rows from the start of the armhole, place a stitch marker at the right edge to mark the neckline.
- Continue working straight. After 17 cm ~ 49 rows from the neckline marker, place a second marker.
- After 6.5 (9) cm = 19 (25) rows from the second marker, leave 47 (49) sts unworked at the right edge.
- Over the remaining 68 sts, continue working the left side for another 3 (5) cm = 8 (12) rows.
- The back piece ends with 1 row in Raspberry Sorbet (or 2 rows in Chocolate).
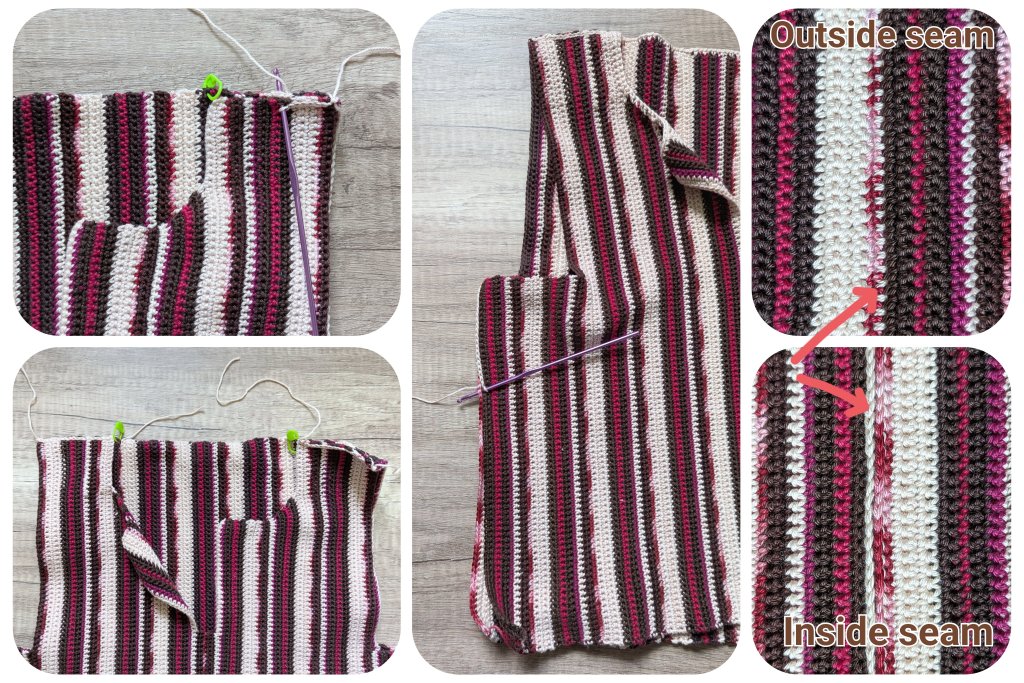
3. Assembly
- Now the front and back pieces are joined together by crocheting.
- Use the lightest yarn color (Powder Pink) and slip stitch the pieces together on the wrong side (this way, only the connecting seam is visible from the outside, not the slip stitches themselves).
- First, join the shoulder seams on the wrong side using Powder Pink slip stitches (from the edge to the stitch marker).
- TRY-ON: Try the top on for the first time.
The top will become softer after blocking.
If the top or the armholes feel too tight, you can still extend the armholes on the back piece now (by making the armhole sections on each side of the back piece longer than 3 (5) cm). - Next, close the side seams on the wrong side using 1 row of slip stitches on each side.
- Weave in all yarn ends.
4. Edging
Once the pieces have been crocheted together, turn the top right side out (right side facing out, wrong side facing in).
For the armholes, neckline, and bottom edge of the top, crochet 1 round of single crochet (sc) using Powder Pink. While doing this:
- At the bottom corners of the armholes, crochet the following into the corner for a smooth, rounded transition:
(1 half double crochet, 3 half double crochets in one stitch, 1 half double crochet) —
meaning: in the corner stitch, work 3 hdc, and in the stitches before and after the corner, work 1 hdc each. - At the neckline, along the outer edge of the slit, crochet 3 single crochet stitches to keep the slit edge straight and defined.
Weave in all yarn ends or crochet over them as you go.
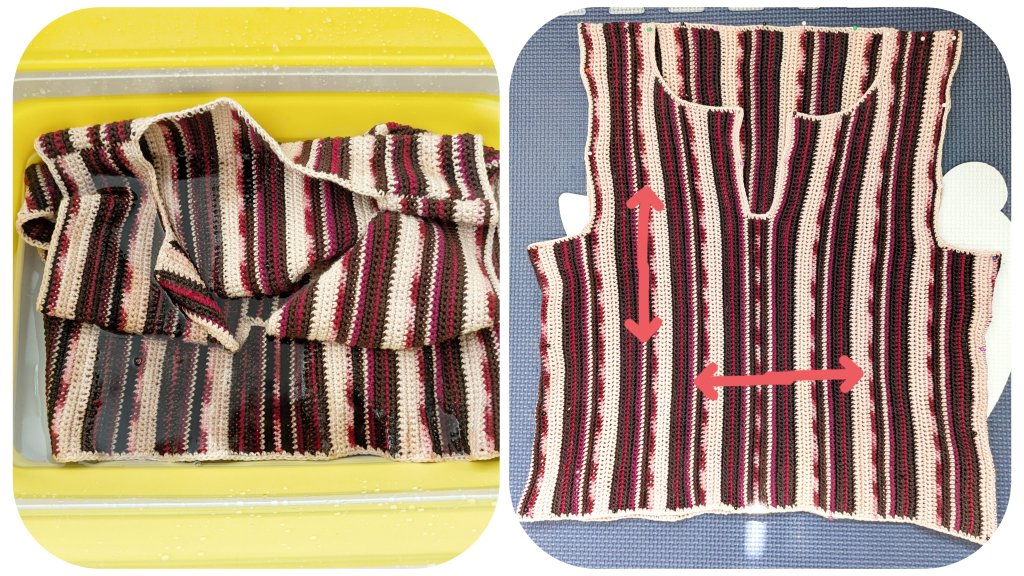
5. Blocking and Finishing
Wet the finished top and block it: use lukewarm water with a wool detergent or a fabric softener to make the cotton crochet top noticeably softer. Alternatively, you can add a splash of silicone-free hair conditioner to the water—this helps relax the cotton fibers.
After washing, roll the top in a towel and gently press out the excess water (do not wring). Then shape it on a soft surface (such as a blocking mat, foam pad, or yoga mat) and pin it in place with sewing pins. Focus on stretching it more in width than in length so that the tight stitches gain a slightly stretched structure. This makes the top drape more casually and gives the stitches a looser appearance.
Tip: For extra softness, you can hold a steam iron about 1–2 cm above the stretched crochet top (do not press it directly onto the fabric!) to allow the steam to relax the fibers. If it still feels stiff after drying, you can continue to soften it by wearing and washing it multiple times using a mild detergent—cotton becomes more supple over time with frequent use.
Finally, sew a wooden bead to the neckline. You can use powder pink yarn or clear elastic thread. The bead should be about as long as the bottom edge of the neckline slit so that the slit doesn’t flare outward.
Your crochet top is finished! I hope your top turned out beautifully and that my instructions were easy to follow.