
You have a smoked or bandeau top that doesn’t sit right anymore? Or a simple thin-strap top that you grew bored of? Then this post might just be what you need: let’s transform your top into a unique, stylish piece using crochet elements. Through just a few, easy steps and minimum sewing skills, you can add a bit of flair to your straps, make your top wider, or simply give your wardrope a personal, creative touch using custom crochet designs.
This article is part 1 of a short series on how to pimp your clothing using crochet elements.
So, let’s start!
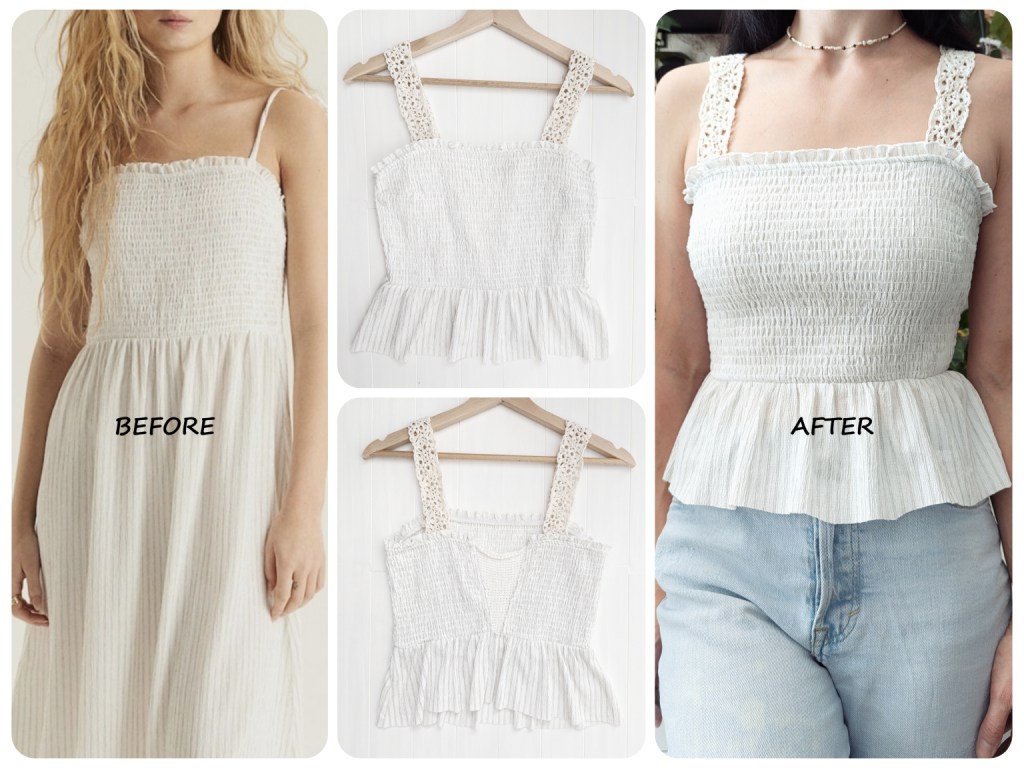
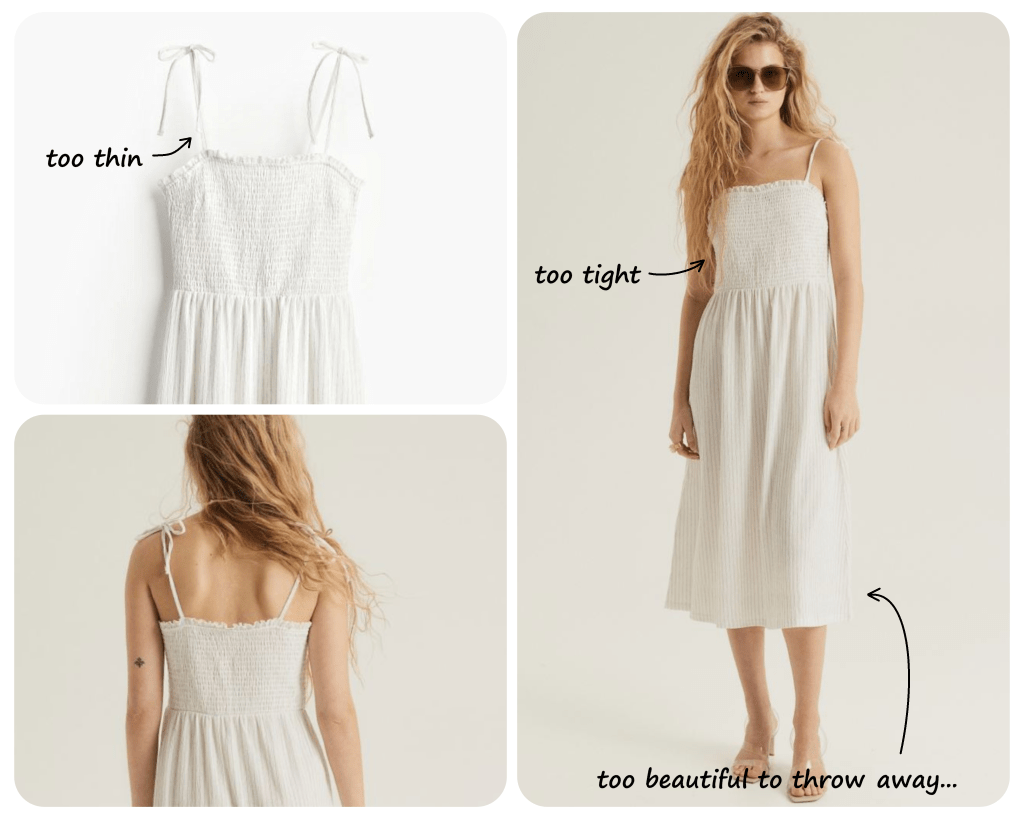
My clothing of choice: this smocked dress with tie straps from H&M made of jersey with a form-fitting bodice, square neckline, and narrow tie straps. Gathered seam and a slightly flared skirt. I fell in love with the material, but noticed after buying it, that it just didn’t sit well on me. The top part was slightly too tight and the straps were too thin for my taste. Yet, I wanted to keep the dress and reuse the material to sew myself a new wide top. But then I thought, what if I try to modify the top part as well and as such throw as little as possible away from that dress. Long story short: I could turn the dress into a new top and, at the same time, get additional beautiful fabric for another top.
This was the dress in question:
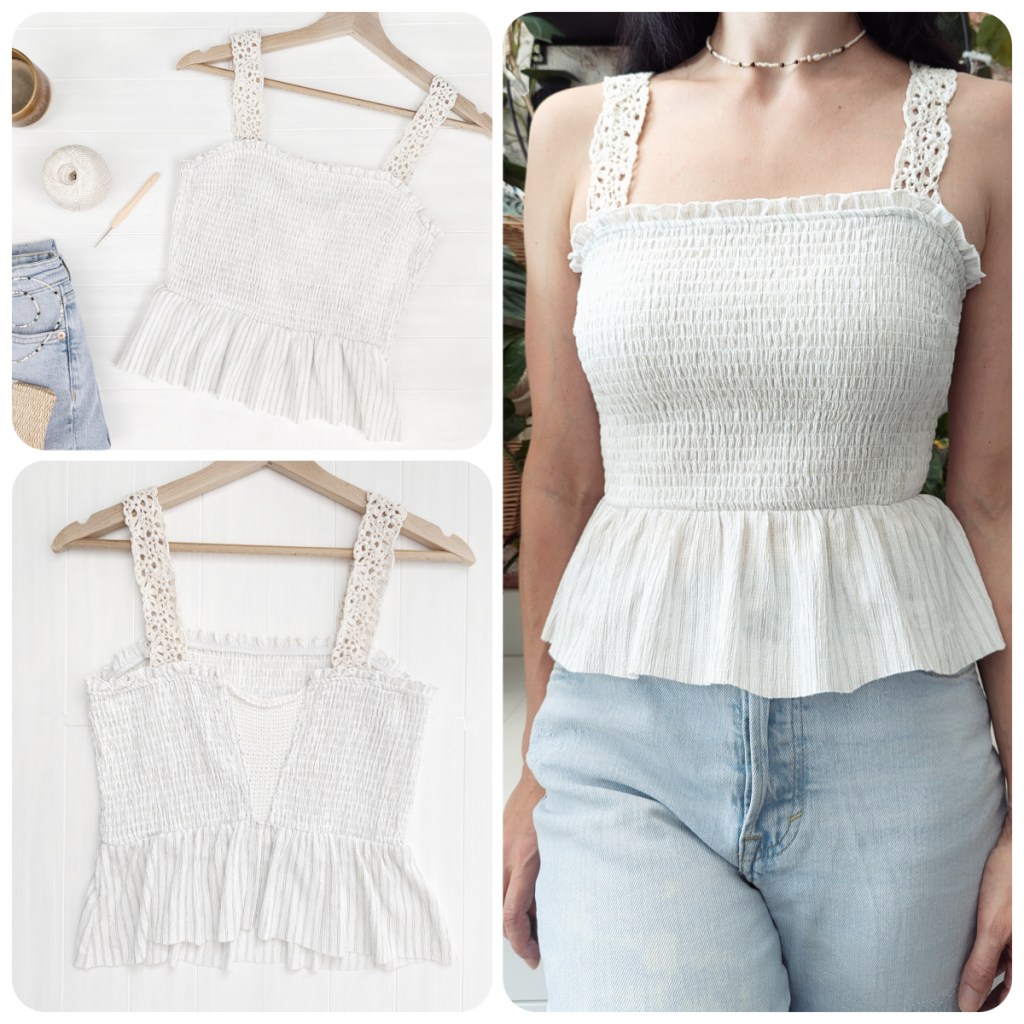
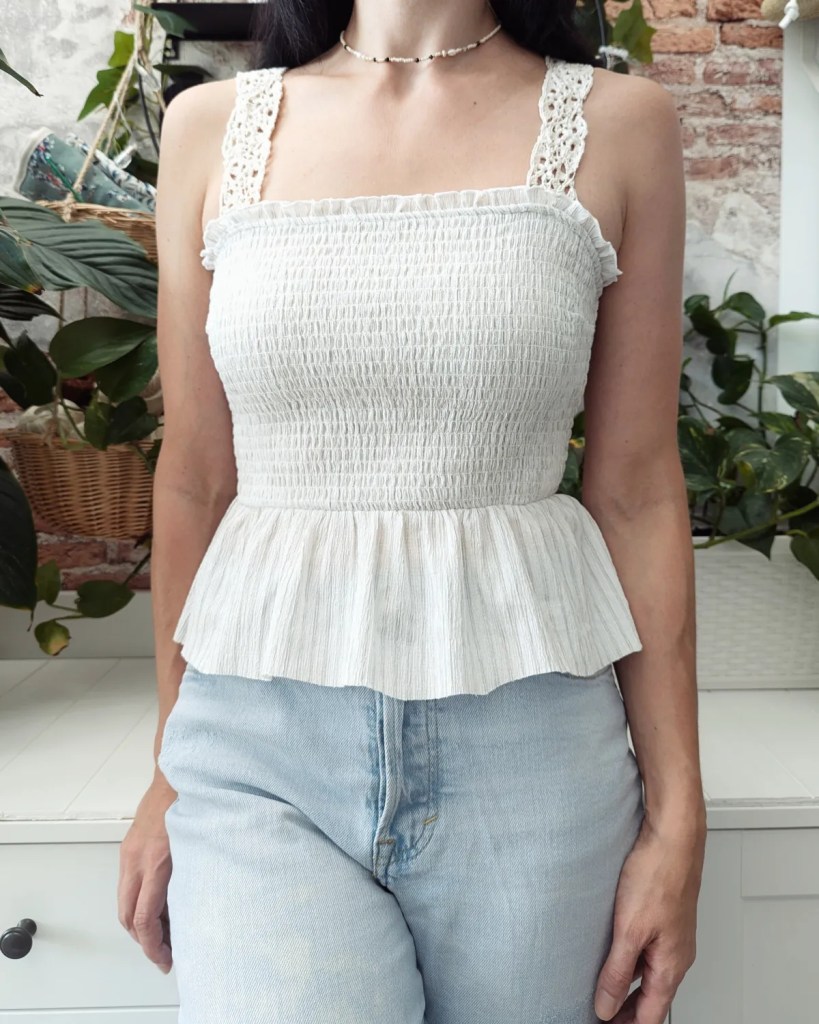
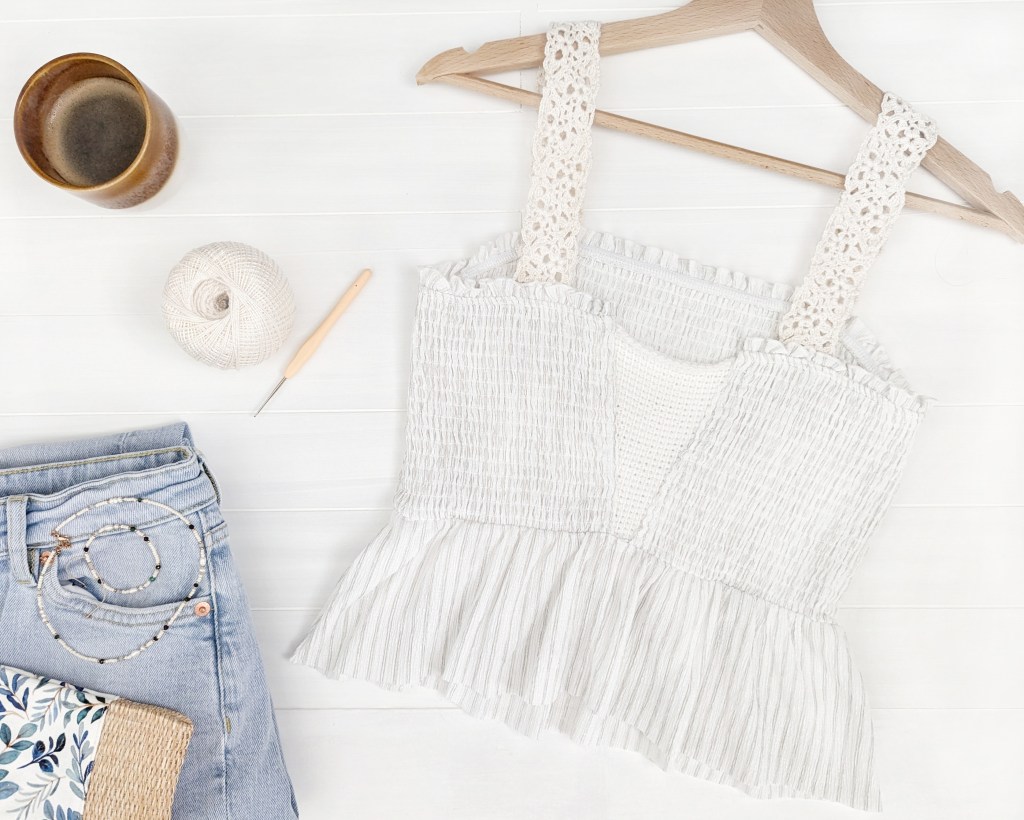
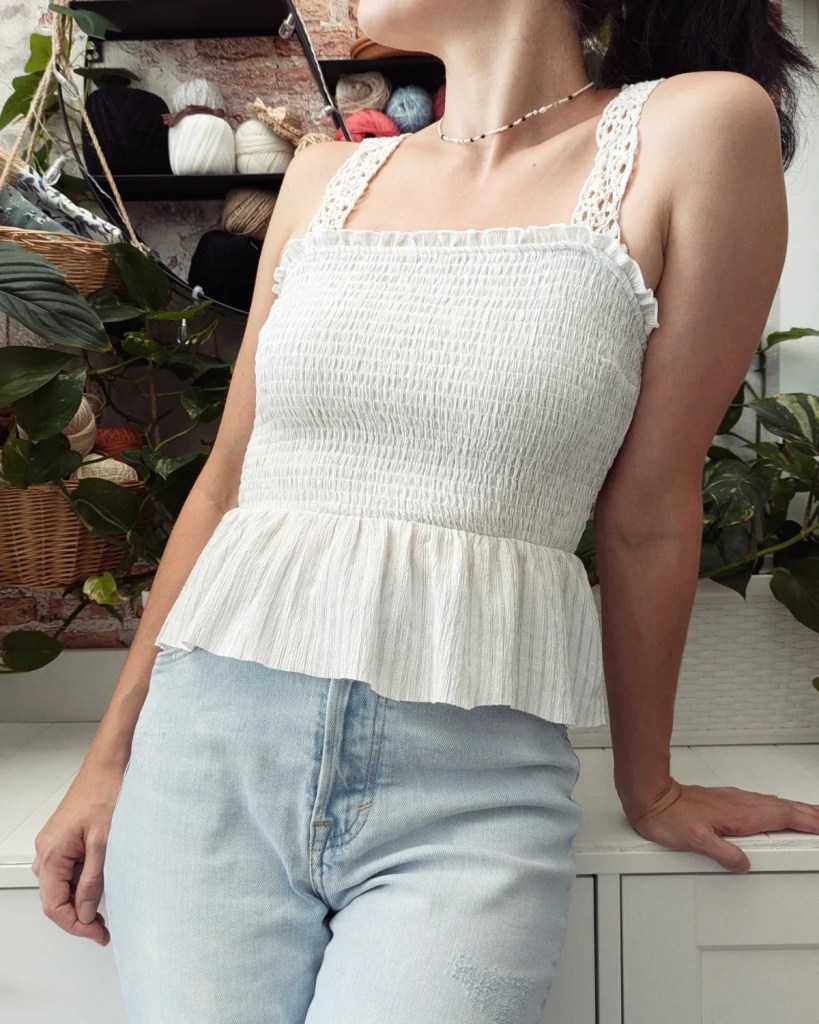
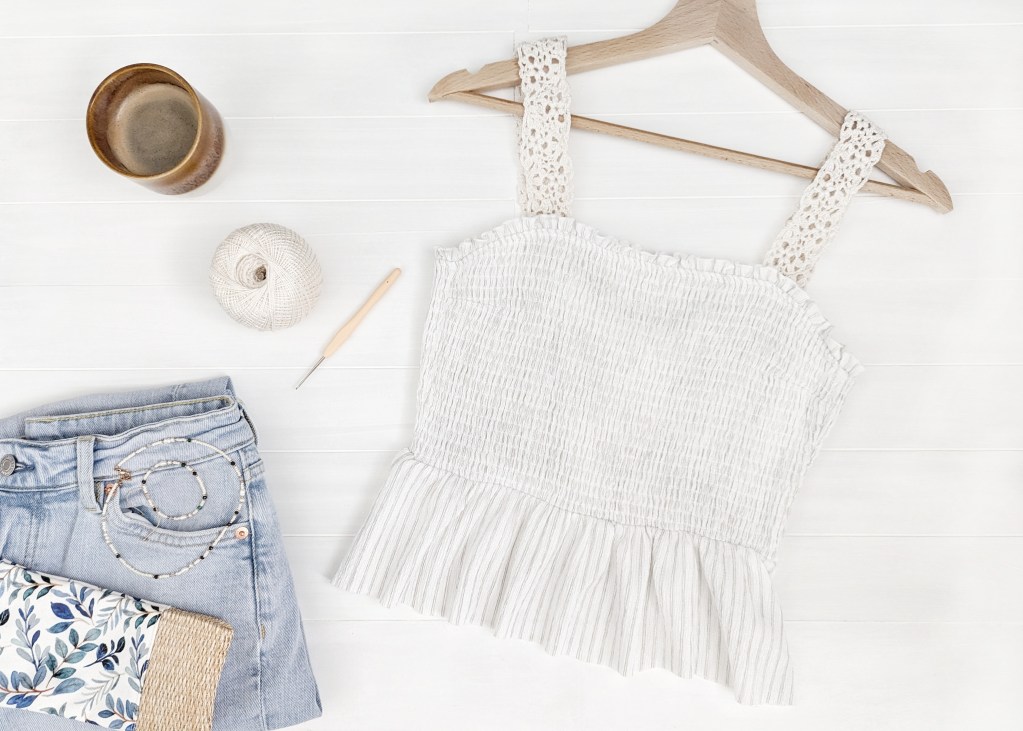
This was the outcome:
My steps to turn this dress into a new top:
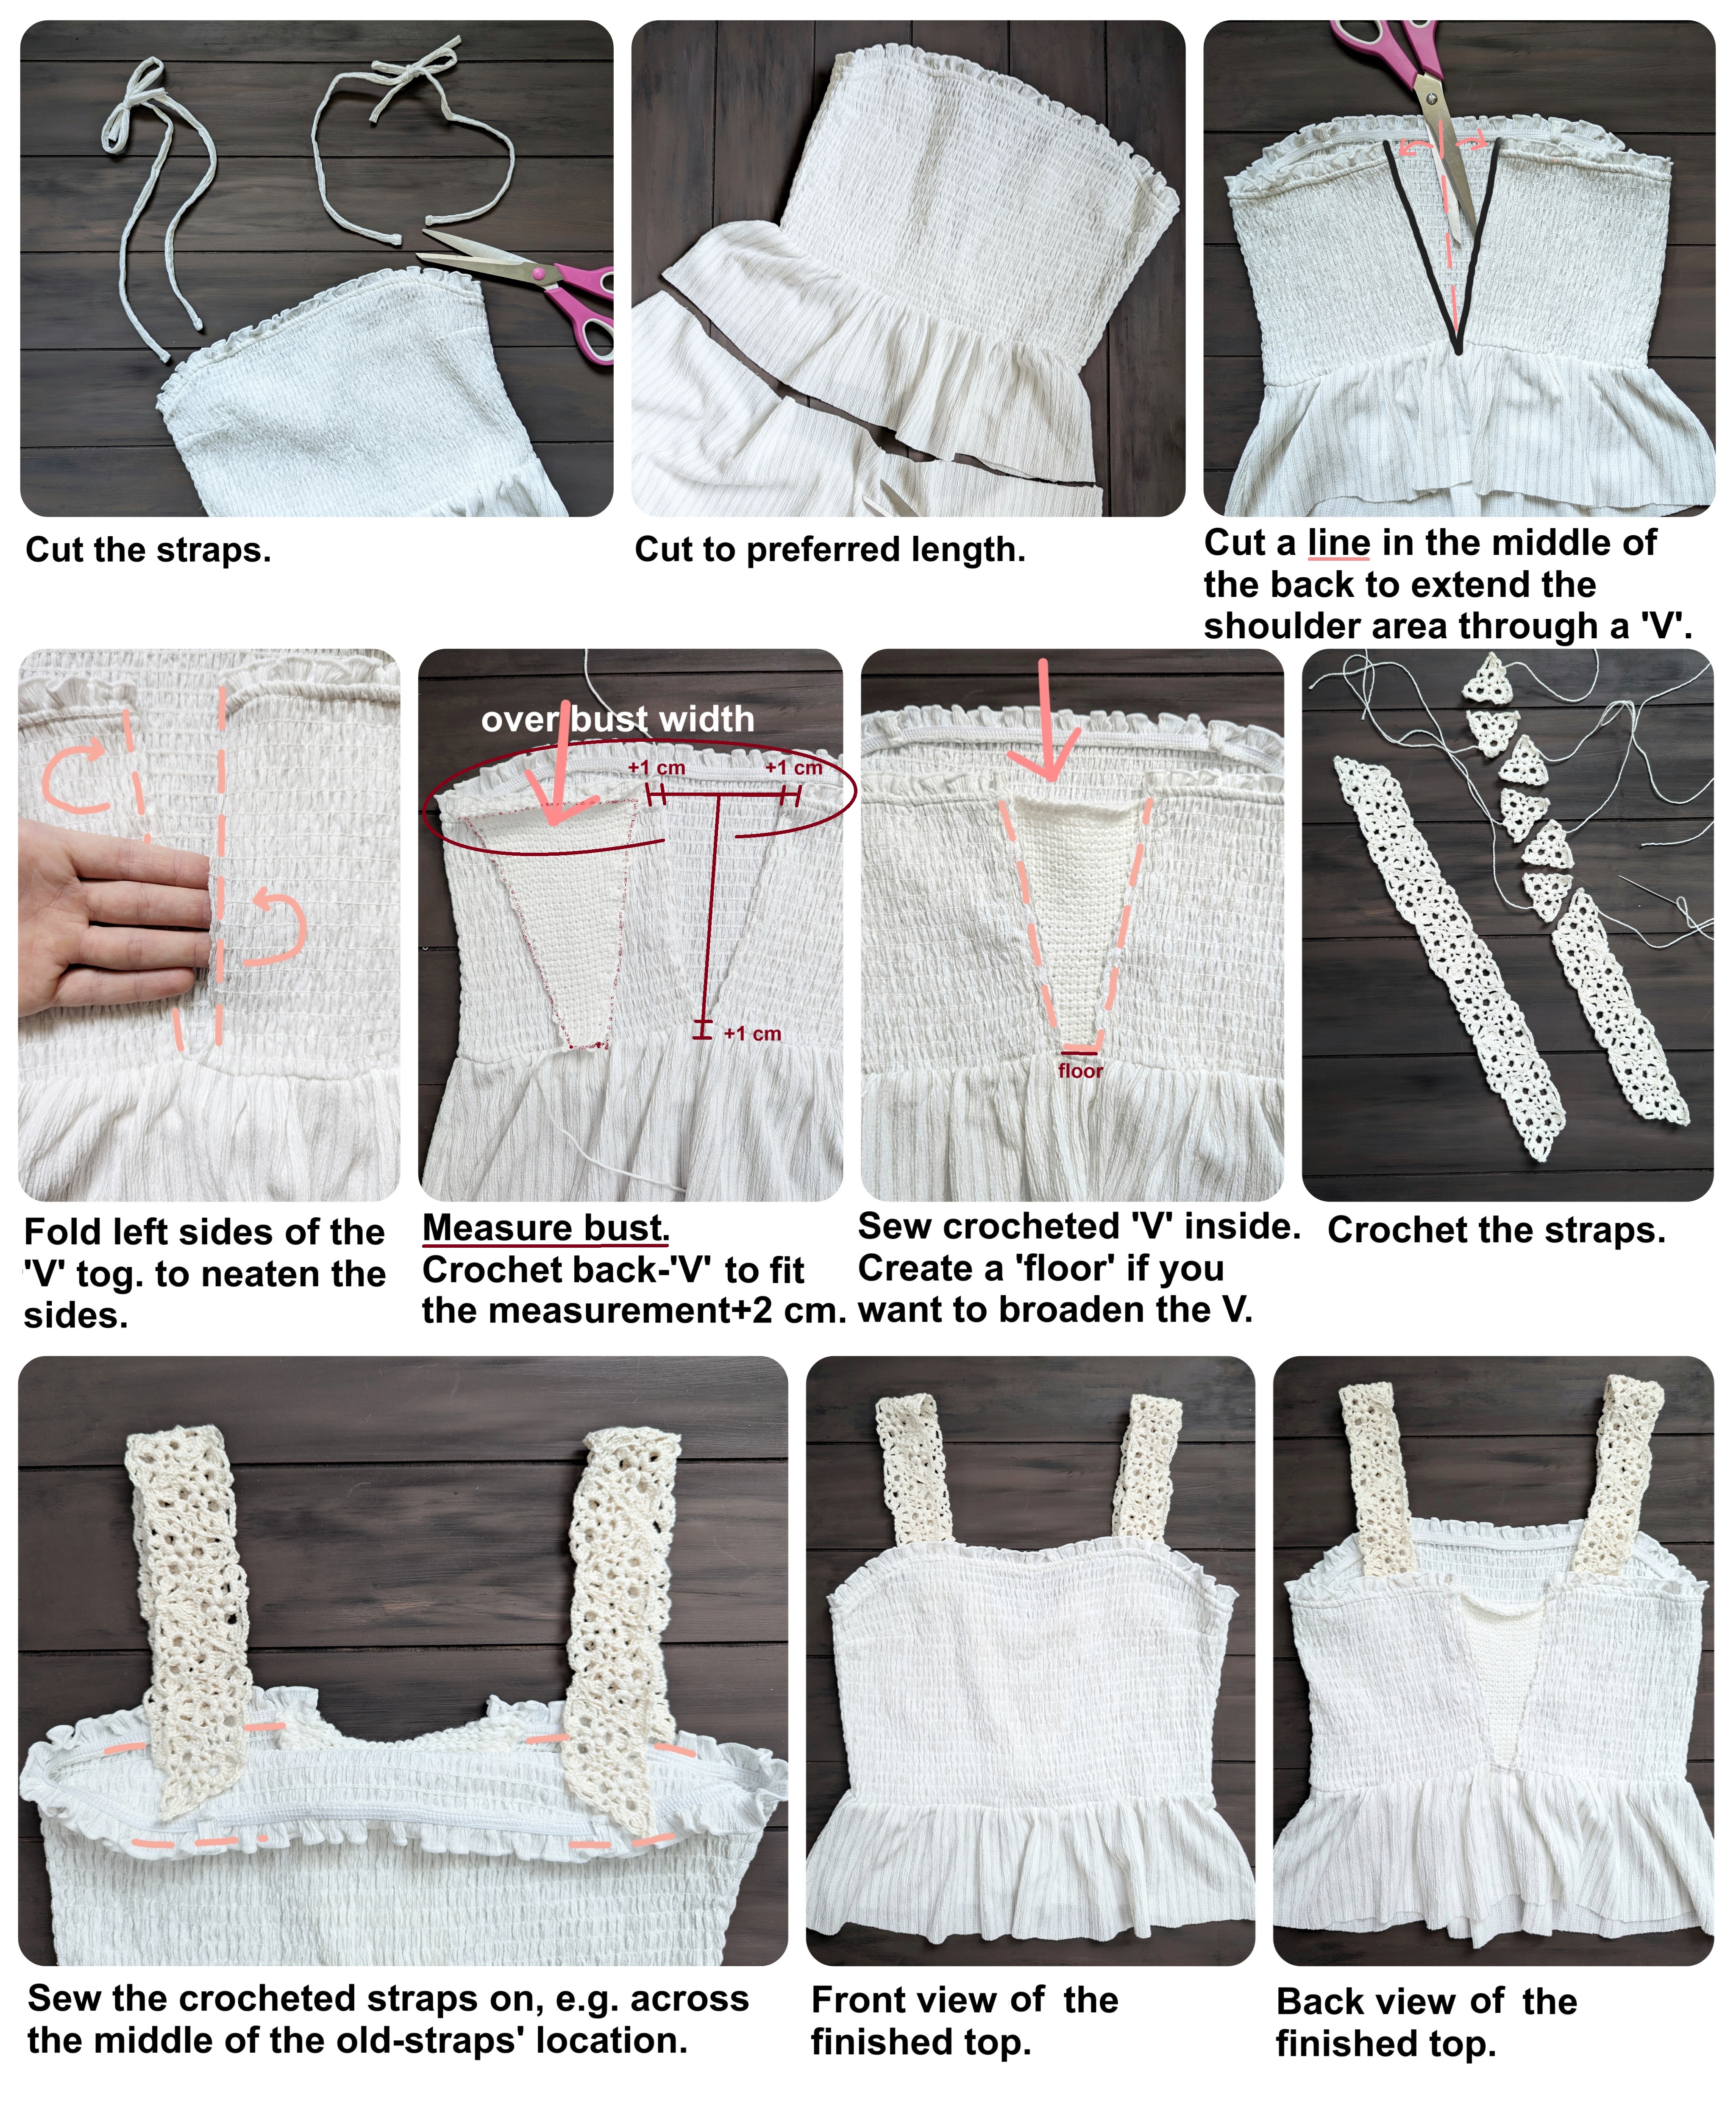
Step 1 (remove straps): I cut the thin straps right off the seam away, because I wanted to use broader crochet straps instead.
Step 2 (cut to preferred length): I wanted to create a new top out of the dress and win new fabric for another top. First, I put the dress on in order to decide on the desired length of my new top. I made a small cut on one side which defined the length to cut along. I took off the dress and finished to cut along the marked length (make sure to flatten the material first, otherwise the cut might be uneven). Beware: as this dress was made of jersey, I wouldn’t need to finish or overlock the ends of the top. For other material add 1 cm seam allowance to your preferred length which you use to overlock the edges.
Step 3 (shoulder extension: cut through middle back): if your top is too tight around the shoulders, cut straight through the middle of the backside. We will use this area to extend the shoulder part by a crocheted ‘V’ form.
Step 4 (shoulder extension: neaten the seam of the back cut): make sure to neaten max. 1 cm of the cut sides of the backside (sewing left to left) to create a clean finish. You can sew using the sewing machine (like I did it) or sew by hand. You might need to additionally flatten the ‘V’ hole (see red line ‘floor‘ in picture 6) to make the finish look more even and the ‘V’ shape less prominent. You can leave this ‘floor’ un-neatened.
Step 5 (shoulder extension: crochet the ‘V’ form for the back): measure around the over bust. Spread out the top to this maximum circumference and measure the dimensions of the resulting triangle form from the freed-up back area. Add 2 cm to the width and 1 cm to the length of the ‘V’ form. Crochet the triangle in any preferred stitch type. I crocheted the ‘V’ form in basic tunisian crochet stitch using super fine yarn and a tunisian crochet needle of 4 mm.
Step 6 (shoulder extension: sew the ‘V’ from inside): sew the right side of the crocheted triangle to the left side of the back (left side = inside of your back), making the ‘V’ form appear as a “background” of your back or like an additional top inside your top.
Step 7 (crochet the straps): I created each strap from 13 Granny Triangles sewed together along the sides (I used this Center-Flower Triangle pattern up to the 2.Rd and a lace crochet yarn in nature-white with a 2.0 mm crochet needle).
Step 8 (sew the straps inside the top): using the position of the old straps, I sewed the crocheted straps across the middle of the old-straps’ position inside the top.
Follow the steps in pictures:
This is the result:
More to come: how to Pimp your Shorts (Pimp your Wardrobe – Part 2).
Did you like this type of post and want to see more? Let me know in the comment section below!
Very nice. Thank you.