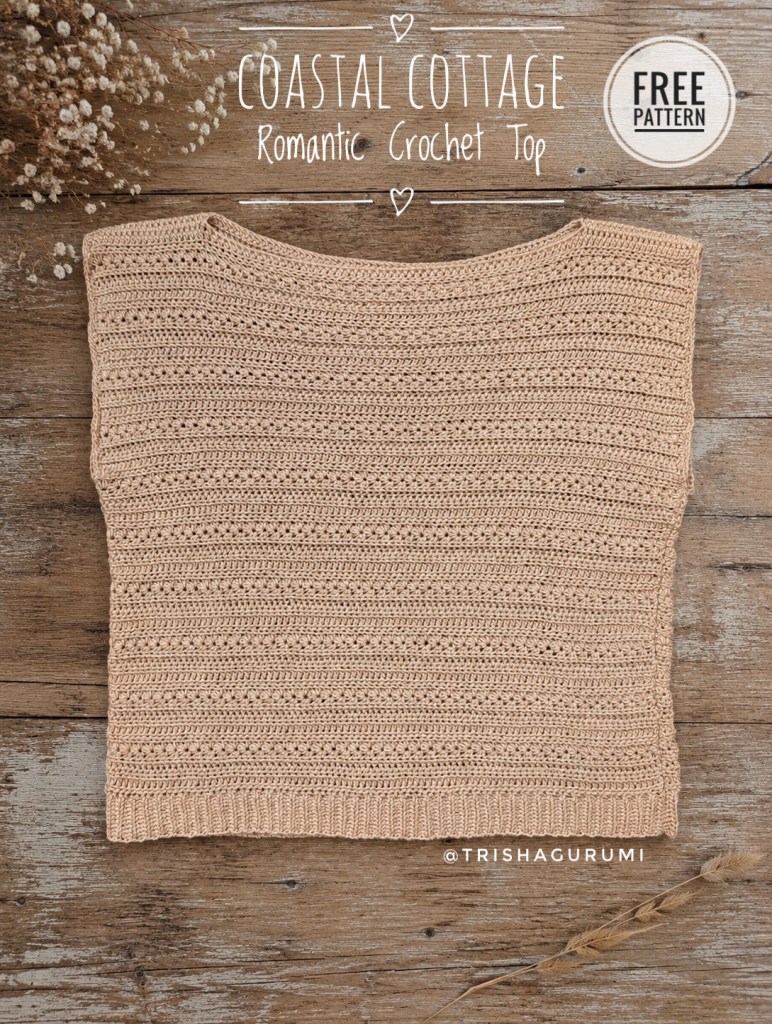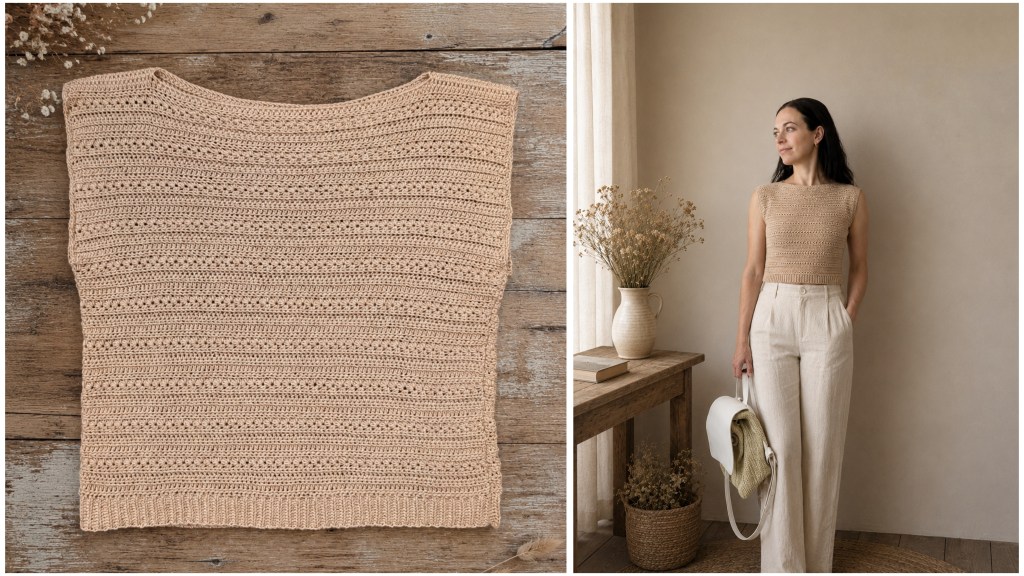

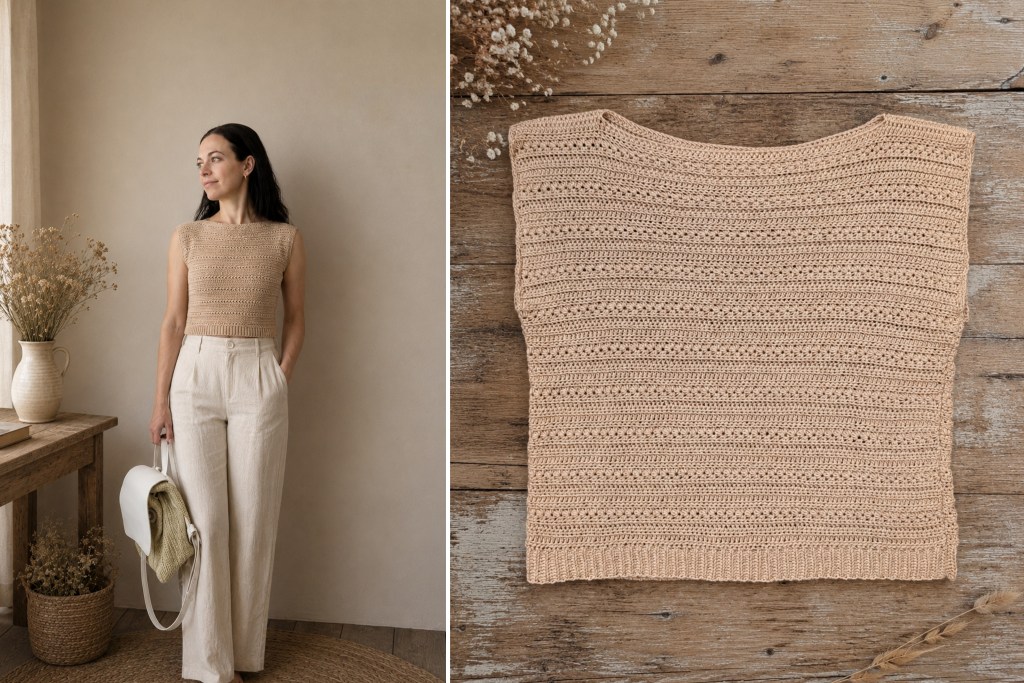
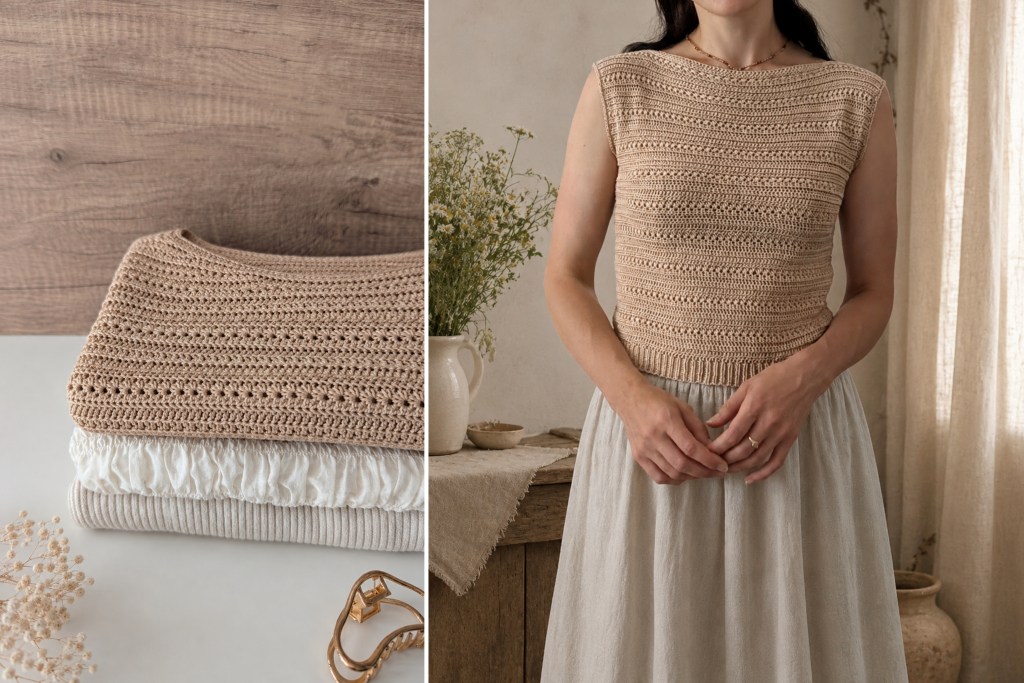
Some projects carry memories in every single stitch. This crochet top came to life during a summer vacation on the Baltic Sea, between walks along the beach, salty sea air, and the wild sound of the waves. I wanted to capture that very feeling of lightness in this design.
The openwork stitch pattern reminds me of little waves on the water, while the relaxed, slightly boxy fit makes the top feel wonderfully light and comfortable to wear.
It is a timeless summer top that pairs beautifully with dark jeans, light linen pants, or flowy skirts, adding a subtle touch of cottagecore and vintage charm to your outfit. It can even be worn as a stylish alternative to a classic Dirndl blouse.

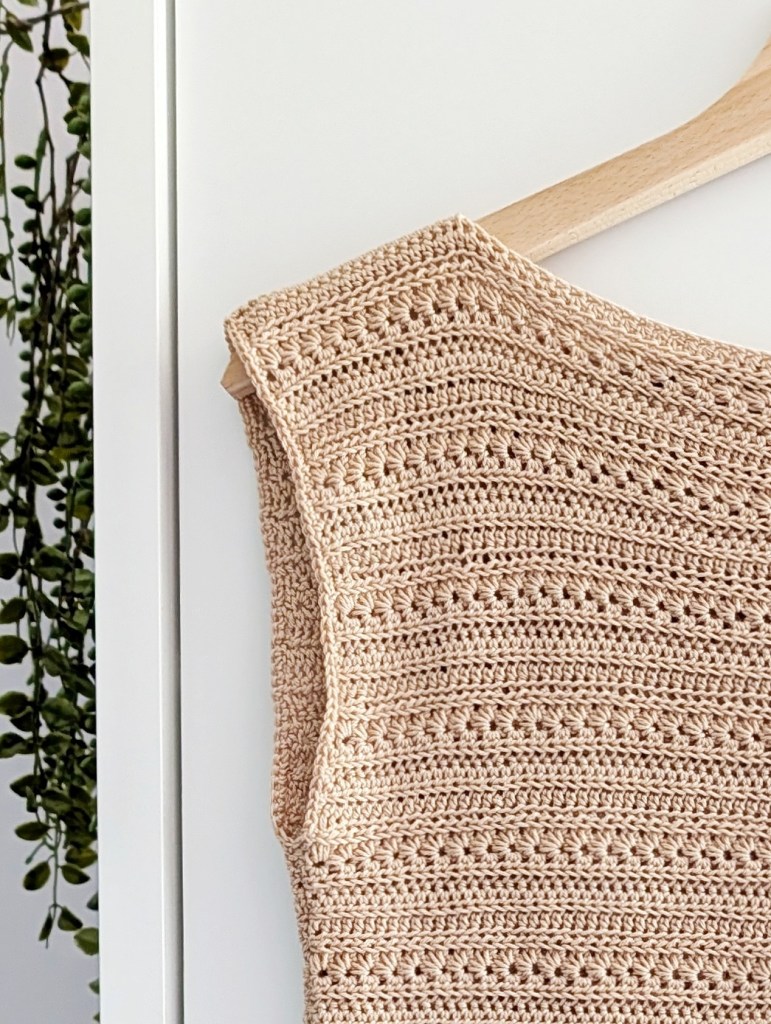
This pattern is perfect for anyone who loves simple designs with special details. Thanks to the repeating stitch pattern, the top is relaxing to crochet – almost as soothing as an afternoon by the sea. 😉
Features of the top:
- sleeveless with wide straps
- subtle U-neckline
- cropped length
- airy openwork stitch pattern with delicate textured stripes
- slightly relaxed fit
- perfect for spring and summer
- easy to style with jeans, shorts, skirts, or linen pants
- subtle cottagecore and vintage look
- easily adjustable in length
- looks beautiful in bold colors, too


You’ll find the free crochet pattern further down in this post. I hope you have lots of fun making your own!
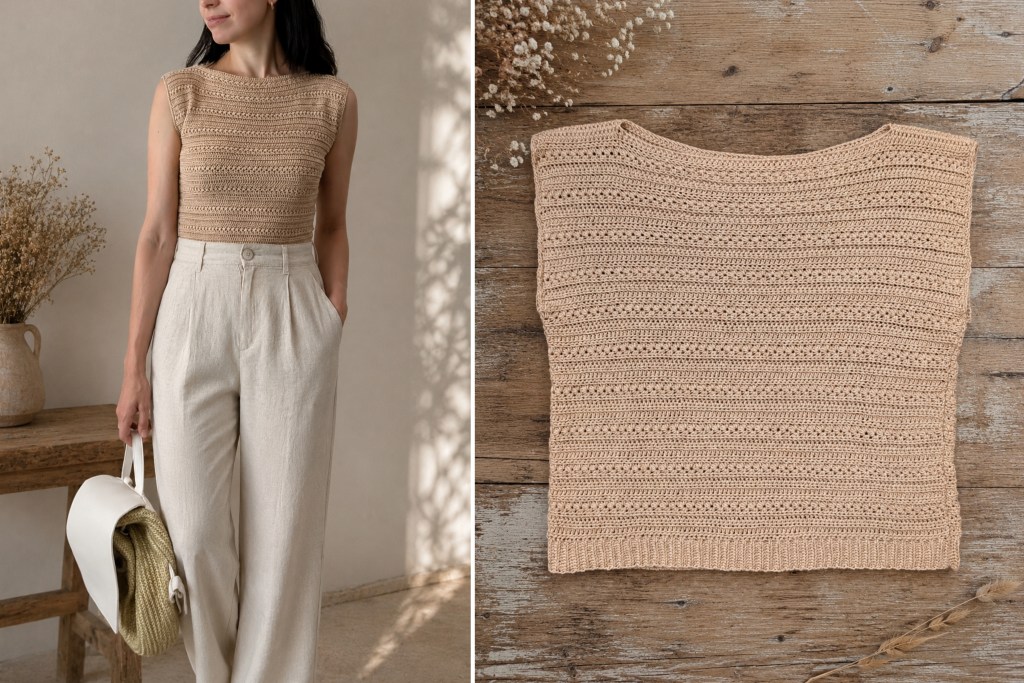
Materials
- Sport/fine weight yarn (Category 2) in caramel, e.g. Woll Butt Sonja (100% cotton)
- Yardage needed: approx. 680 m / 744 yd (size S), equivalent to 4 skeins.
- 3.0 mm crochet hook
- Scissors
- Yarn needle for weaving in ends
Size
Size: S (M/L). Instructions for the larger size are given in parentheses.
Abbreviations
st(s) = stitch(es)sl st = slip stitch(es)YO sl st = yarn over slip stitchch = chain stitch(es)sc = single crochethdc = half double crochetsl st2tog = slip stitch 2 stitches together (decrease)FLO = front loop onlyBLO = back loop onlyRd = roundR = rowprev row = previous row
Stitch Basics / How-To
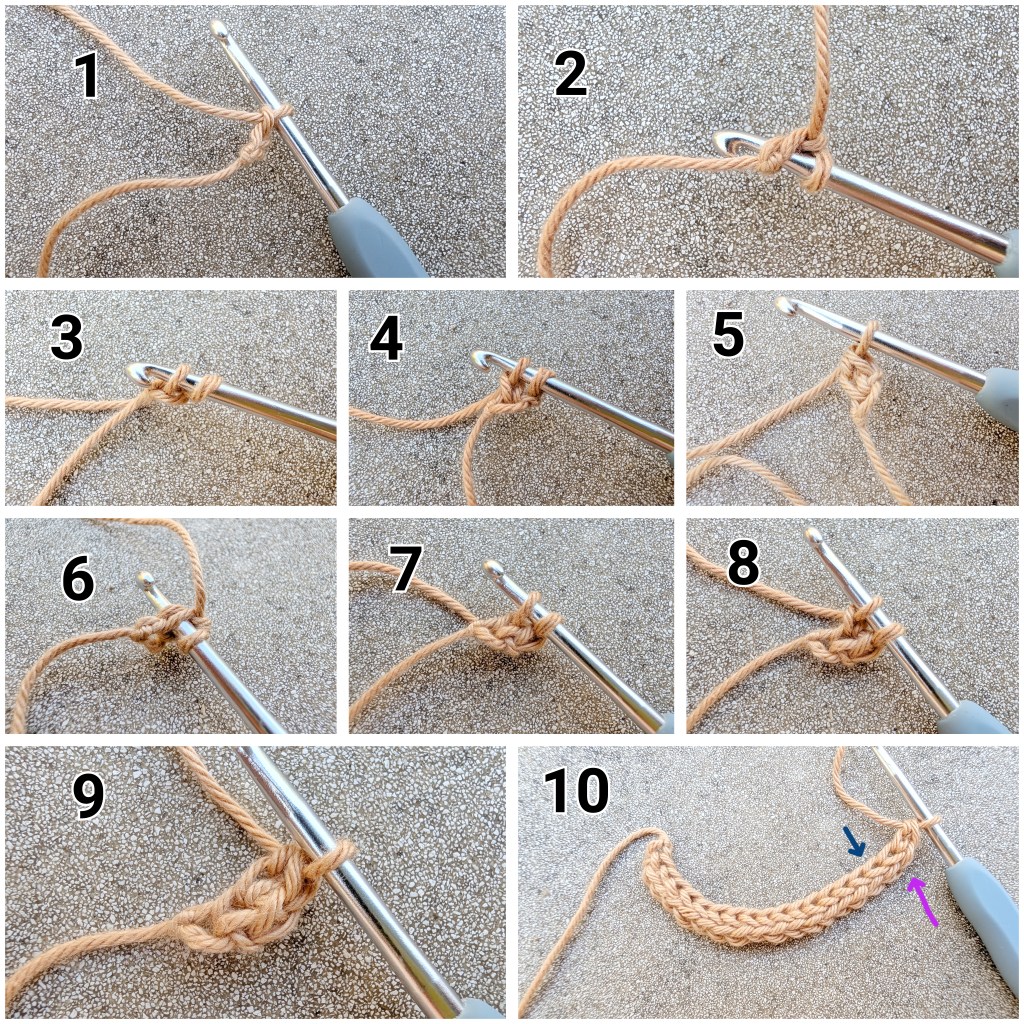
Foundation Single Crochet (FSC)
Image 1: Begin the foundation row by chaining 2.
Images 2–3: Insert your hook into the 2nd ch from the hook, working through the middle and back loops of the ch. Yarn over and pull up a loop. You now have 2 loops on your hook.
Image 4: Yarn over and pull through the first loop on your hook (this creates 1 ch). You still have 2 loops on your hook.
Image 5: Yarn over and pull through both loops on your hook. The first foundation sc is complete. You can see 1 st along the top edge and 2 sts along the bottom edge.
Image 6: To make the next foundation sc, insert your hook under both loops of the st at the bottom of the previous foundation st.
Image 7: Yarn over and pull up a loop. You now have 2 loops on your hook.
Image 8: Yarn over again and pull through the first loop on your hook (creating another ch). You still have 2 loops on your hook.
Image 9: Yarn over and pull through both loops on your hook.
Image 10: Repeat steps 6–9 until you reach the desired length, then turn your work. In the next row, work into the sts on the right side of the image, indicated by the purple arrow (= top edge). The loops on the left side of the image, indicated by the blue arrow, form the bottom edge.

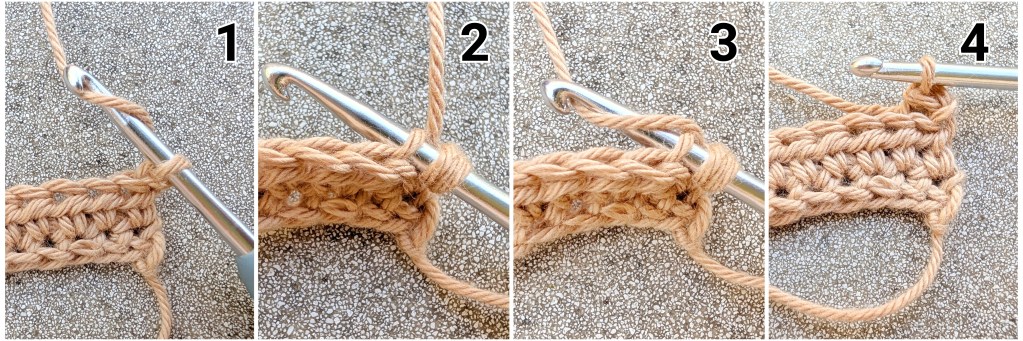
Yarn Over Slip Stitch (YO Sl St)
In this pattern, the yarn over slip stitches are worked either in the front loop only (FLO) or in the back loop only (BLO). See the comparison images below.
Yarn Over Slip Stitch in the Front Loop Only (YO Sl St FLO):
Image 1: Yarn over (2 loops on hook).
Image 2: Insert your hook into the front loop only of the next st.
Image 3: Yarn over and pull up a loop.
Image 4: Pull the loop through the front loop of the st and through both loops on your hook in one motion.


A Yarn Over Slip Stitch in the Back Loop Only (YO Sl St BLO) is worked in the same way, but insert your hook into the back loop only instead.
Star Stitch
Image 1: Begin the star stitch row with ch 3.
Image 2: Pick up 5 loops as follows: insert your hook into the 2nd ch from the hook and pull up a loop. Then insert your hook into the 3rd ch and pull up a loop. Next, insert your hook into each of the first 3 sts of the previous row and pull up a loop from each st. For this pattern, work in the back loops only (BLO).
Image 3: Yarn over and pull through all 6 loops on your hook.
Image 4: Ch 1 to complete the star stitch.
The colored line on the top of the images indicate the first star stitch.
Image 5: The red arrows indicate the 5 insertion points where you will pick up the loops for the next star stitch.
Image 6: For the first loop, insert your hook directly into the ch-1 space of the previous star stitch and pull up a loop.
Images 7–8: For the second loop, insert your hook under the horizontal strand directly below and pull up a loop.
Images 9–10: For the third loop, insert your hook into the same st and pull up a loop.
Images 11–12: For the fourth loop, insert your hook into the BLO of the next st and pull up a loop.
Images 13–14: For the fifth loop, insert your hook into the BLO of the following st and pull up a loop. You now have 6 loops on your hook.
Images 15–16: Yarn over and pull through all 6 loops on your hook.
Image 17: Ch 1 to complete the next star stitch.
Image 18: Continue working across the row in the same way: pick up 5 loops (for a total of 6 loops on your hook) – the first 3 loops through the previous star stitch and the last 2 loops through the BLO of the next 2 sts. Yarn over and pull through all 6 loops, then ch 1. Therefore, the last star stitch of the row also ends with ch 1.


Stitch Chart
The crochet top is worked according to the stitch chart shown below. A detailed stitch chart explanation can be found beneath the chart.

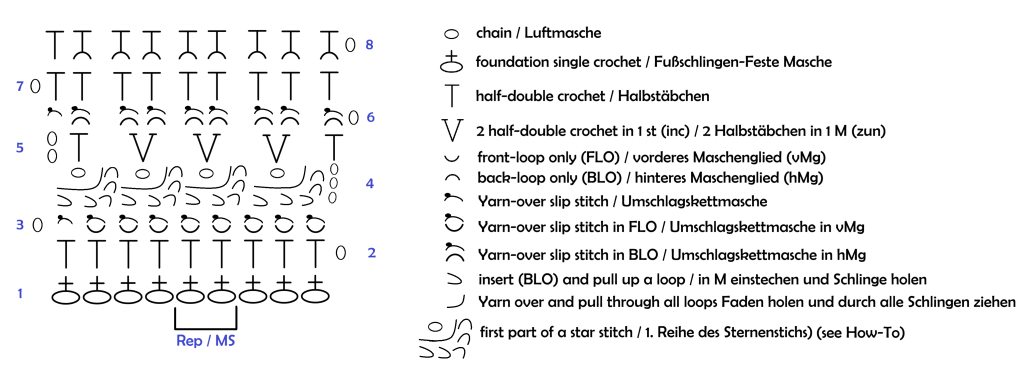
- Work in rows following the crochet chart. The rows shown in the chart represent both the right-side and wrong-side rows.
- When several stitches meet at the same point at the bottom of the chart, work all of them into the same stitch.
- The stitch sequence between the arrows forms the pattern repeat and is repeated continuously across the row.
- Begin with Foundation Single Crochet (FSC).
- Row 2: Ch 1, 1 hdc in each st across. Turn.
- Row 3: Ch 1, 1 YO sl st FLO in each st across until 1 st remains, 1 YO sl st through both loops of the last st. Turn.
- Row 4: Ch 3, work 1 star stitch by picking up the first 5 loops (through the 2nd and 3rd ch from the hook and through the BLO of the first 3 sts), ch 1. Repeat [1 star stitch (pick up the first 3 loops through the previous star stitch and the last 2 loops through the BLO of the next 2 sts of the previous row; see How-To), ch 1] to the end of the row. Turn.
- Row 5: Ch 2 (counts as 1 hdc), 1 hdc in the ch-1 of the previous row, 2 hdc in each star stitch eye (the ch-1 of each star stitch), 1 hdc in the last st after the final star stitch eye. Turn.
- Row 6: Ch 1, 1 YO sl st BLO in each st across until 1 st remains. Work 1 YO sl st into the 2nd ch of the previous row. Turn.
- Row 7: Ch 1, 1 hdc in each st across. Turn.
- Row 8: Ch 1, 1 hdc BLO in each st across. Turn.
- Repeat Rows 3–8 (6 rows) until the desired length is reached. Then work the hem; see the instructions below for further details.
Crochet Pattern
- The top is made from two identical panels (front and back), worked in rows from the top down. The hem is added at the end.
- The two panels are then crocheted together at the shoulder straps and along the sides.
- Finally, the armholes are finished with one round of single crochet.

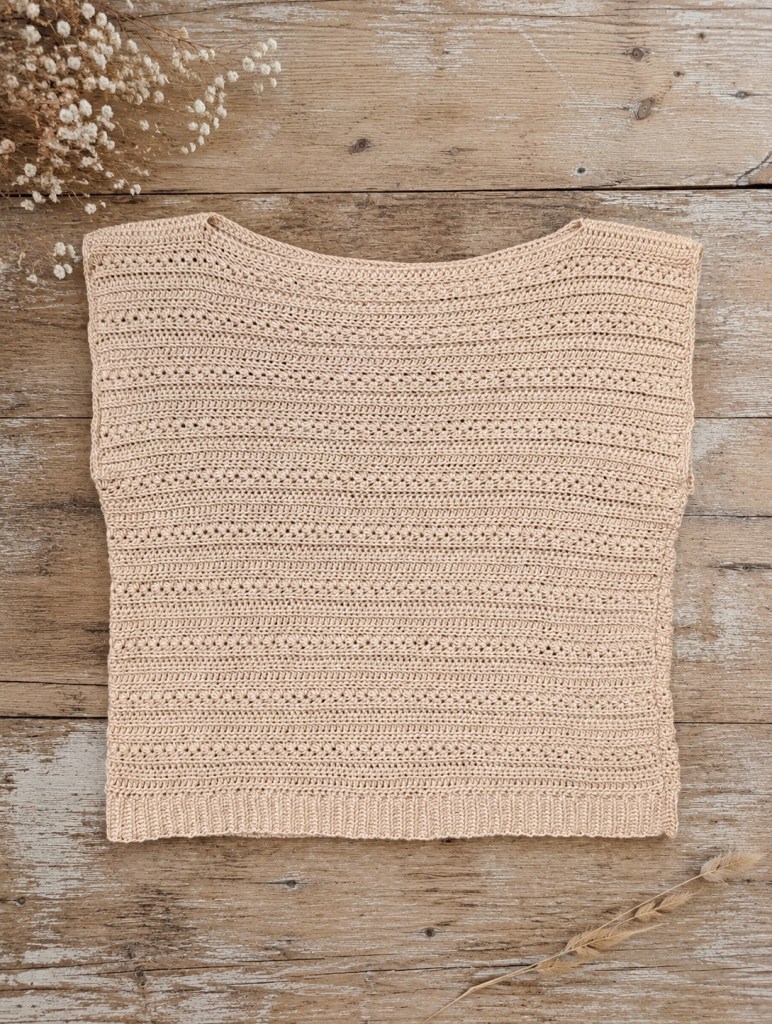
Start by making a gauge swatch using the stitch pattern of the crochet top (see Crochet Chart). Using a 3.0 mm crochet hook, the gauge measures in my case:
22 sts and 13 rows = 4 x 4 in (10 x 10 cm).


Front / Back Panel
Row 1: Begin with 95 (105/115) foundation single crochet (FSC) sts (the stitch count must be a multiple of 2 + 1). This technique replaces the foundation chain and the first row of single crochet in one step, creating a more flexible foundation row. Turn.
Row 2: Ch 1, 1 hdc in each st across, turn. (95 (105/115))
Repeat the following pattern until the desired length is reached:
Row 3: Ch 1, 1 YO sl st FLO in each st across until 1 st remains, 1 YO sl st through both loops of the last st, turn. (95 (105/115))
Row 4: Ch 3, 1 star st into the 2nd + 3rd ch from the hook + the BLO of the first 2 sts, ch 1, [1 star st into the previous star st + the BLO of the next 2 sts (see How-To), ch 1] repeat to the end of the row (work the last loop of the final star st through both loops of the last st instead of BLO only. End with ch 1), turn. (95 (105/115))
Row 5: Ch 2 (= 1 hdc), 1 hdc in the ch-1 of the previous row, 2 hdc in each star st eye, 1 hdc in the 3rd ch st (after the final eye), turn. (95 (105/115))
Row 6: Ch 1, 1 YO sl st BLO in each st across until 1 st remains, 1 YO sl st through both loops of the last st, turn. (95 (105/115))
Row 7: Ch 1, 1 hdc in each st across, turn. (95 (105/115))
Row 8: Ch 1, 1 hdc BLO in each st across until 1 st remains, 1 hdc through both loops of the last st, turn. (95 (105/115))
For size S, repeat Rows 3–8 a total of 11 times (~40 (41/42.5) cm / 15.7 (16 / 16.7) in), but check if the length fits and continue if you want the top to be longer. Keep in mind that, depending on the yarn you use, the top may have a slightly more relaxed drape after blocking.
For size M, work 4 additional rows: after completing the instructions for size S, work Rows 3–6 once more.
For size L, work 6 additional rows: after completing the instructions for size S, work Rows 3–8 once more.
Then work Row 2 once more. This means that, regardless of size, the final row is worked as Row 2.
Now continue directly with the hem.
Hem
The hem is worked along the foundation row of the front/back panel. At the end of every other row, the hem is joined to the foundation row by working 2 slip stitches of the foundation row together.
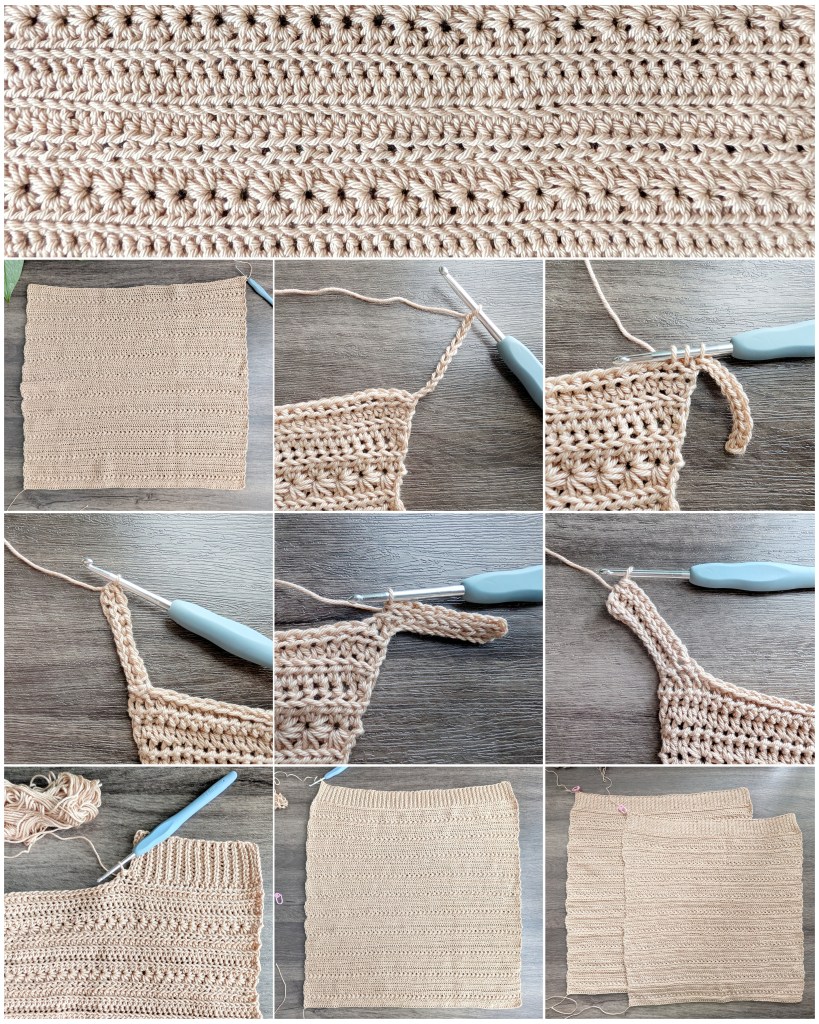
Ch 10 + 1.
Row 1: 1 sl st in each of the next 10 sts (work loosely), sl st2tog over the next 2 sts of the foundation row, turn (do not ch).
Row 2: Skip the decrease st, 1 YO sl st BLO in each of the next 9 sts, 1 YO sl st through both loops of the last st, ch 1 and turn. (10)
Row 3: 1 sl st BLO in each of the next 10 sts, sl st2tog over the next 2 sts of the foundation row, turn without a turning ch. (10)
Repeat Rows 2–3 until you reach the last st of the foundation row. Finish with Row 2, so that your working yarn ends exactly at the corner of the crochet panel.
Fasten off, or leave a yarn tail of approx. 40 cm / 16 in, which will be used later to crochet the panels together along the sides.
Repeat for the front panel.

Joining the Panels
Place the front and back panels right sides together. The right side is the side where the star stitch row faces outward, while the row of 2 hdc worked after the star stitches faces inward.
Neckline
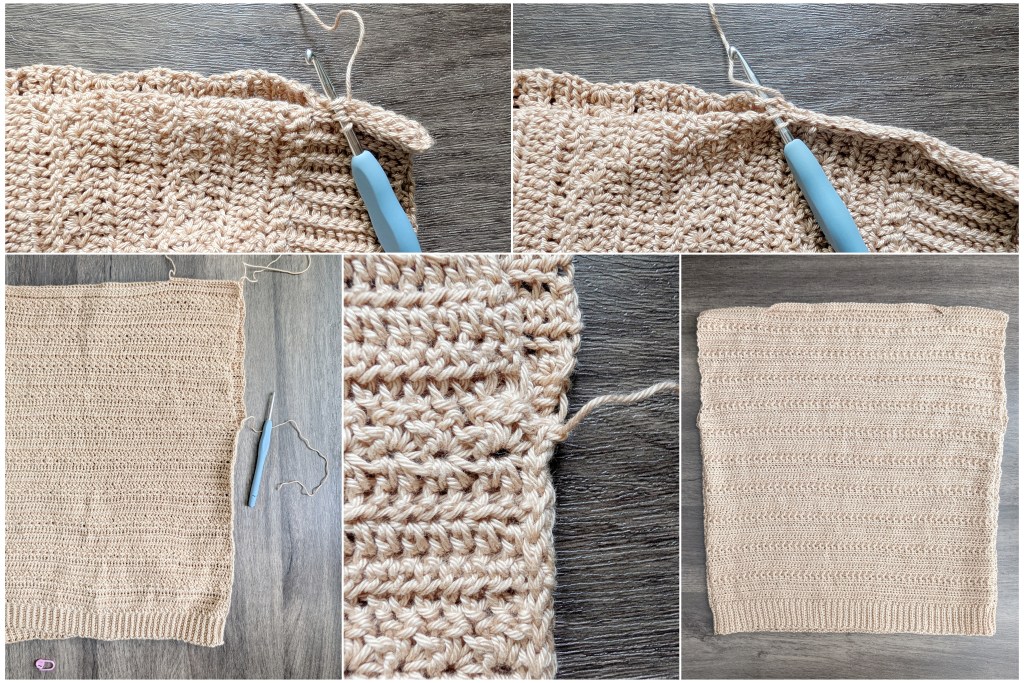
Join a new strand of yarn and join 21 (26/32) sts on each side (approx. 8 (10/12) cm / 3.1 (3.9/4.7) in) by single crocheting the two panels together. Work from the armhole edge toward the neckline.

Armholes
For the side seams, use the yarn tail you left earlier. Rejoin the yarn, ch 1, then insert your hook through the first row of both panels at the same time and join them together with sl sts.
Work from the bottom edge (hem) upward for a total of 25 cm / 9.8 in, or until you are approximately 15 (16/17.5) cm / 5.9 (6.3/6.9) in below the straps. Finish the side seam in the 2-hdc row, just above the star stitch row.
The finished armhole should therefore measure approximately 15 (16/17.5) cm / 5.9 (6.3/6.9) in.
Finishing the Armholes
Join a new strand of yarn and work 1 Rd of sc evenly around each armhole.
Then weave in all remaining yarn ends securely.

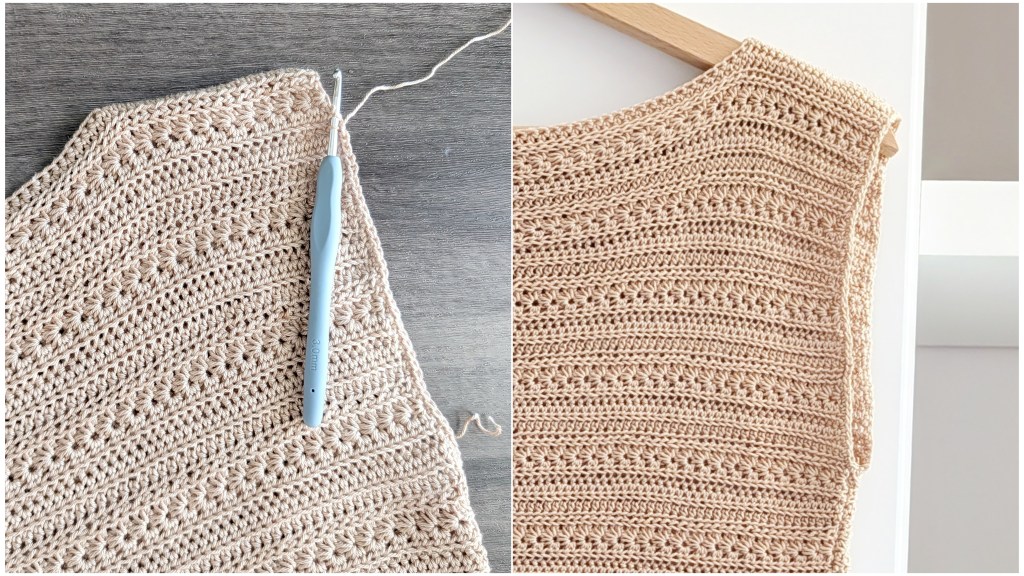
Now all that’s left to do is block your top, and your romantic crochet top is finished!
I hope you enjoyed the pattern and love wearing your new crochet top!