


🍂 Fall Is Here – Time for Cozy Fashion!
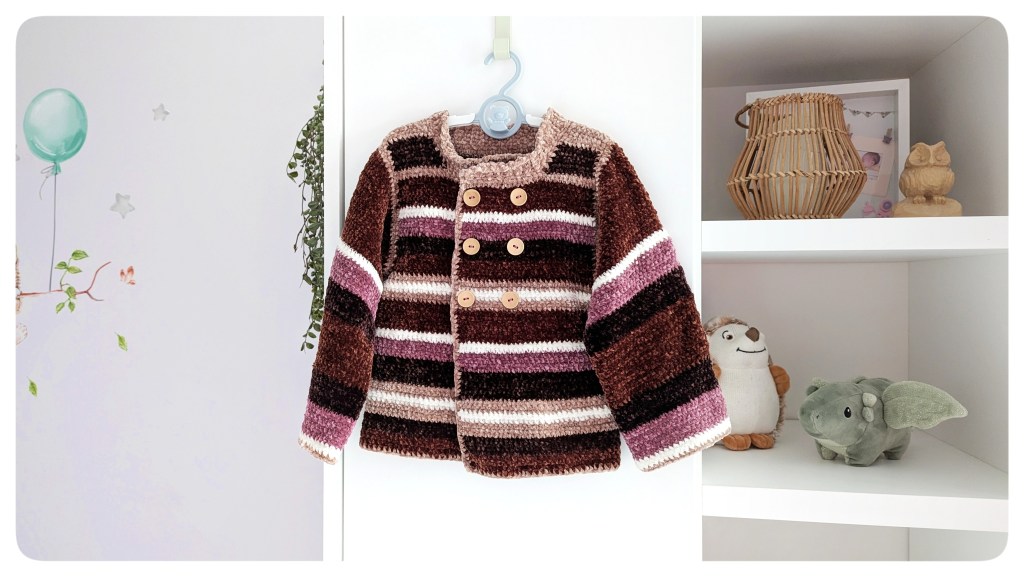
With the first colorful leaves and crisp mornings, it’s finally the season to bring out warm and snuggly clothes again. And this year, my kids are getting something extra special: a hand-crocheted transitional jacket made from wonderfully soft plush yarn.
This jacket isn’t just warm and cuddly — it’s also stylish to wear! The earthy autumn tones make it perfect for leaf-crunching walks through the park. The plush yarn gives it a velvety, airy texture, while the dense single crochet stitch pattern keeps little ones warm and comfy — ideal for those in-between days when mornings are chilly but afternoons are still mild.


I took inspiration from a Burda sewing pattern and adapted it so the jacket can be crocheted in one piece, with almost no sewing required (just the shoulders need stitching!).
The design draws from classic retro jackets: simple lines, soft edges, and a touch of nostalgia — combined with modern colors. The result? A piece that’s practical yet eye-catching – as cozy as a blanket, but wearable like a favorite jacket.


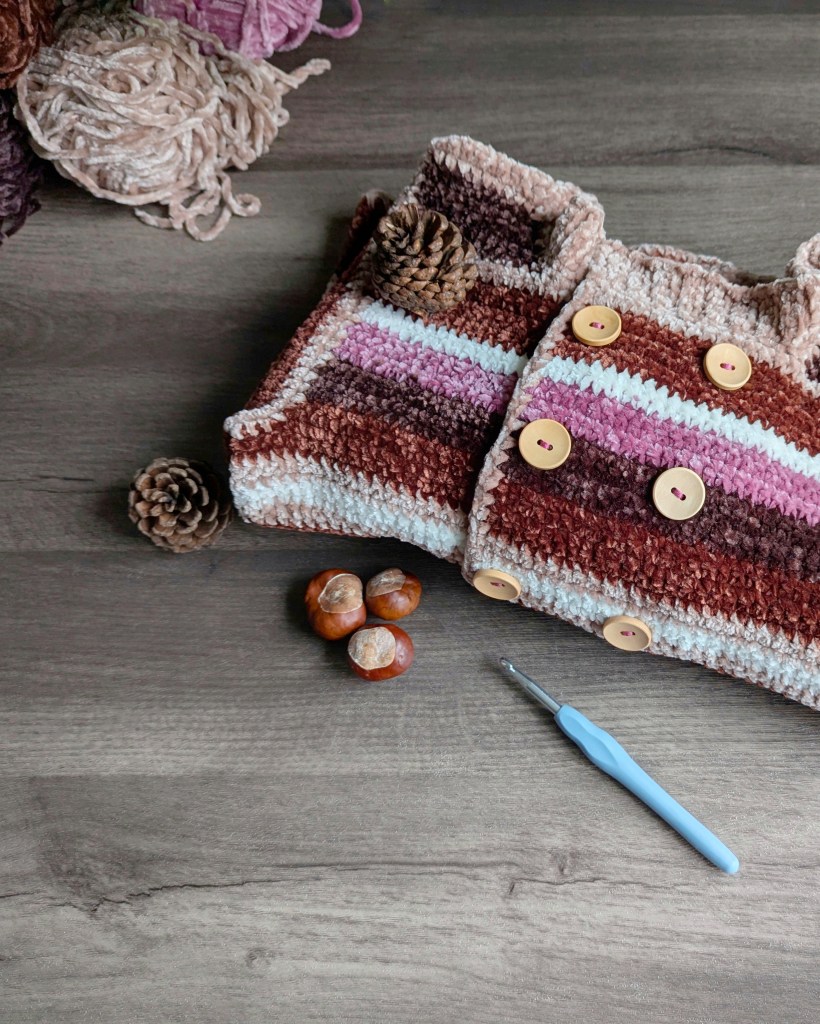
You’ll Need:
- Plush yarn, e.g. Bohème Velvet Double (100% Polyester, 70 m / 50 g)
Colors used (for size 110/116):- 3 skeins Rusty
- 3 skeins Plum
- 1 skein White
- 2 skeins Raspberry
- 2 skeins Brown
- Crochet hook: 4.0 mm
- 6 buttons, 25 mm each
- Yarn needle
- Scissors

Gauge:
Worked in single crochet (sc) with a 4.0 mm crochet hook: 10 x 10 cm (4″ x 4″) = 16 sts and 19 rows
Sizes:
This pattern is written for children’s sizes 98/104, 110/116, and 122/128 (EU sizes).
Size options are separated by a slash ( / ).
If only one number is given, it applies to all sizes.
Stitch Guide & Construction:
The entire jacket is made using single crochet stitches (sc) only.
The jacket is crocheted in one piece, starting with the body, then working the sleeves directly from the arm openings, and finishing with the collar from the neckline upward.
Only the shoulder seams need to be sewn together before attaching the sleeves.
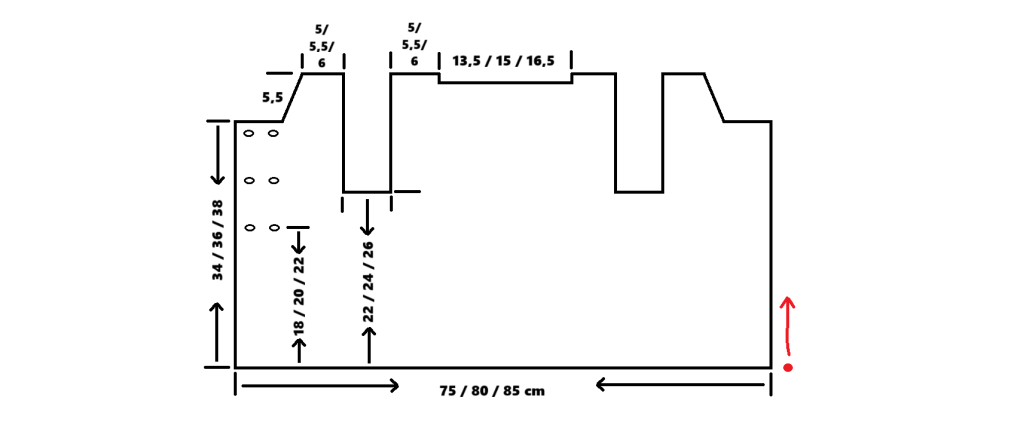
- Step 1 – Chart A: Crochet the body of the jacket

- Step 2 – Chart B: Join shoulders and crochet the edging

- Step 3 – Chart C: Crochet the sleeves
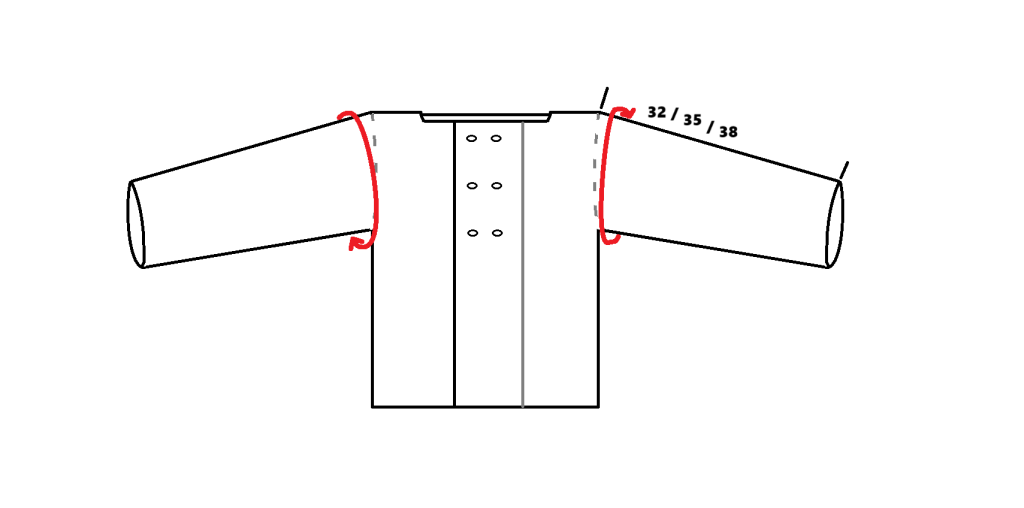
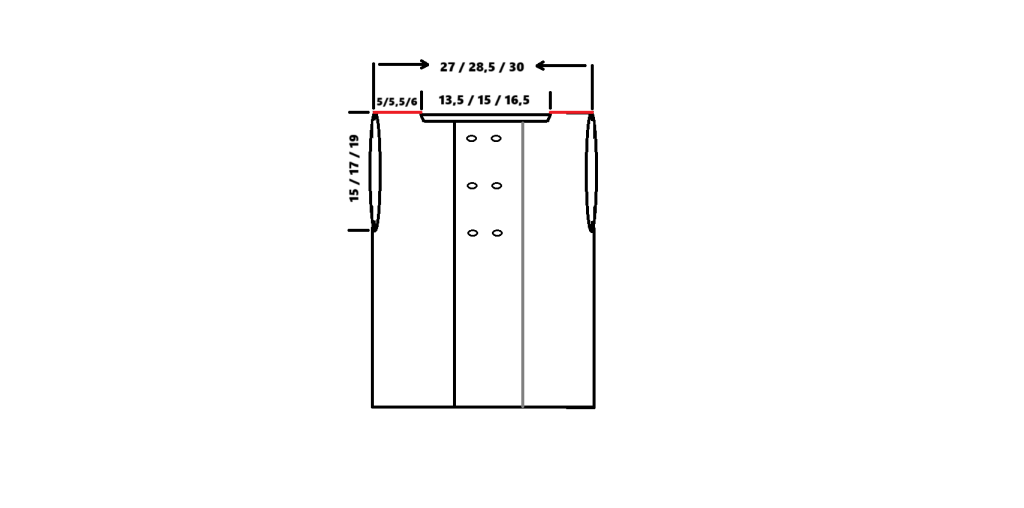
- Step 4 – Chart D: Crochet the collar


Color Sequence:
(Based on size 110/116 — adjust as needed for other sizes.)
Jacket Body: 4 rows Rusty, 4 rows Plum, 3 rows Brown, 2 rows White, 3 rows Brown, 6 rows Plum, 4 rows Raspberry, 2 rows White, 7 rows Rusty, 2 rows Brown,2 rows White, 2 rows Brown, 5 rows Rusty, 4 rows Plum, 4 rows Raspberry, 2 rows White, 6 rows Rusty, 2 rows Brown, 5 rows Plum, 4 rows Brown
Sleeves: 2 rows Brown, 19 rows Rusty, 2 rows White, 6 rows Raspberry, 6 rows Plum, 14 rows Rusty, 7 rows Plum, 7 rows Raspberry, 2 rows White, 1 row Brown
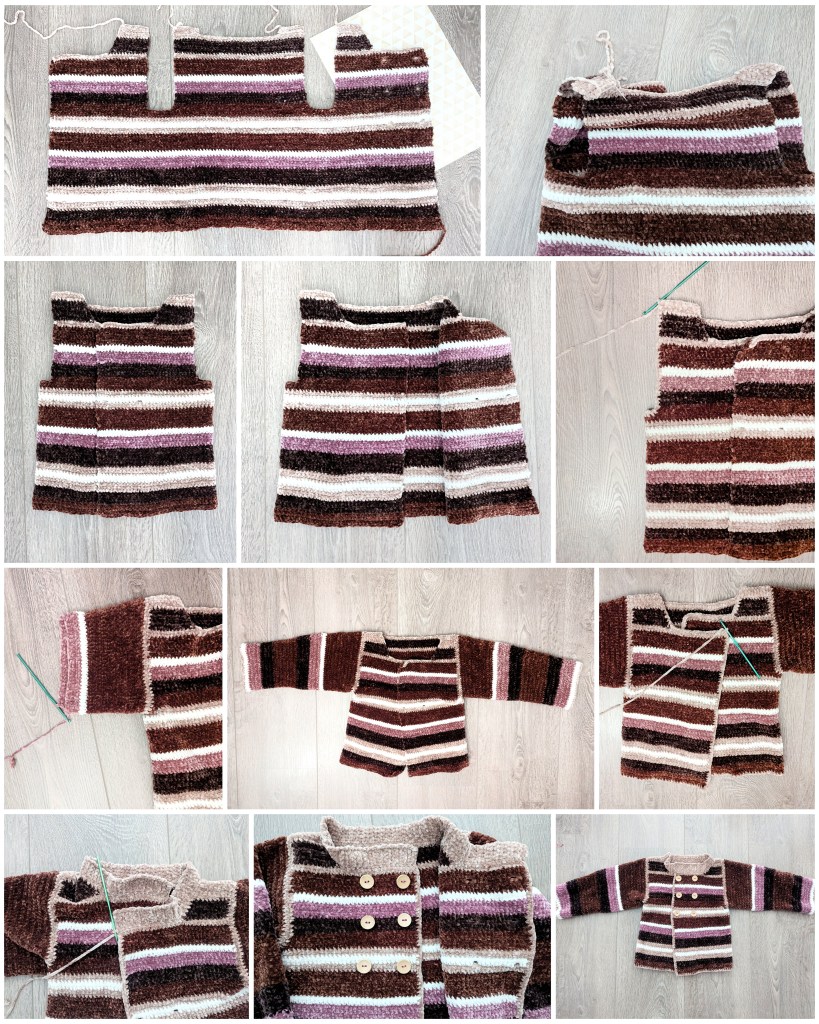
Step-by-Step Instructions:
Intro: The jacket is worked flat from the bottom edge up to the armholes and neckline.
Once the body is complete, the shoulder seams are sewn together, and then the sleeves are crocheted directly from the arm openings. After that, crochet the edging around the entire jacket, followed by the soft, cozy collar. Finally, sew on the buttons – and your handmade jacket is ready to wear!
Chain 114/122/130.
Work in rows of single crochet (sc).
After about 18/20/22 cm (7/8/8.5″) total height, create the buttonholes as follows:
On a return row, when 14/15/16 sts remain to the end of the row: skip the next 2 sts, ch 2, sc in next 7/8/9 sts, skip 2 sts, ch 2, sc in next 2 sts.
On the following row, continue in sc across, working 2 sc into each ch-2 space.
Crochet 4 more buttonholes, spacing them 5.5/6/6.5 cm (2¼/2⅜/2½”) apart.
At the same time, separate the body for the armholes, front, and back sections:
Armholes:
After 22/24/26 cm (8¾/9½/10¼”) total height, work as follows:
- Right front (button side): 28/30/32 sts
- Slip stitch (sl st) in next 8 sts (right armhole)
- Back: 41/45/49 sts
- Slip stitch (sl st) in next 8 sts (left armhole)
- Left front (buttonhole side): 28/30/32 sts
Continue working the left front:
Left Front (Buttonhole Side):
Continue working rows of sc for 11 cm (4¼”) from the armhole (28/30/32 sts).
At 11 cm, on a return row, work sc across until 16 sts remain, leaving the remaining stitches unworked (this forms the neckline).
On the neckline side, decrease 1 st at the beginning of the next 5 rows.
You’ll have 7/8/9 sts left.
At 5.5 cm (2¼”) height from the neckline start, fasten off and weave in the end.
Back:
With a new strand of yarn, reattach at the back (41/45/49 sts).
Work even in sc for 14/15/16 cm (5½/6/6¼”) from the start of the armholes.
At this point, sl st across the center 27/29/31 sts for the neckline.
You’ll have 7/8/9 sts on each side.
Work each shoulder separately for 1 cm (2 rows) in sc.
Fasten off and weave in ends.
Right Front (Button Side):
With a new strand, reattach yarn to the right front and work as a mirror image of the left front — without buttonholes.
This completes Chart A.
Join Shoulders (Chart B):
Using a mattress stitch, sew the 7/8/9 sts of each shoulder together.
This completes Chart B.
Sleeves (Chart C):
With a new strand of yarn, start in the center of the shoulder seam.
Ch 1, sc in same st as join, sc2tog over the next 2 sts, then work 1 sc evenly around the armhole until 2 sts remain. Sc2tog in the last 2 sts, sl st in 1st sc, turn your work.
Continue working in closed rounds of sc, at each end turn your work and ch 1 at the beginning of the new Rd. Start the 1st sc in the same st as the sl st and continue working in the next sts thereafter – in the other working direction.
After about 2.5 cm (1″) = 5 rounds, begin decreasing:
Work sc across, decreasing 1 st at each start and end of the Rd (after the first st and before the last 2 sts).
Then alternate decreases every 4th and 6th Rd, decreasing 1 st at each start and end of the Rd a total of 10/11/12 times.
If the sleeve is still too short, continue in sc without decreasing until the desired length.
Fasten off and weave in the end.
This completes Chart C.
Edging:
With a new strand of yarn, crochet one round of sc evenly along the left front edge, bottom edge, right front edge, and neckline.
Work 3 sc in each corner to keep edges flat.
Fasten off and weave in the end.
Collar (Chart D):
With a new strand of yarn, start at the corner of the right front (button side).
Ch 6, sl st in next 5 sts, then sl st 2 sts together along the neckline, turn.
Row 2: (no turning ch) work 1 sc in the front loop only of each of the 5 sts, ch 1, turn.
Row 3: work 1 sc in the back loop only of each of the 5 sts, sl st 2 sts together along the neckline, turn (no ch 1).
Repeat Rows 2 and 3 alternately along the entire neckline until you reach the corner of the left front (buttonhole side).
Fasten off and weave in the end.
This completes Chart D.
Finishing:
Sew the buttons evenly along the right front panel, matching them to the buttonholes on the opposite side.

Your cozy handmade jacket is complete! 🧥🍂
I hope you enjoyed this pattern and that your handmade crochet jacket keeps you cozy and happy this fall!


